
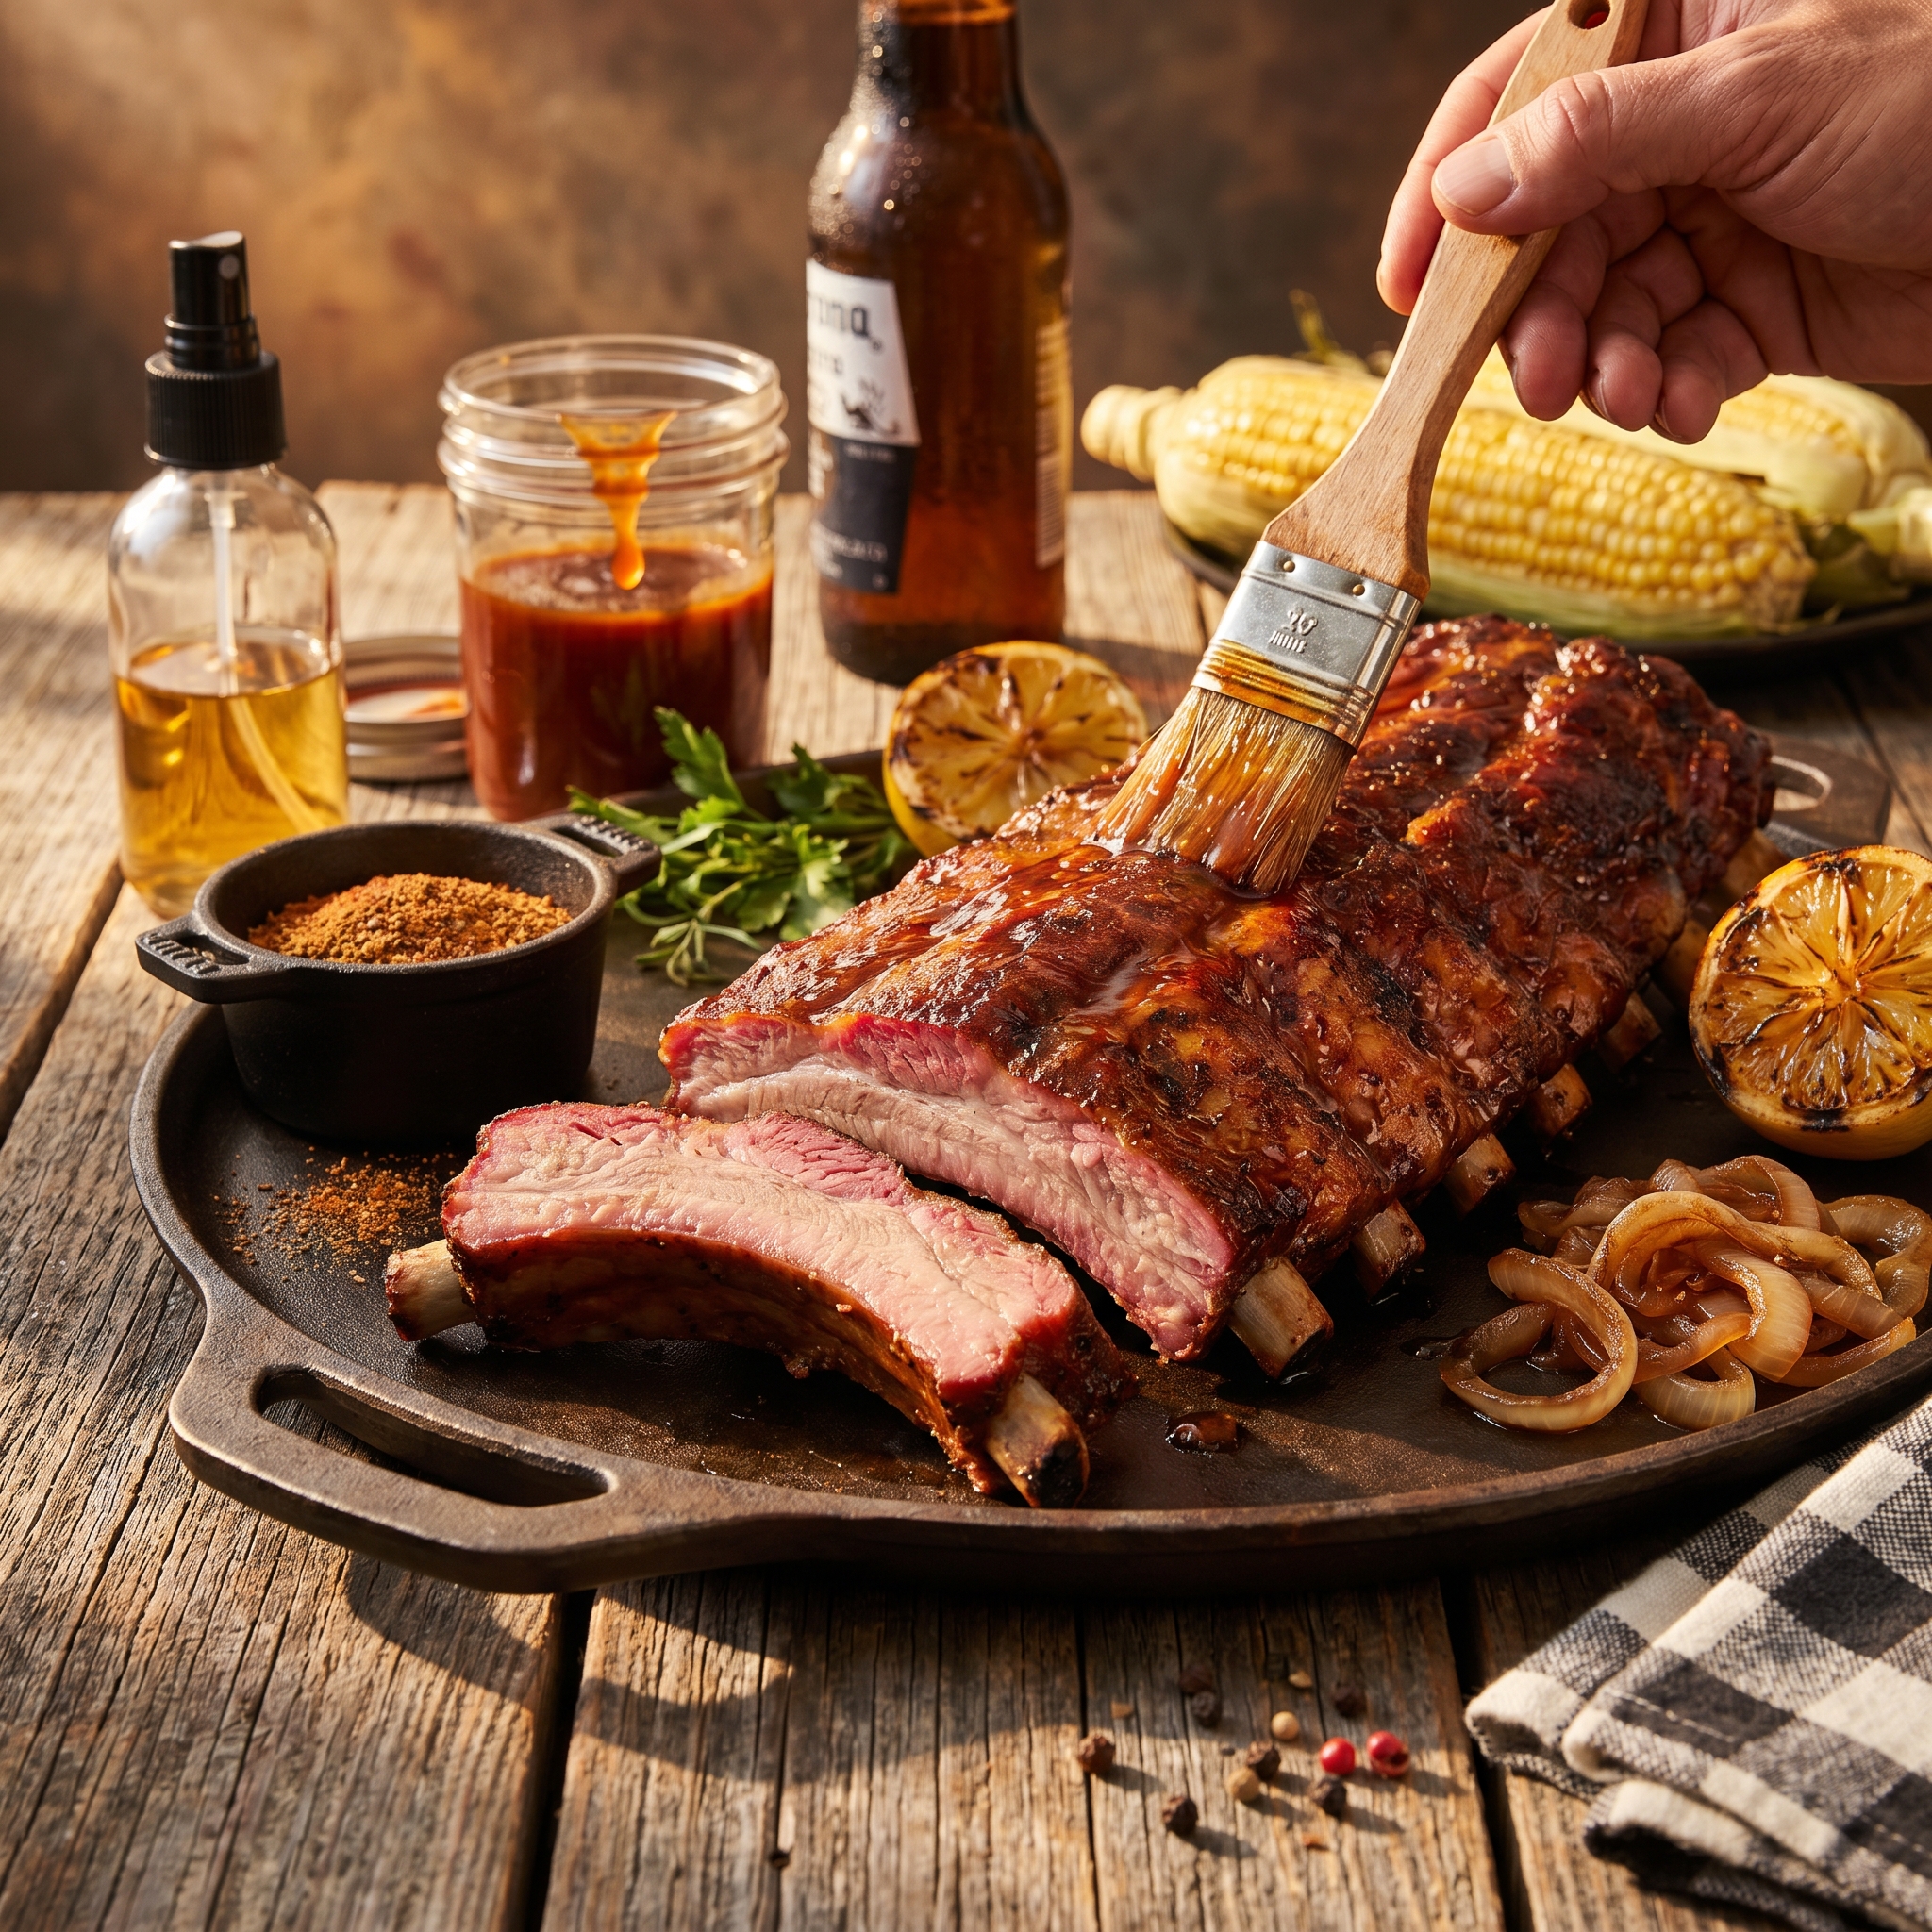
The Best Grilled Baby Back Ribs Dry Rub Recipe That Falls Off the Bone Every Single Time
Imagine pulling a rack of baby back ribs off the grill on a slow Saturday afternoon — the bark is deep mahogany and crackling, the smoke is curling up into the warm summer air, and the moment you pick up the rack with your tongs, the meat pulls back from the bone like it has been waiting all day to be eaten. You set it down on the cutting board, run your knife between each rib, and the whole table goes completely silent the second the first bite hits. That is exactly what these grilled baby back ribs with dry rub taste like — and I am here to tell you that every single backyard cook in America deserves to pull that off at least once this summer.
Let me ask you something honest — have ribs always felt like a restaurant-only situation at your house? The kind of thing you order at a barbecue joint and figure you could never quite recreate at home because the process seems too long, too complicated, or too dependent on expensive smoker equipment you do not own? Because I felt that exact same way for years, and then I discovered that the secret to genuinely extraordinary grilled baby back ribs has almost nothing to do with the equipment and almost everything to do with two things — a perfect dry rub that builds a flavor-packed bark, and a simple two-zone grilling method that gives you smoky, tender, fall-off-the-bone meat without a smoker, a pellet grill, or a single piece of specialized equipment in sight.
This is the baby back ribs dry rub recipe I pull out for every Fourth of July cookout, every Labor Day backyard bash, every Father’s Day grill session, and every Saturday afternoon when the weather is right and the grill is calling. It has never once failed to produce a rack of ribs that makes everyone at the table genuinely quiet — which, if you have ever cooked for a crowd, you know is the highest possible compliment a dish can receive. Keep reading — I am walking you through every step, every technique, and every hard-won tip I know.
Table of Contents
Why This Recipe Works
There are a lot of rib recipes out there claiming to be the best. Here is exactly why this dry rub baby back ribs recipe earns that title and keeps it:
- ✔ The dry rub does all the heavy lifting — a perfectly balanced blend of smoky, sweet, savory, and spicy spices builds a deeply flavored bark that makes every single bite extraordinary from the outside in
- ✔ No smoker required — a standard gas or charcoal grill with a two-zone setup produces ribs that rival anything from a dedicated barbecue smoker, using a technique any home cook can execute confidently
- ✔ The 3-2-1 method adapted for the grill — a simple low-and-slow technique followed by a high-heat finish gives you meat so tender it barely clings to the bone and a bark so deeply caramelized it crackles under the knife
- ✔ Make-ahead friendly — the dry rub can be applied up to 24 hours in advance, making this the perfect recipe for effortless weekend entertaining where you want to do the work the night before and just grill the day of
- ✔ Completely crowd-pleasing — one rack feeds 2 to 3 people generously, and this recipe scales up effortlessly for a backyard full of hungry guests without changing a single thing about the technique
- ✔ No sauce required — but spectacular with it — these ribs are so deeply flavorful from the rub alone that they need absolutely nothing else, but a brush of your favorite barbecue sauce in the final few minutes of grilling takes them to a completely different level entirely
- ✔ A Father’s Day and Fourth of July legend in the making — this is the recipe that becomes the family tradition, the one everyone associates with summer, backyard grills, and the smell of something extraordinary happening outside
Ready to make the ribs that your friends and family talk about until next summer? Good. Let’s get into the ingredients — and please do not skip the two Chef’s Notes below, because one of them contains the membrane removal tip that is single-handedly responsible for more tender ribs than any other technique in this recipe.
What You’ll Need
For the Ribs
- 2 full racks baby back ribs (about 2 to 2½ lbs each)
- 2 tablespoons yellow mustard (the binder — trust me on this)
- Wood chips or wood chunks for smoking (hickory, apple, or cherry wood — more on this below)
For the Dry Rub
- 3 tablespoons dark brown sugar, packed
- 2 tablespoons smoked paprika
- 1 tablespoon regular paprika
- 1 tablespoon kosher salt
- 1 tablespoon freshly cracked black pepper
- 1 tablespoon garlic powder
- 1 tablespoon onion powder
- 1 teaspoon ground cumin
- 1 teaspoon dry mustard powder
- 1 teaspoon chili powder
- ½ teaspoon cayenne pepper (adjust to your heat preference)
- ½ teaspoon dried thyme
- ½ teaspoon celery salt
Optional Barbecue Sauce Finish (Highly Recommended)
- 1 cup of your favorite barbecue sauce (store-bought or homemade)
- 2 tablespoons apple cider vinegar, stirred into the sauce to thin it slightly
- 1 tablespoon honey or brown sugar, for extra glaze
For Serving
- Extra barbecue sauce, warmed, for dipping
- Fresh coleslaw
- Pickled jalapeños or pickles
- White bread or buttery rolls for soaking up the sauce
- Ice-cold lemonade, sweet tea, or cold beer
Substitutions
No dark brown sugar? Light brown sugar works perfectly fine and produces a beautiful caramel bark — it is just slightly less molasses-forward than dark brown sugar. In a pinch, coconut sugar or turbinado sugar both work well and add their own subtle depth of flavor to the finished crust.
No smoked paprika? Regular paprika plus ½ teaspoon of chipotle powder makes an excellent substitute with a similar smoky depth and a slightly smokier heat profile. If you use both chipotle and cayenne, dial back the cayenne slightly so the heat does not overwhelm the other flavors in the rub.
No wood chips? Entirely optional but genuinely transformative — even a small handful of soaked wood chips on a gas grill adds a deep, authentic barbecue smoke flavor that takes these ribs from “backyard grilled” to “old-school barbecue joint.” Hickory is the classic choice for bold, robust smoke. Apple wood is sweeter and more delicate — beautiful with pork. Cherry wood gives a gorgeous, deep reddish color to the bark and a mild sweetness. If you truly have none, the ribs will still be exceptional — just less smoky.
No yellow mustard for the binder? A thin drizzle of olive oil, a light coating of vegetable oil, or even a thin spread of hot sauce all work as effective binders that help the dry rub adhere to the surface of the ribs. The mustard flavor itself completely disappears during the long cook — you taste absolutely none of it in the finished ribs — it is purely a textural and adhesive tool.
🧑🍳 Chef’s Note — Remove the Membrane. Full Stop. No Exceptions: On the bone side of every rack of baby back ribs, there is a thin, papery, silvery membrane called the silverskin that covers the bones. If you leave it on, it acts as a near-impenetrable barrier between the dry rub and the meat, prevents the spices from penetrating the underside of the ribs at all, and becomes tough, chewy, and completely unpleasant to eat in the finished ribs — like trying to chew through plastic wrap. Removing it takes ninety seconds and makes a genuinely extraordinary difference in the final texture and flavor penetration of the entire rack. Use a butter knife or the tip of a spoon to work under the membrane at one end of the rack, grab it firmly with a paper towel for grip (it is slippery), and pull it back in one long, satisfying strip. If it tears, work your fingers under the remaining pieces and pull them off in sections. This is the single most important technique step in the entire recipe. Do not skip it.
🧑🍳 Chef’s Note — Low and Slow Is the Only Way: Baby back ribs are not a quick cook. The connective tissue and collagen in the meat need extended time at a low, sustained temperature to break down into the gelatin that makes ribs tender, juicy, and fall-off-the-bone magnificent. Rush the process with high heat and you end up with ribs that are tough, chewy, and dry despite being technically “cooked.” Plan for a total grill time of 4 to 5 hours at a grill temperature between 225°F and 250°F. This is not negotiable. The good news is that the actual hands-on work during those hours is minimal — you check the grill temperature, add wood chips, and mostly enjoy your day while the ribs do their slow, glorious thing. Great ribs reward patience more than almost any other recipe in the barbecue canon.
Ingredients lined up and both Chef’s Notes committed firmly to memory? Perfect. Let’s build the best rack of grilled baby back ribs you have ever put on a table — and there are two technique tips in the instructions that change everything about how the bark forms and how the meat finishes.
How to Make Grilled Baby Back Ribs with Dry Rub — Step by Step
Part One: Prep the Ribs (The Night Before or Day Of)
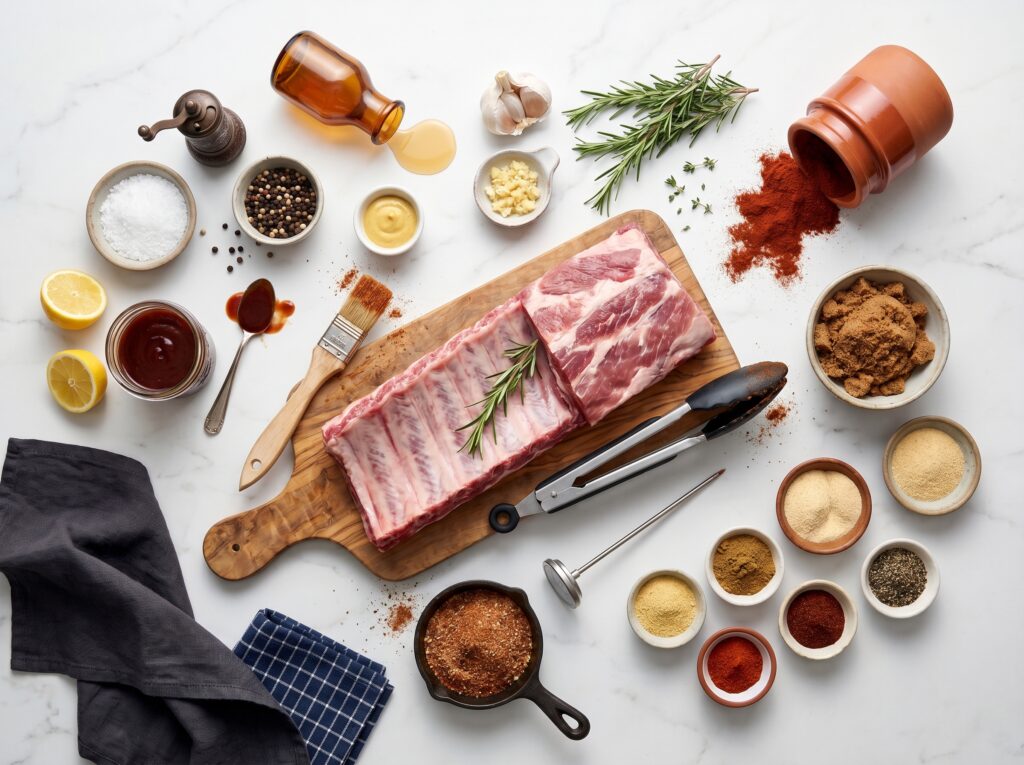
- Remove the membrane from the bone side. Lay each rack of ribs bone-side up on a large cutting board. Slide a butter knife under the membrane at the small end of the rack until you have enough to grip. Grab the membrane firmly with a dry paper towel — the paper towel gives you the friction you need to hold onto this notoriously slippery film. Pull back slowly and firmly in one long strip, peeling it away from the rack entirely. Repeat on the second rack. If it comes off in pieces, work your fingers underneath and remove every last bit. Once this is done, you will never skip it again.
- Mix the dry rub. Combine all the dry rub ingredients — the dark brown sugar, both paprikas, salt, black pepper, garlic powder, onion powder, cumin, dry mustard, chili powder, cayenne, dried thyme, and celery salt — in a medium bowl and whisk together until the brown sugar is fully broken up and evenly distributed throughout the spice blend. The finished rub should be a deep, fragrant, rust-brown color that smells smoky, sweet, and deeply savory all at once. Taste a tiny pinch — it should be bold, complex, and slightly tingly on the tip of your tongue.
- Apply the mustard binder. Using your hands or a brush, apply a thin, even layer of yellow mustard across the entire surface of both racks — front, back, and sides. You want a thin coating rather than a thick slather — just enough to give the dry rub something tacky to grip onto. Do not worry about the mustard flavor. It disappears entirely during cooking and leaves absolutely no taste behind. It exists purely to help the rub adhere into a cohesive, crackling bark.
- Apply the dry rub generously. Sprinkle the dry rub over every surface of both racks — top, bottom, and all the edges — using about one-third of the total rub mixture per rack on the meat side and the remainder on the bone side and edges. Press the rub firmly into the mustard with your hands rather than just patting it — pressing it in helps it adhere more securely and gives you a thicker, more deeply flavored bark on the finished ribs. Be generous. This is not a dish that rewards timidity with seasoning.
- Bring the ribs to room temperature before grilling. Remove the rubbed racks from the refrigerator 30 to 45 minutes before they go on the grill. Cold meat placed directly on the grill takes longer to cook through evenly and can result in a tough, unevenly cooked interior. Room-temperature ribs cook more consistently from edge to center and reach your target internal temperature more predictably throughout the cook.
Part Two: Setting Up the Grill
- Set up a two-zone grill for indirect cooking. This is the single most important grill setup technique for low-and-slow ribs, and it works on both gas and charcoal. For a gas grill: turn one or two burners on the far side to low-medium and leave the remaining burners completely off — the ribs will cook over the off burners with the lid closed. For a charcoal grill: push all the lit coals to one side of the grill and leave the other side empty — the ribs cook over the coal-free side. You are creating an oven-like environment inside the closed grill where the heat circulates evenly around the meat without direct flame contact underneath.
- Preheat to 225°F to 250°F and add wood chips. Close the grill lid and let it come to a stable temperature between 225°F and 250°F — measure at the grate level using a grill thermometer rather than the lid thermometer, which often reads 25 to 50°F higher than the actual cooking temperature at the grate. While the grill heats, soak a large handful of wood chips in water for 30 minutes, drain them, and wrap them loosely in a foil packet with several holes punched in the top. Place the foil packet directly on the hot coals or on the lit burners — within 10 minutes it will begin producing the fragrant, thin blue smoke that gives barbecue its soul.
Part Three: The Low-and-Slow Cook
- Place the ribs on the indirect heat side, bone-side down. Lay both racks bone-side down on the cool side of the grill, away from the direct heat source. If the racks are too long to fit flat, use a rib rack stand to hold them upright and vertical — this allows both racks to cook simultaneously in a smaller footprint and promotes even airflow around every surface of the meat. Close the lid immediately and resist the urge to open it for at least 45 minutes.
- Cook low and slow for 3 hours, adding wood chips as needed. Cook the ribs undisturbed with the lid closed for a full 3 hours at 225°F to 250°F. Replace the wood chip packet once during this period — after about 90 minutes — for continuous smoke throughout the cook. The bark should be forming beautifully during this phase, turning from the bright rust-red of the raw rub into a deep, almost mahogany-colored crust that looks stunning and smells absolutely extraordinary. Do not rush this phase. This is where the flavor is built.
- Wrap in foil and cook for another 1 to 1½ hours. After 3 hours, remove the racks from the grill and place each one meat-side down on a large sheet of heavy-duty aluminum foil. Add 2 tablespoons of apple juice or apple cider vinegar and a tablespoon of brown sugar to the foil around each rack before sealing — this creates a small amount of steam inside the foil packet that gently braises the meat and takes the tenderness to a completely different level. Wrap each rack tightly in a double layer of foil, return them to the indirect heat side of the grill, and cook for another 1 to 1½ hours at the same temperature. This is the stage where the collagen breaks down, the meat loosens from the bones, and those ribs go from good to genuinely incredible.
- Unwrap and finish over direct heat. Carefully unwrap the racks — the foil packets will be full of hot, fragrant, deeply porky liquid that is pure flavor gold (save it for basting or drizzling). Return the unwrapped ribs bone-side down to the direct heat side of the grill over medium-high heat for 10 to 15 minutes to re-crisp the bark and caramelize the exterior back into that gorgeous, crackling crust that the foil wrap softened slightly. Watch them carefully during this phase — the brown sugar in the rub can go from perfectly caramelized to scorched in minutes over direct heat.
- Optional: Apply barbecue sauce glaze in the final minutes. If you are finishing with barbecue sauce, brush a generous layer of the thinned sauce over the top of the ribs during the last 5 to 7 minutes of the direct heat finish. Let it caramelize and set for 2 to 3 minutes, brush on a second coat, and let it set for another 2 minutes. The result is a deeply glossy, lacquered glaze over the bark that is sweet, smoky, slightly sticky, and completely magnificent.
- Rest, slice, and serve. Transfer the finished racks to a large cutting board and let them rest, loosely tented with foil, for 10 full minutes before cutting. Resting allows the juices to redistribute back through the meat — cutting immediately sends them running out onto the cutting board and leaves the ribs drier than they should be. After resting, flip the racks meat-side down and use a sharp knife to cut cleanly between each bone, applying steady downward pressure rather than a sawing motion. Stack the cut ribs on the largest platter you own, scatter a little fresh thyme or parsley over the top if you want to be fancy about it, and bring them to the table immediately.
You just made competition-level grilled baby back ribs with dry rub on a standard backyard grill. Now let’s talk about building the ultimate spread around them.
How to Serve It
These dry rub baby back ribs are the crown jewel of any summer spread. Here are five ways to build an unforgettable meal around them:
- 🎆 Fourth of July and Labor Day cookout feast — stack the ribs high on a massive wooden platter or a metal sheet pan lined with butcher paper, set out a variety of barbecue sauce options for dipping, and surround with classic sides: creamy coleslaw, baked beans, corn on the cob brushed with herb butter, and a big bowl of potato salad. This is the quintessential American summer cookout spread and these ribs are its undisputed centerpiece. Every single person at the table eats with their hands, and nobody apologizes for it.
- 👨 Father’s Day grill-out centerpiece — ribs are the definitive Father’s Day dish, full stop. Set the scene with cold beer, a side of smashed grilled potatoes, a cast iron skillet of jalapeño cornbread, and a big slice of watermelon on the side. Let Dad sit at the grill for the first hour before the low-and-slow babysitting begins, then let him be the hero who brings them to the table. Everyone wins.
- 🧑🍳 Backyard competition-style barbecue night — set up a full barbecue spread alongside the ribs: pulled pork shoulder, smoked chicken thighs, grilled sausages, and every classic side dish you can fit on the table. Make a sauce station with three or four different barbecue sauces — Kansas City sweet, Carolina vinegar, Alabama white, and Texas original — and let everyone find their favorite combination. This is the backyard party that becomes the summer legend.
- 🌽 Summer Sunday family dinner — serve two or three ribs per person alongside a big bowl of macaroni and cheese, roasted corn salad, buttered Texas toast, and a pitcher of sweet tea. The combination of tender, smoky ribs and creamy, rich mac and cheese is one of the greatest pairings in the entire catalog of American comfort food, and it is the kind of Sunday dinner that brings the whole family to the table without a second invitation needed.
- 🤠 Tailgate and game day spread — pre-cut the ribs into individual pieces, pile them in a foil pan lined with butcher paper, cover tightly with foil to keep them warm during transport, and bring them to the tailgate alongside a stack of napkins, a bottle of sauce, and the quiet confidence of someone who knows they brought the best thing in the parking lot. Pre-cut ribs are the perfect finger food for a standing, eating, cheering crowd of any size.
Before you fire up the grill, let me walk you through the storage and make-ahead strategy that makes these ribs work for both same-day grilling and smart advance preparation.
Storage & Make-Ahead Tips
Dry rub — pantry storage: The dry rub recipe makes more than enough for two full racks with a little left over. Store any unused rub in an airtight jar or zip-top bag in a cool, dark pantry for up to 6 months — it makes an outstanding all-purpose seasoning for grilled chicken, pork chops, shrimp, and roasted vegetables far beyond just ribs. Label the jar with the date and keep it close to the grill all summer.
Rubbed raw ribs — fridge: Once the dry rub has been applied over the mustard binder, the racks can be wrapped tightly in plastic wrap and refrigerated for up to 24 hours before grilling. As noted in the Pro Tip, overnight refrigeration after rubbing is actually the recommended approach for the deepest flavor and best bark formation — the salt in the rub dry-brines the meat beautifully during those hours.
Cooked ribs — fridge: Leftover cooked ribs keep in an airtight container or wrapped tightly in foil in the refrigerator for up to 4 days. The flavor continues to develop in the refrigerator and many people genuinely prefer leftover ribs to freshly cooked ones — the smoke, the rub, and the rendered fat all have more time to settle into the meat.
Cooked ribs — freezer: Fully cooked ribs freeze beautifully for up to 3 months. Wrap individual portions or full racks tightly in plastic wrap, then in a layer of foil, then place in a zip-top freezer bag with the air pressed out. Thaw overnight in the refrigerator before reheating.
Reheating — oven method (best): Wrap the ribs tightly in foil with a tablespoon of apple juice or water inside the packet to create steam. Place in a 300°F oven for 25 to 30 minutes until heated all the way through. Unwrap and finish under the broiler for 3 to 4 minutes to re-crisp the bark and restore that gorgeous caramelized exterior. This method produces reheated ribs that are genuinely close to freshly grilled.
Reheating — grill method (even better): Wrap in foil and place over indirect heat on a preheated grill at 300°F for 20 to 25 minutes, then unwrap and move briefly to direct heat to re-crisp the bark. This method produces the best reheated ribs possible and is absolutely worth doing on a summer evening when the grill is already fired up for something else.
🗓️ Make-Ahead Cookout Game Plan: Here is the exact timeline that takes all the guesswork and day-of pressure out of serving ribs for a crowd. The night before: remove the membranes, mix the rub, apply the mustard and rub to both racks, wrap tightly in plastic wrap, and refrigerate overnight. Four to five hours before you want to eat: fire up the grill to 225°F, add wood chips, and put the ribs on. The cook runs largely unattended — check temperature every 45 minutes, swap the wood chip packet at the 90-minute mark, wrap in foil at the 3-hour mark, and finish over direct heat in the final 15 minutes. Serve exactly when everyone is hungry. No panic. No rush. Just perfect ribs delivered with complete calm.
Almost there — let me walk you through the five most critical mistakes people make with grilled ribs so yours come out absolutely perfect on the very first rack.
Helpful Tips & Common Mistakes
Ribs intimidate a lot of home cooks — and they should not, because once you know what to avoid, they are deeply forgiving. Here are the five mistakes that turn a promising rack of ribs into a disappointing result, and exactly how to avoid every single one:
✗ Mistake: Leaving the silverskin membrane on the bone side
✓ Fix: This is the number one rib mistake in home cooking. The membrane blocks the rub from penetrating the underside of the rack, prevents smoke from flavoring the bottom of the meat, and becomes tough and plasticky in the finished ribs. It takes ninety seconds to remove and the difference in texture, flavor penetration, and overall eating experience is nothing short of dramatic. Remove it every single time. No exceptions, no shortcuts.
✗ Mistake: Cooking at too high a temperature to speed things up
✓ Fix: Ribs cooked too hot — above 275°F — become dry and tough rather than tender and juicy because the collagen and connective tissue do not have time to break down into the gelatin that makes them succulent. The rendered fat also burns off too quickly instead of basting the meat from the inside as it slowly melts. Hold 225°F to 250°F firmly and patiently, and the ribs will reward you beyond anything that a hurried cook at high heat could ever produce.
✗ Mistake: Boiling the ribs before grilling to “speed up” the cook
✓ Fix: Boiling ribs before grilling strips out the rendered fat and all the water-soluble flavor compounds that make ribs taste like ribs — you lose the deep, porky, smoky depth that low-and-slow grilling builds and replaces it with a waterlogged, bland result that no amount of sauce can save. The foil-wrap braising phase in this recipe achieves the same tenderness effect as boiling while keeping every bit of the flavor locked inside the meat where it belongs.
✗ Mistake: Constantly lifting the grill lid to check on the ribs
✓ Fix: Every time you lift the lid, the grill temperature drops significantly — sometimes by 25 to 50°F — and takes 10 to 15 minutes to recover. Constantly opening and closing the lid extends the cook time, disrupts the smoke environment around the meat, and creates temperature swings that produce uneven cooking. Check the temperature gauge on the outside of the lid, trust the process, and commit to keeping that lid closed for the periods between your scheduled checks. The ribs do not need your supervision. They need your patience.
✗ Mistake: Cutting into the ribs immediately off the grill
✓ Fix: Ribs cut the moment they come off the grill lose their accumulated juices all over the cutting board rather than staying in the meat where they belong. A full ten-minute rest under a loose foil tent allows those juices to redistribute back into the muscle fibers, producing ribs that are visibly juicier, more flavorful in every bite, and actually easier to cut cleanly between the bones. Ten minutes. Set a timer. Walk away from the cutting board and enjoy your well-earned beverage.
With all of these mistakes behind you, here are four spectacular ways to put your own signature spin on these ribs.
Recipe Variations
🍯 Sweet and Sticky Honey Bourbon Glaze Version: Whisk together ½ cup of your favorite barbecue sauce, 3 tablespoons of good bourbon, 2 tablespoons of honey, 1 tablespoon of brown sugar, and a teaspoon of apple cider vinegar. Apply this glaze in two generous layers during the final direct-heat finish instead of plain barbecue sauce. The bourbon caramelizes into an extraordinarily deep, complex, slightly boozy glaze that lacquers the bark into something so glossy and gorgeous it looks like it belongs under a heat lamp at a competition barbecue tent. This is the version you make when you want to absolutely silence a table.
🌶️ Texas-Style Spicy Dry Rub Version: Double the cayenne to 1 full teaspoon, add 1 teaspoon of chipotle powder, increase the black pepper to 1½ tablespoons, and reduce the brown sugar by half for a rub that leans heat-forward and peppery rather than sweet. Skip the sauce finish entirely and serve these alongside a simple vinegar-based slaw and pickled jalapeños to cut through the heat. This is the version for the serious heat enthusiasts at your table who find sweet-glazed ribs a little too gentle for their taste.
🍎 Apple and Brown Sugar Fall Version: Add 1 teaspoon of apple pie spice and an extra tablespoon of dark brown sugar to the dry rub. Use apple wood chips exclusively for smoking. During the foil-wrap phase, add 3 tablespoons of fresh apple cider and a tablespoon of apple butter alongside the brown sugar in the foil packet. Glaze the finished ribs with a mixture of apple butter, barbecue sauce, and a pinch of cinnamon during the final direct-heat finish. This variation is the perfect warm-weather-to-cool-weather transition recipe for September and October cookouts when the air is getting crisp and everything apple-flavored feels exactly right.
🫙 Kansas City Sweet and Smoky Version: Add 1 extra tablespoon of dark brown sugar and 1 teaspoon of allspice to the dry rub for a sweeter, spice-forward profile. Make a quick Kansas City-style sauce by simmering 1 cup of ketchup, ¼ cup of brown sugar, 2 tablespoons of apple cider vinegar, 1 tablespoon of Worcestershire sauce, 1 teaspoon of smoked paprika, and a pinch of cayenne for 10 minutes until thick and glossy. Apply it in three generous coats during the final finish for a thick, sweet, deeply caramelized glaze that is the definitive Midwestern barbecue experience and a total crowd favorite from Kansas City to the Carolinas.
Fire Up the Grill — Your Best Ribs Are Waiting
These grilled baby back ribs with dry rub are everything that summer cooking at its very best should feel like — slow, smoky, deeply satisfying, and shared with the people who matter most around a table that smells like something genuinely extraordinary. You now have the rub, the technique, the tips, and the confidence to make a rack of ribs that rivals anything you have ever ordered at a restaurant and tastes even better because you made it yourself in your own backyard. Now go pull that membrane, mix that rub, and fire up the grill. The best ribs of your life are about four and a half hours away.
If you make this recipe, I absolutely want to hear about it — leave a comment, drop a star rating, or tag me on Pinterest with your gorgeous rack fresh off the grill! Seeing your summer cookout masterpieces is the best part of sharing recipes, and I cannot wait to see what you create. Happy grilling! 🔥🍖
Frequently Asked Questions
How long does it take to grill baby back ribs from start to finish?
Plan for a total grill time of 4 to 4½ hours using the method in this recipe: approximately 3 hours of unwrapped low-and-slow indirect cooking, followed by 1 to 1½ hours wrapped in foil, followed by 10 to 15 minutes of direct heat finishing to re-crisp the bark. Add 30 minutes of prep time for membrane removal, rub application, and grill setup and you are looking at roughly 5 hours from start to table. The vast majority of that time is completely hands-off — you are monitoring grill temperature, not actively cooking.
What internal temperature should baby back ribs reach?
Unlike chicken or pork chops, ribs are not judged by a single target internal temperature — they are judged by tenderness, which correlates to temperature but is better measured by the bend test and the toothpick test. For the bend test: pick up the rack in the middle with tongs and let the ends hang freely — perfectly done ribs will bend significantly and begin to crack on the surface of the bark. For the toothpick test: insert a toothpick between two bones — it should slide through the meat with almost no resistance, like pushing into soft butter. If you do want a temperature target, aim for 190°F to 203°F at the thickest point between the bones for fully rendered collagen and maximum tenderness.
Can I make this recipe in the oven instead of on the grill?
Absolutely — oven baby back ribs are excellent and follow the same general method. Apply the rub as directed, place the racks bone-side down on a foil-lined rimmed baking sheet, cover tightly with foil, and bake at 275°F for 2½ to 3 hours until tender. Uncover, brush with barbecue sauce if using, and finish under the broiler on high for 4 to 5 minutes until the bark is caramelized and slightly charred on the edges. You will not get the smoke flavor from an oven — add 1 teaspoon of liquid smoke to the foil packet liquid during the covered bake to approximate it. The texture will be just as tender and the flavor of the rub will be just as delicious.
What is the difference between baby back ribs and spare ribs?
Baby back ribs come from the upper portion of the rib cage near the spine, where the ribs meet the backbone. They are shorter, leaner, more curved, and more tender than spare ribs, and they cook faster — typically 4 to 5 hours at low temperature. Spare ribs come from the lower rib cage near the belly and are larger, flatter, fattier, and more flavorful than baby backs — but they require a longer cook time of 5 to 6 hours to become properly tender. Both are excellent; baby backs are more beginner-friendly due to their shorter cook time and more predictable tenderness. The rub and technique in this recipe works equally well on both.
Can I apply the dry rub more than 24 hours in advance?
Up to 24 hours is ideal. Beyond 24 hours, the salt in the rub begins to draw out too much moisture from the surface of the meat, and the sugar in the rub can start to interact with that moisture in ways that create a slightly wet, paste-like surface rather than the dry, crackling bark-ready exterior you want going into the cook. For the best result, apply 8 to 24 hours ahead — overnight is perfect. If you are in a time crunch, even 1 to 2 hours of resting after application makes a meaningful difference compared to rubbing and cooking immediately.
Do I need to use barbecue sauce if I have a good dry rub?
Absolutely not — and many serious barbecue purists would argue that a well-executed dry rub produces a more genuinely complex, nuanced flavor than any sauce-glazed rib can achieve. The bark built by this rub recipe is so deeply flavorful — smoky, sweet, savory, slightly spicy — that these ribs are outstanding eaten completely dry with just the bark for flavor. Sauce is an option, not a requirement. If you do use sauce, apply it only in the last 5 to 7 minutes to caramelize it rather than cooking it for longer, which can cause the sugars to burn and turn bitter over direct heat.
Can I make these ribs on a gas grill without wood chips?
Yes — you will have excellent ribs without wood chips. The bark from the dry rub provides significant smoke-adjacent flavor from the smoked paprika and spices in the blend, and the low-and-slow indirect cooking method produces tender, flavorful ribs regardless of whether actual smoke is involved. That said, even a single small foil packet of soaked wood chips placed on the lit burner during the first two hours of cooking adds a genuinely dramatic amount of authentic barbecue smoke flavor that is worth the minimal effort. If you have wood chips, use them. If you do not, proceed confidently without them.
How do I know if I bought quality baby back ribs at the store?
Look for racks that are meaty and thick across the bones — thin, bony racks have little meat between the bones and produce a disappointing final result no matter how good your technique is. The meat should be pinkish-red in color, not gray or pale. Avoid racks that have been heavily trimmed or are labeled “enhanced” or “solution added” — these have been injected with a salt-water solution that makes them taste pre-seasoned but muddy the flavor of your dry rub and can make the finished meat taste slightly salty and commercial. For the best possible ribs, look for a reputable butcher counter or a natural grocery store carrying heritage-breed or pasture-raised pork — the difference in flavor and fat quality is genuinely noticeable in the finished rack.