
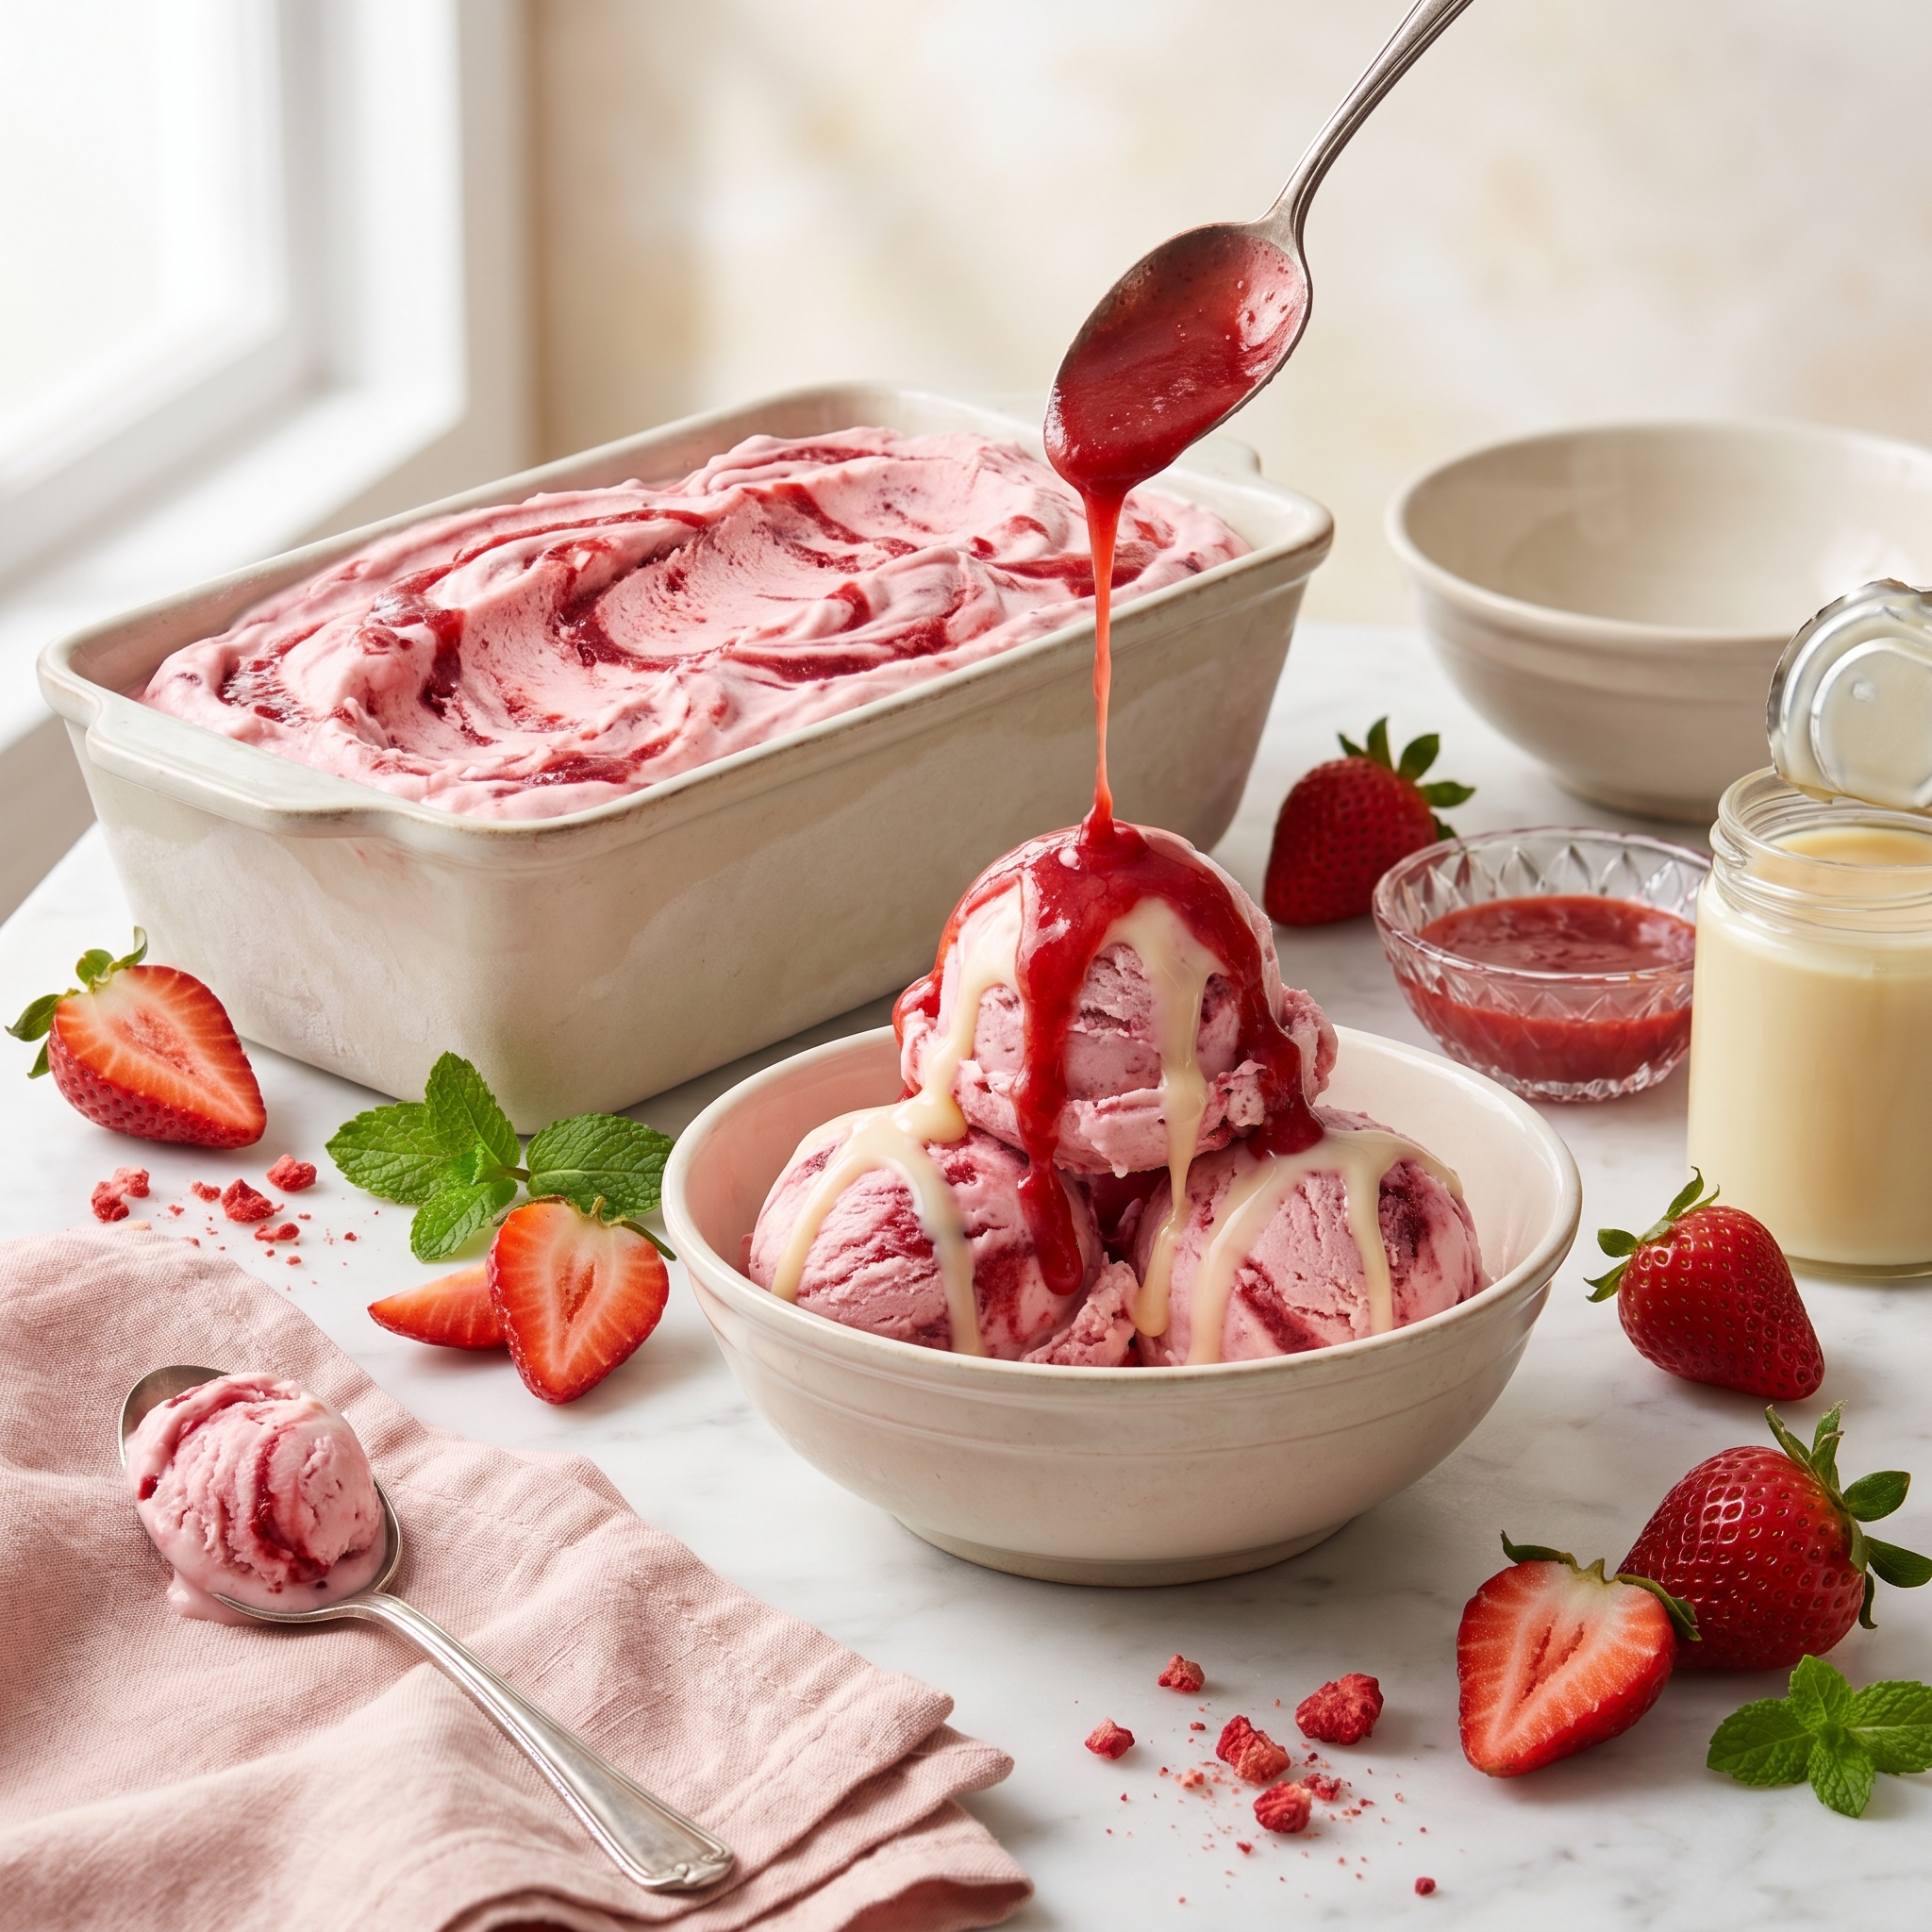
Homemade No-Churn Strawberry Ice Cream That’s Creamier Than Anything From the Store
Imagine scooping a bowl of the most impossibly creamy, deeply pink, intensely strawberry ice cream you have ever tasted — ice cream that is studded with real pieces of ripe summer strawberries, silky smooth right out of the freezer, and absolutely bursting with the kind of fresh, bright berry flavor that a pint from the grocery store freezer section has been failing to deliver your entire life. Now imagine that you made it entirely from scratch, in your own kitchen, with no ice cream machine, no special equipment, and no more than fifteen minutes of active work before the freezer does the rest. That is exactly what this homemade no-churn strawberry ice cream tastes and feels like — and once you make it, I promise you will never reach for a store-bought pint again.
Can I ask you something? When is the last time a carton of strawberry ice cream from the store actually tasted like real strawberries? Because most of them taste like strawberry-flavored sugar and pink food dye in a disappointing, icy base that barely melts before it gets watery. I have been there. I have been let down by pale, artificial, institutionally flavored grocery store ice cream more times than I can count, and somewhere along the way I decided that if I was going to eat strawberry ice cream, it was going to taste like I was eating a bowl of peak-season berries dipped in the most luxurious, rich cream imaginable. That mission led directly to this recipe, and it has been the most popular thing I make every summer without exception.
The secret is equal parts embarrassingly simple and genuinely brilliant — two main ingredients, one game-changing strawberry technique, and the patience to wait six hours while your freezer transforms everything into something extraordinary. No ice cream machine. No custard. No eggs to temper. No special skills required whatsoever. This is the no-churn strawberry ice cream that makes every person who tastes it ask the same question: “You made this yourself?” Keep reading — every single detail is right here waiting for you.
Table of Contents
Why This Recipe Works
There are a hundred ice cream recipes on the internet. Here is exactly why this homemade no-churn strawberry ice cream is the one worth making this weekend — and every summer weekend after that:
- ✔ No ice cream machine required — ever, not once, not even a little — just a hand mixer, a freezer-safe container, and a freezer that works
- ✔ Only 15 minutes of active work — the rest of the time the freezer does everything while you go about your day
- ✔ Tastes like real strawberries — a simple macerating technique draws out every drop of the berry’s natural juices and concentrates the flavor into something that no artificial flavoring could ever come close to replicating
- ✔ Perfectly scoopable straight from the freezer — no waiting ten minutes for it to soften, no chipping away at a frozen-solid block — just open, scoop, and eat
- ✔ Only 5 core ingredients — nothing exotic, nothing hard to find, and nothing that isn’t already in most kitchens during strawberry season
- ✔ Kid-approved and crowd-pleasing — there has never been a child or adult who tasted this and was not immediately and completely won over
- ✔ Perfect for summer entertaining — make it up to two weeks in advance, pull it straight from the freezer at party time, and scoop it into bowls or cones while everyone watches in disbelief that you made something this good yourself
Ready to make the best strawberry ice cream of your life with zero special equipment and fifteen minutes of effort? Let’s talk ingredients — and do not skip either of the Chef’s Notes below, because the maceration technique in the first one is the single step that separates genuinely great strawberry ice cream from every mediocre version you have ever tasted.
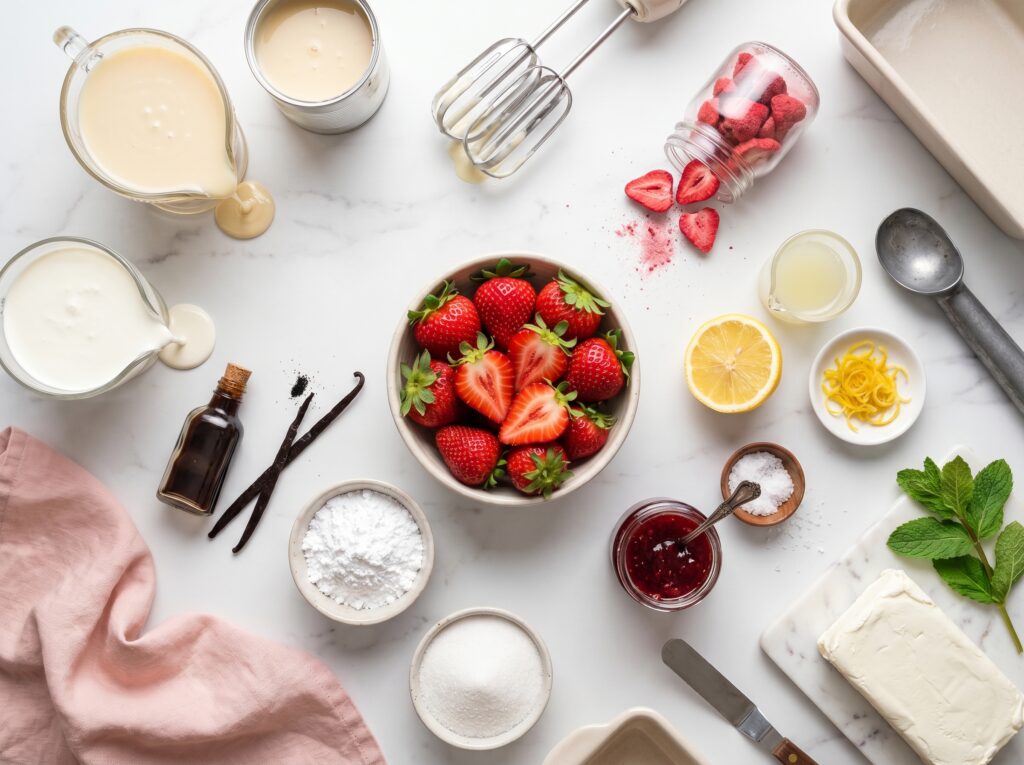
What You’ll Need
For the Strawberry Base
- 2 lbs fresh strawberries, hulled and roughly chopped (about 4 cups chopped)
- ⅓ cup granulated sugar
- 1 tablespoon fresh lemon juice
- 1 teaspoon lemon zest
- Pinch of fine sea salt
For the Ice Cream Base
- 2 cups heavy whipping cream, very cold
- 1 can (14 oz) full-fat sweetened condensed milk
- 2 teaspoons pure vanilla extract
- 1 tablespoon cream cheese, softened (the secret stabilizer — more on this below)
- Pinch of fine sea salt
Optional Mix-Ins and Swirls
- ½ cup fresh strawberries, diced small, for mix-in chunks
- 3 tablespoons strawberry jam or preserves, for a swirl
- ½ cup graham cracker crumbs, for a strawberry cheesecake version
- ¼ cup mini chocolate chips
- 2 tablespoons freeze-dried strawberry powder (intensifies the color and flavor dramatically)
For Serving
- Fresh strawberries, halved
- Freshly whipped cream
- Waffle cones or sugar cones
- Hot fudge or chocolate sauce
- Sprinkles, for the kids
- Fresh mint leaves
Substitutions
No fresh strawberries? Frozen strawberries work beautifully in this recipe and are available year-round at every grocery store in America. Thaw them completely, drain off the excess liquid, and then macerate them with the sugar and lemon as directed. The flavor is excellent — in fact, frozen strawberries are often picked at peak ripeness and flash-frozen immediately, which means they can sometimes be more flavorful than fresh strawberries purchased out of season.
No sweetened condensed milk? This is the foundational ingredient of no-churn ice cream and there is no true one-to-one substitute that produces the same result. That said, you can make a substitute by simmering 1½ cups of whole milk with ½ cup of granulated sugar over low heat for 30 to 40 minutes, stirring frequently, until reduced and thickened. It works, but the store-bought version is far more convenient and consistent — just keep a can or two in the pantry during summer.
No cream cheese? You can leave it out and the ice cream will still be delicious — it will just be very slightly less stable and may develop small ice crystals with extended freezer storage. The cream cheese is a tiny stabilizer that makes a surprisingly noticeable difference in the final scoopability and smoothness of the frozen base. Even one tablespoon is worth including if you can.
Want it dairy-free? Full-fat canned coconut cream (chilled overnight, solid portion only) replaces the heavy whipping cream perfectly and whips up beautifully. Use a dairy-free sweetened condensed coconut milk — several brands are available at natural grocery stores and online — and omit the cream cheese or use a dairy-free cream cheese alternative. The resulting ice cream has a subtle tropical undertone from the coconut that is actually wonderful alongside the strawberry flavor.
🧑🍳 Chef’s Note — The Maceration Step Is Everything: Macerating the strawberries — tossing them with sugar, lemon juice, and salt and letting them sit for a full thirty minutes before doing anything else — is the single most important step in this entire recipe. During maceration, the sugar draws the natural juices out of the strawberries, the lemon brightens and amplifies the berry flavor, and the salt suppresses any bitterness and makes the sweetness more vivid. The result is a deeply concentrated, syrupy, intensely flavored strawberry mixture that tastes about three times more powerfully of fresh strawberry than raw chopped berries do. It is this concentrated strawberry reduction — berries plus all of their extracted syrup — that goes into the ice cream base and gives the finished ice cream that extraordinary, unmistakably real strawberry flavor that makes people genuinely stop mid-bite. Do not rush this step. Thirty minutes of maceration is the minimum. Forty-five minutes is even better. An hour is ideal if you have the time. The longer the berries macerate, the more juice they release, and the more intensely flavored your ice cream will be.
🧑🍳 Chef’s Note — Your Heavy Cream Must Be Genuinely Cold: The temperature of the heavy cream going into this recipe is not a minor detail — it is fundamental to the success of the entire base. Warm or room-temperature heavy cream will not whip up into stable, firm peaks regardless of how long you beat it, and without properly whipped cream, the ice cream base will be dense, icy, and heavy rather than light, airy, and scoopably creamy. Pull your cream from the coldest part of the refrigerator right before using. For even better results — especially on a warm summer day when your kitchen is hot — place the mixing bowl and your beater attachments in the freezer for ten to fifteen minutes before you start. Cold bowl plus cold cream plus cold beaters equals fast, stable, beautifully stiff peaks every single time.
All five core ingredients assembled and both Chef’s Notes firmly in mind? Perfect. Let’s make the best ice cream you have ever pulled out of your own freezer — and there is a folding technique tip in the instructions that is the difference between ice cream with invisible air and ice cream with beautiful, creamy, smooth lightness in every single scoop.
How to Make No-Churn Strawberry Ice Cream — Step by Step
Part One: The Macerated Strawberries
- Hull, chop, and macerate the strawberries. Hull all the strawberries and roughly chop them into pieces about the size of a large blueberry — not too fine, because you want some real berry texture in the finished ice cream, and not too large, because big chunks freeze rock-hard and are unpleasant to bite into on a cold scoop. Add the chopped berries to a medium bowl along with the granulated sugar, fresh lemon juice, lemon zest, and pinch of salt. Toss everything together until the sugar coats the berries evenly. Cover the bowl loosely with plastic wrap and let it sit at room temperature for a minimum of 30 minutes — 45 to 60 minutes is genuinely better if you have the time.
- Assess the macerated berries and prepare two portions. After maceration, your berries should be sitting in a beautiful, deep red pool of syrupy, concentrated strawberry juice — this is exactly what you want. Now divide the macerated berries into two portions: roughly two-thirds of the mixture goes into the blender for a smooth strawberry purée that flavors the entire ice cream base, and the remaining one-third stays in its chunky, syrupy form to be folded in at the end for real berry pieces throughout every scoop.
- Blend the larger portion into a smooth purée. Pour the two-thirds portion of macerated berries — syrup and all — into a blender and blend until completely smooth with no chunks remaining, about 30 seconds. You want a vivid, deeply colored, pourable strawberry purée. Pour it into a bowl and set it aside. Do not strain out the seeds — they add visual charm and a tiny bit of pleasant texture to the finished ice cream that feels very much like real, honest-made-from-scratch ice cream rather than the over-processed commercial kind.
Part Two: The Ice Cream Base
- Beat the cream cheese until completely smooth. Place the softened cream cheese in a large mixing bowl and beat with a hand mixer for about one minute until it is completely smooth and lump-free. This tiny pre-beating step prevents the cream cheese from forming lumps in the finished base — undissolved cream cheese lumps that show up later in the whipped cream are nearly impossible to remove without deflating the whole mixture. One minute now saves significant frustration later.
- Add the condensed milk, vanilla, and salt. Add the sweetened condensed milk, vanilla extract, and pinch of salt to the cream cheese and beat together on medium speed until completely smooth and fully combined — about 30 seconds. The mixture should look glossy, creamy, and uniform with no visible streaks of cream cheese.
- Add the strawberry purée and mix to combine. Pour the strawberry purée into the condensed milk mixture and stir together until fully incorporated and beautifully, deeply pink throughout. Taste this mixture — it should be intensely strawberry-flavored, rich, and sweet. If you want more strawberry intensity, add a tablespoon of freeze-dried strawberry powder at this point and stir in — it amplifies the color to a gorgeous deep rose and intensifies the flavor even further without adding any moisture.
Part Three: The Whipped Cream
- Whip the heavy cream to stiff peaks. In a separate, clean, large mixing bowl — cold from the freezer if possible — pour the very cold heavy whipping cream and beat with a hand mixer starting on medium speed, increasing to medium-high after about 30 seconds. Continue beating until the cream forms firm, stable stiff peaks that stand straight up and hold their shape without drooping or collapsing when you lift the beaters. This takes approximately 3 to 4 minutes with cold cream in a cold bowl. Stop the moment the peaks are firm — over-whipped cream becomes grainy and butter-like and cannot be corrected once it has gone too far.
- Fold the whipped cream into the strawberry base in three additions. Add one-third of the whipped cream to the strawberry condensed milk mixture and stir it in fairly vigorously with a rubber spatula — this first addition lightens the dense base and makes it easier to fold in the remaining cream without deflating it. Add the second third and fold gently using slow, sweeping motions from the bottom of the bowl up and over the top. Add the final third and fold with the same gentle motion until the mixture is completely uniform, beautifully pink, and no white streaks of cream remain. Every fold should be deliberate and unhurried — you are preserving the air you just worked to whip into the cream, and that air is what produces the light, creamy, non-icy texture that makes this ice cream so extraordinary.
Part Four: Layering, Freezing, and Serving
- Layer the ice cream with the reserved berry chunks. Pour roughly half of the ice cream base into a 9×5-inch loaf pan or a freezer-safe container with a tight-fitting lid. Scatter half of the reserved macerated berry chunks — syrup and all — over the surface. Use a butter knife or a skewer to gently swirl the berries into the base with a few lazy figure-eight passes — you want pockets and streaks of berry throughout the layer, not a fully blended uniform mixture. Pour the remaining ice cream base over the top and repeat with the remaining berry chunks, swirling gently once more.
- Add any optional mix-ins or swirls. If you are doing a strawberry jam swirl, drop small spoonfuls of jam over the surface and run a butter knife through in a loose swirling pattern for a gorgeous ribbon effect throughout the finished ice cream. If you are adding graham cracker crumbs for a cheesecake version, scatter them in layers between the ice cream pours. Mini chocolate chips can be scattered over the top layer and pressed in gently. Do all of this now — adding mix-ins after freezing is not possible.
- Cover tightly and freeze for a minimum of 6 hours. Press a piece of plastic wrap directly against the surface of the ice cream mixture before putting the lid on — this prevents ice crystals from forming on the surface and keeps the top layer smooth and creamy rather than frosty and grainy. Freeze for a minimum of 6 hours, though overnight is strongly preferred and produces a noticeably better, more firmly scoopable result. The ice cream needs the full freeze time to set from a mousse into a cohesive, sliceable, perfectly textured frozen dessert.
- Let it sit for 3 to 5 minutes before scooping. Remove the container from the freezer and let it sit on the counter for 3 to 5 minutes before attempting to scoop. Run your ice cream scoop under hot water, wipe dry, and then scoop in a firm, decisive, rolling motion. The ice cream should release in gorgeous, creamy rounds without requiring excessive force — if it is still too firm after five minutes, give it another two minutes and try again. Serve immediately in bowls or cones with your chosen toppings and eat it fast, because it is going to disappear even faster.
You just made the most beautiful, most flavorful, most legitimately extraordinary homemade no-churn strawberry ice cream of your life. Now let’s talk about all the wonderful ways to serve it and make every single scoop as memorable as possible.
How to Serve It
This no-churn strawberry ice cream is spectacular all on its own, but here are five ways to serve it that take every bowl or cone completely over the top:
- 🍓 Classic summer sundae bar — set out the ice cream container alongside bowls of toppings: fresh sliced strawberries, hot fudge sauce, freshly whipped cream, rainbow sprinkles, chopped toasted almonds, maraschino cherries, and waffle cones. Let everyone build their own creation. This is the backyard Fourth of July or Memorial Day dessert station that kids and adults alike hover around with unbridled enthusiasm, and it requires zero day-of work since the ice cream is fully made in advance.
- 🎂 Ice cream cake base — press the ice cream mixture into a springform pan over a crushed graham cracker or Oreo crust before freezing, freeze completely solid, then remove the ring and frost with freshly whipped cream. Decorate the top with halved fresh strawberries arranged in a beautiful pattern and a drizzle of strawberry sauce. This is the birthday cake for the person in your life who loves ice cream more than cake, and it is one of the most impressive-looking desserts you can make with genuinely minimal effort.
- 🌞 Summer cookout dessert — bring the entire loaf pan to a cookout in a small cooler, pull it out after the main event, and scoop right from the pan into paper cups or waffle cones for the group. There is something deeply nostalgic and communal about eating handmade ice cream at a summer cookout that makes every scoop taste better than it would at any other time or place. It always gets more compliments than anything else on the dessert table.
- 🧇 Ice cream sandwich station — sandwich generous scoops of this strawberry ice cream between two soft snickerdoodle cookies, two chocolate chip cookies, or two toasted waffles for the most indulgent, most crowd-pleasing handheld summer dessert imaginable. Roll the edges in mini chocolate chips, crushed graham crackers, or rainbow sprinkles for presentation and flavor. Wrap individually in parchment and freeze for 30 minutes until the edges are firm enough to eat without dripping.
- 🍫 Strawberry and chocolate pairing plate — serve two scoops in a chilled bowl alongside a warm, generous drizzle of dark chocolate fudge sauce and a few pieces of fresh strawberry on the side. The combination of cold, creamy, intensely strawberry ice cream and warm, bittersweet chocolate sauce is one of the great classic dessert pairings and one that never, ever gets old no matter how many times you come back to it.
Before you head to the kitchen to start macerating those berries, let me walk you through the storage details and every make-ahead strategy that makes this ice cream the most practical, most impressive homemade dessert in your summer repertoire.
Storage & Make-Ahead Tips
Freezer storage: This no-churn strawberry ice cream keeps beautifully in the freezer for up to 2 weeks at peak quality. After two weeks, it is still completely safe to eat but may begin to develop more ice crystals at the surface and the texture will become slightly less smooth and creamy. For best results, consume within the first ten days — which, in my experience, has never once been a challenge.
Preventing ice crystals: The single most effective way to prevent ice crystals from forming on the surface is to press a piece of plastic wrap directly against the surface of the ice cream — touching the ice cream, not just covering the container from above. This eliminates the air gap between the ice cream and the lid where frost and ice crystals form. Do this every single time you put it back in the freezer after scooping, and your ice cream will stay smooth, creamy, and perfect from the first scoop to the last.
Container matters: A standard 9×5-inch metal loaf pan covered tightly with plastic wrap and then foil works very well. A freezer-safe container with a tight-fitting lid is even better. Avoid wide, shallow containers — the more surface area exposed to freezer air, the faster ice crystals form and the sooner the texture suffers. Depth over width is the goal for long-term freezer storage.
Make-ahead for parties: This ice cream can be made up to 2 weeks in advance of any occasion, making it the single most convenient homemade dessert for summer entertaining. Mix it on a Tuesday night, freeze it solid by Wednesday morning, and it is ready and waiting in the freezer for the Saturday cookout, the Sunday birthday party, or the Fourth of July celebration — with zero day-of dessert work required whatsoever.
Softening for service: If the ice cream has been in the freezer for more than 24 hours, it will be quite firm and may benefit from sitting on the counter for 4 to 6 minutes before scooping rather than the standard 3 to 5 minutes. For a very large gathering where you need to scoop many bowls quickly, set the container out 8 to 10 minutes before service and run your scoop under hot water between scoops for smooth, effortless, beautiful rounds every time.
🗓️ Make-Ahead Summer Party Game Plan: Here is the exact strategy for serving this at a large summer party without a single moment of day-of dessert stress. Up to two weeks before: macerate the berries, make the ice cream base, fold in the whipped cream, layer with berry chunks, freeze solid. Store covered with plastic wrap pressed to the surface. Day of the party: pull the container from the freezer 5 minutes before dessert time, set out your toppings bar, run the scoop under hot water, and serve. Total day-of effort: opening the freezer door. Total guest reaction: genuinely stunned that you made homemade ice cream and that it tastes this extraordinary. This is the party move that costs you fifteen minutes one evening earlier in the week and pays you back in compliments all summer long.
One more thing before you go make this — let me walk you through the five most common no-churn ice cream mistakes so your very first batch comes out absolutely perfect.
Helpful Tips & Common Mistakes
No-churn ice cream is one of the most forgiving frozen dessert recipes in existence — but a few small missteps produce results that are icy, dense, or lacking in flavor. Here is how to avoid every single one of them:
✗ Mistake: Skipping or rushing the maceration step
✓ Fix: Tossing the strawberries in sugar and letting them sit for only five or ten minutes produces berries that have barely begun to release their juices — you end up with a purée that tastes like diluted, mildly sweet berry water rather than the intensely concentrated, vivid strawberry flavor that thirty to sixty minutes of proper maceration produces. Set a timer, walk away, and let the sugar do the patient work of pulling every drop of flavor out of those berries. The difference in the finished ice cream is dramatic and immediately obvious in both the depth of color and the intensity of flavor.
✗ Mistake: Using warm or room-temperature heavy cream
✓ Fix: Cream that is not genuinely cold will not whip to proper stiff peaks — it will whip to soft, floppy mounds that collapse almost immediately and produce an ice cream base with insufficient air incorporated. The result is dense, icy, heavy ice cream rather than light, creamy, smooth ice cream. Always use cream straight from the coldest part of the refrigerator, and if your kitchen is warm on a summer day, chill the bowl and beaters in the freezer for ten minutes before you start. Cold everything is the mantra for successful no-churn ice cream.
✗ Mistake: Over-folding the whipped cream into the base
✓ Fix: Every extra fold you make after the mixture looks uniform is deflating the air you just worked to whip in. Stop folding the moment no white streaks of cream are visible. The mixture should look light, airy, and mousse-like — if it starts to look dense, glossy, and pourable rather than fluffy and thick, you have gone too far. You cannot put the air back once it is gone. Fewer folds, more patience, and stopping at the right moment is the entire technique.
✗ Mistake: Not pressing plastic wrap against the surface before freezing
✓ Fix: Air between the ice cream surface and the lid is where frost forms and ice crystals develop, producing a gritty, icy top layer on every batch. Pressing plastic wrap directly onto the surface before putting the lid on costs you ten seconds and preserves the creamy, smooth texture of every scoop from the very top to the very bottom of the container. Do this every single time — when you first freeze it and every time you put it back after serving.
✗ Mistake: Trying to scoop it straight from the freezer without resting
✓ Fix: No-churn ice cream, with its higher fat content from the heavy cream, freezes quite firmly — more firmly than commercial ice cream, which contains stabilizers and is formulated specifically for ease of scooping. Trying to force a scoop into rock-hard ice cream straight from the freezer tears and drags rather than producing the clean, round, beautiful scoop you want, and risks bending your scoop in the process. Three to five minutes on the counter and a hot-water-dipped scoop are all you need for effortless, gorgeous results every time.
With all five mistakes officially behind you, here are four spectacular flavor variations that prove this recipe is one of the most versatile in your entire summer dessert collection.
Recipe Variations
🍰 Strawberry Cheesecake No-Churn Ice Cream: Increase the cream cheese in the base from 1 tablespoon to 4 ounces (half a standard block), softened completely, and beat it into the condensed milk mixture until silky smooth before adding the strawberry purée. Layer the ice cream into the container over a ½-inch layer of crushed graham crackers tossed with 2 tablespoons of melted butter, pressed firmly into the bottom of the pan like a cheesecake crust. Swirl 3 tablespoons of strawberry jam through the top layer for a jam ribbon. The result tastes exactly like a frozen New York-style strawberry cheesecake in ice cream form, and it is one of the most extraordinary things you will ever pull out of your own freezer.
🍫 Chocolate-Covered Strawberry Version: Reduce the strawberry purée in the base by half and swirl 3 tablespoons of high-quality chocolate fudge sauce through the layers alongside the berry chunks in a thick, generous ribbon. Add ¼ cup of mini dark chocolate chips folded into the final base before pouring. The combination of intensely concentrated strawberry ice cream and dark chocolate ribbons and chips running through every scoop is the frozen dessert version of chocolate-covered strawberries — and it is absolutely irresistible for Valentine’s Day, anniversary dinners, or any occasion that calls for something that feels genuinely romantic and special.
🌿 Strawberry Basil Balsamic Version: Add 2 tablespoons of very finely chopped fresh basil leaves to the macerated strawberries before blending — the basil infuses the purée with an herbal, slightly peppery note that is one of the most sophisticated and unexpected flavor combinations in the entire world of frozen desserts. Add 1 teaspoon of good-quality aged balsamic vinegar to the condensed milk base for a subtle, complex depth that makes every bite taste like something from a high-end gelateria. This is the version you make for dinner parties when you want to serve something that shows true culinary creativity without requiring any additional effort whatsoever.
🍑 Mixed Summer Berry Version: Replace one pound of the strawberries with an equal weight combination of fresh raspberries, blackberries, and blueberries. Macerate all four berries together with the sugar and lemon. Blend two-thirds smooth and reserve one-third chunky as directed. The mixed berry base produces a deeper, more complex, more wine-dark purple-red ice cream with layered berry flavor from all four fruits — sweet, tart, bright, and rich all at once. This is the summer berry season greatest-hits version and the one that disappears fastest at every gathering where both the strawberry original and this mixed version are served side by side.
Go Make the Best Ice Cream of Your Summer
This homemade no-churn strawberry ice cream is proof — definitive, delicious, undeniable proof — that the best frozen dessert you will eat all summer does not require a machine, a culinary degree, or anything more than fifteen minutes of genuine effort and a handful of ingredients that celebrate the season at its absolute sweetest. Once you taste a scoop of this against anything from the grocery store freezer section, the comparison will be so dramatic and so immediate that you will genuinely wonder how you went this many summers without making it. Now go get those strawberries, let them macerate, and make something that everyone at your table is going to remember long after summer is over.
Made this recipe? I want to see every beautiful scoop — drop a comment and a star rating below, or tag me on Pinterest with your gorgeous ice cream! Seeing your homemade frozen creations all summer long is genuinely the best part of my entire July and August. Happy scooping! 🍓🍦
Frequently Asked Questions
Why is my no-churn ice cream icy instead of creamy?
Icy texture in no-churn ice cream is almost always caused by one of three things: the heavy cream was not cold enough to whip to proper stiff peaks before folding in, the whipped cream was over-folded and lost too much of its incorporated air, or the plastic wrap was not pressed directly against the surface during freezer storage allowing ice crystals to form. The fix going forward is simple — ice-cold cream, careful folding that stops the moment the mixture is uniform, and plastic wrap pressed flat against the surface every single time the container goes back in the freezer.
How long does no-churn ice cream need to freeze before serving?
A minimum of 6 hours is required for the ice cream to freeze completely from a mousse-like mixture into a properly firm, scoopable frozen dessert. Overnight — 8 to 10 hours — is strongly preferred and produces a noticeably better texture and a more firmly set result that scoops more cleanly and melts more slowly in the bowl. Making it the evening before you plan to serve it is always the right move. Do not attempt to serve it after only 2 or 3 hours — it will be partially frozen and soft in the center, more like a semifreddo than a proper scoopable ice cream.
Can I make this without sweetened condensed milk?
Sweetened condensed milk is the foundational ingredient of all no-churn ice cream — it provides the sweetness, the thick body, and most importantly the sugar concentration that prevents large ice crystals from forming in the frozen base. Without it, no-churn ice cream simply does not work the same way. You can make a homemade version by simmering 1½ cups of whole milk with ½ cup of sugar over low heat for 30 to 40 minutes until reduced and thickened to a syrupy consistency, but the store-bought canned version is far more reliable and convenient. Keep a few cans in your pantry all summer — you will use them.
Can I use frozen strawberries instead of fresh?
Yes, absolutely — and frozen strawberries are a wonderful year-round option that makes this recipe accessible even when fresh berries are out of season or overpriced. Thaw the frozen strawberries completely, drain off any excess liquid from the package, and then macerate them with the sugar and lemon as directed. The maceration step works equally well on thawed frozen berries and produces the same concentrated, syrupy result. One note: the color from frozen strawberries tends to be slightly deeper and more vibrant than fresh, which actually produces an even more beautifully pink finished ice cream.
Does this recipe work with other fruits besides strawberries?
This exact no-churn method works beautifully with almost any ripe, flavorful summer fruit. Fresh peaches, mangoes, raspberries, blackberries, and blueberries all macerate and purée into excellent ice cream bases using this same technique. Stone fruits like peaches and nectarines should be peeled before macerating. For fruits that are less naturally sweet than strawberries — raspberries and blackberries especially — increase the maceration sugar slightly and taste the purée before folding in the whipped cream, adjusting sweetness as needed. The world of no-churn fruit ice cream is enormous and entirely accessible once you understand this one foundational method.
Can I make this recipe lower in sugar?
The sweetened condensed milk provides the majority of the sweetness in this recipe, and using a full can is important for both flavor and texture — the sugar concentration from the condensed milk is part of what keeps the ice cream from freezing rock-solid and developing large ice crystals. You can reduce the maceration sugar for the strawberries slightly — down to ¼ cup rather than ⅓ cup — if you are using very sweet, peak-season berries, since they need less added sweetness to taste their best. A no-sugar-added sweetened condensed milk is available at most grocery stores and produces a lower-sugar version that is still creamy and delicious, though slightly less sweet on the palate.
My ice cream is too hard to scoop right out of the freezer. How do I fix it?
This is completely normal for homemade no-churn ice cream and is not a sign that anything went wrong — in fact, a very firmly frozen ice cream is often a sign that the whipped cream was properly stiff and the base was well-made. Simply let the container sit on the counter for 4 to 6 minutes before scooping, run your ice cream scoop under hot water and dry it just before each scoop, and apply firm, steady downward pressure while rolling the scoop in a smooth arc. The ice cream will release in beautiful, creamy rounds. If it is still too firm after six minutes, give it two more and try again — the resting time varies slightly depending on how cold your particular freezer runs.
Can I make this ice cream without a hand mixer?
A hand mixer or stand mixer is strongly recommended for whipping the heavy cream to properly stiff peaks — it is genuinely difficult to achieve the same result by hand with a whisk unless you have exceptional arm stamina and a very cold bowl. That said, it is technically possible to whip the cream by hand with a large balloon whisk in a chilled metal bowl — it takes approximately 8 to 12 minutes of vigorous, continuous whisking. If you do not have any mixer, a hand whisk and considerable patience will get you there. The sweetened condensed milk and cream cheese mixture can absolutely be stirred together by hand with a regular spoon — a mixer is only truly essential for the cream whipping step.