
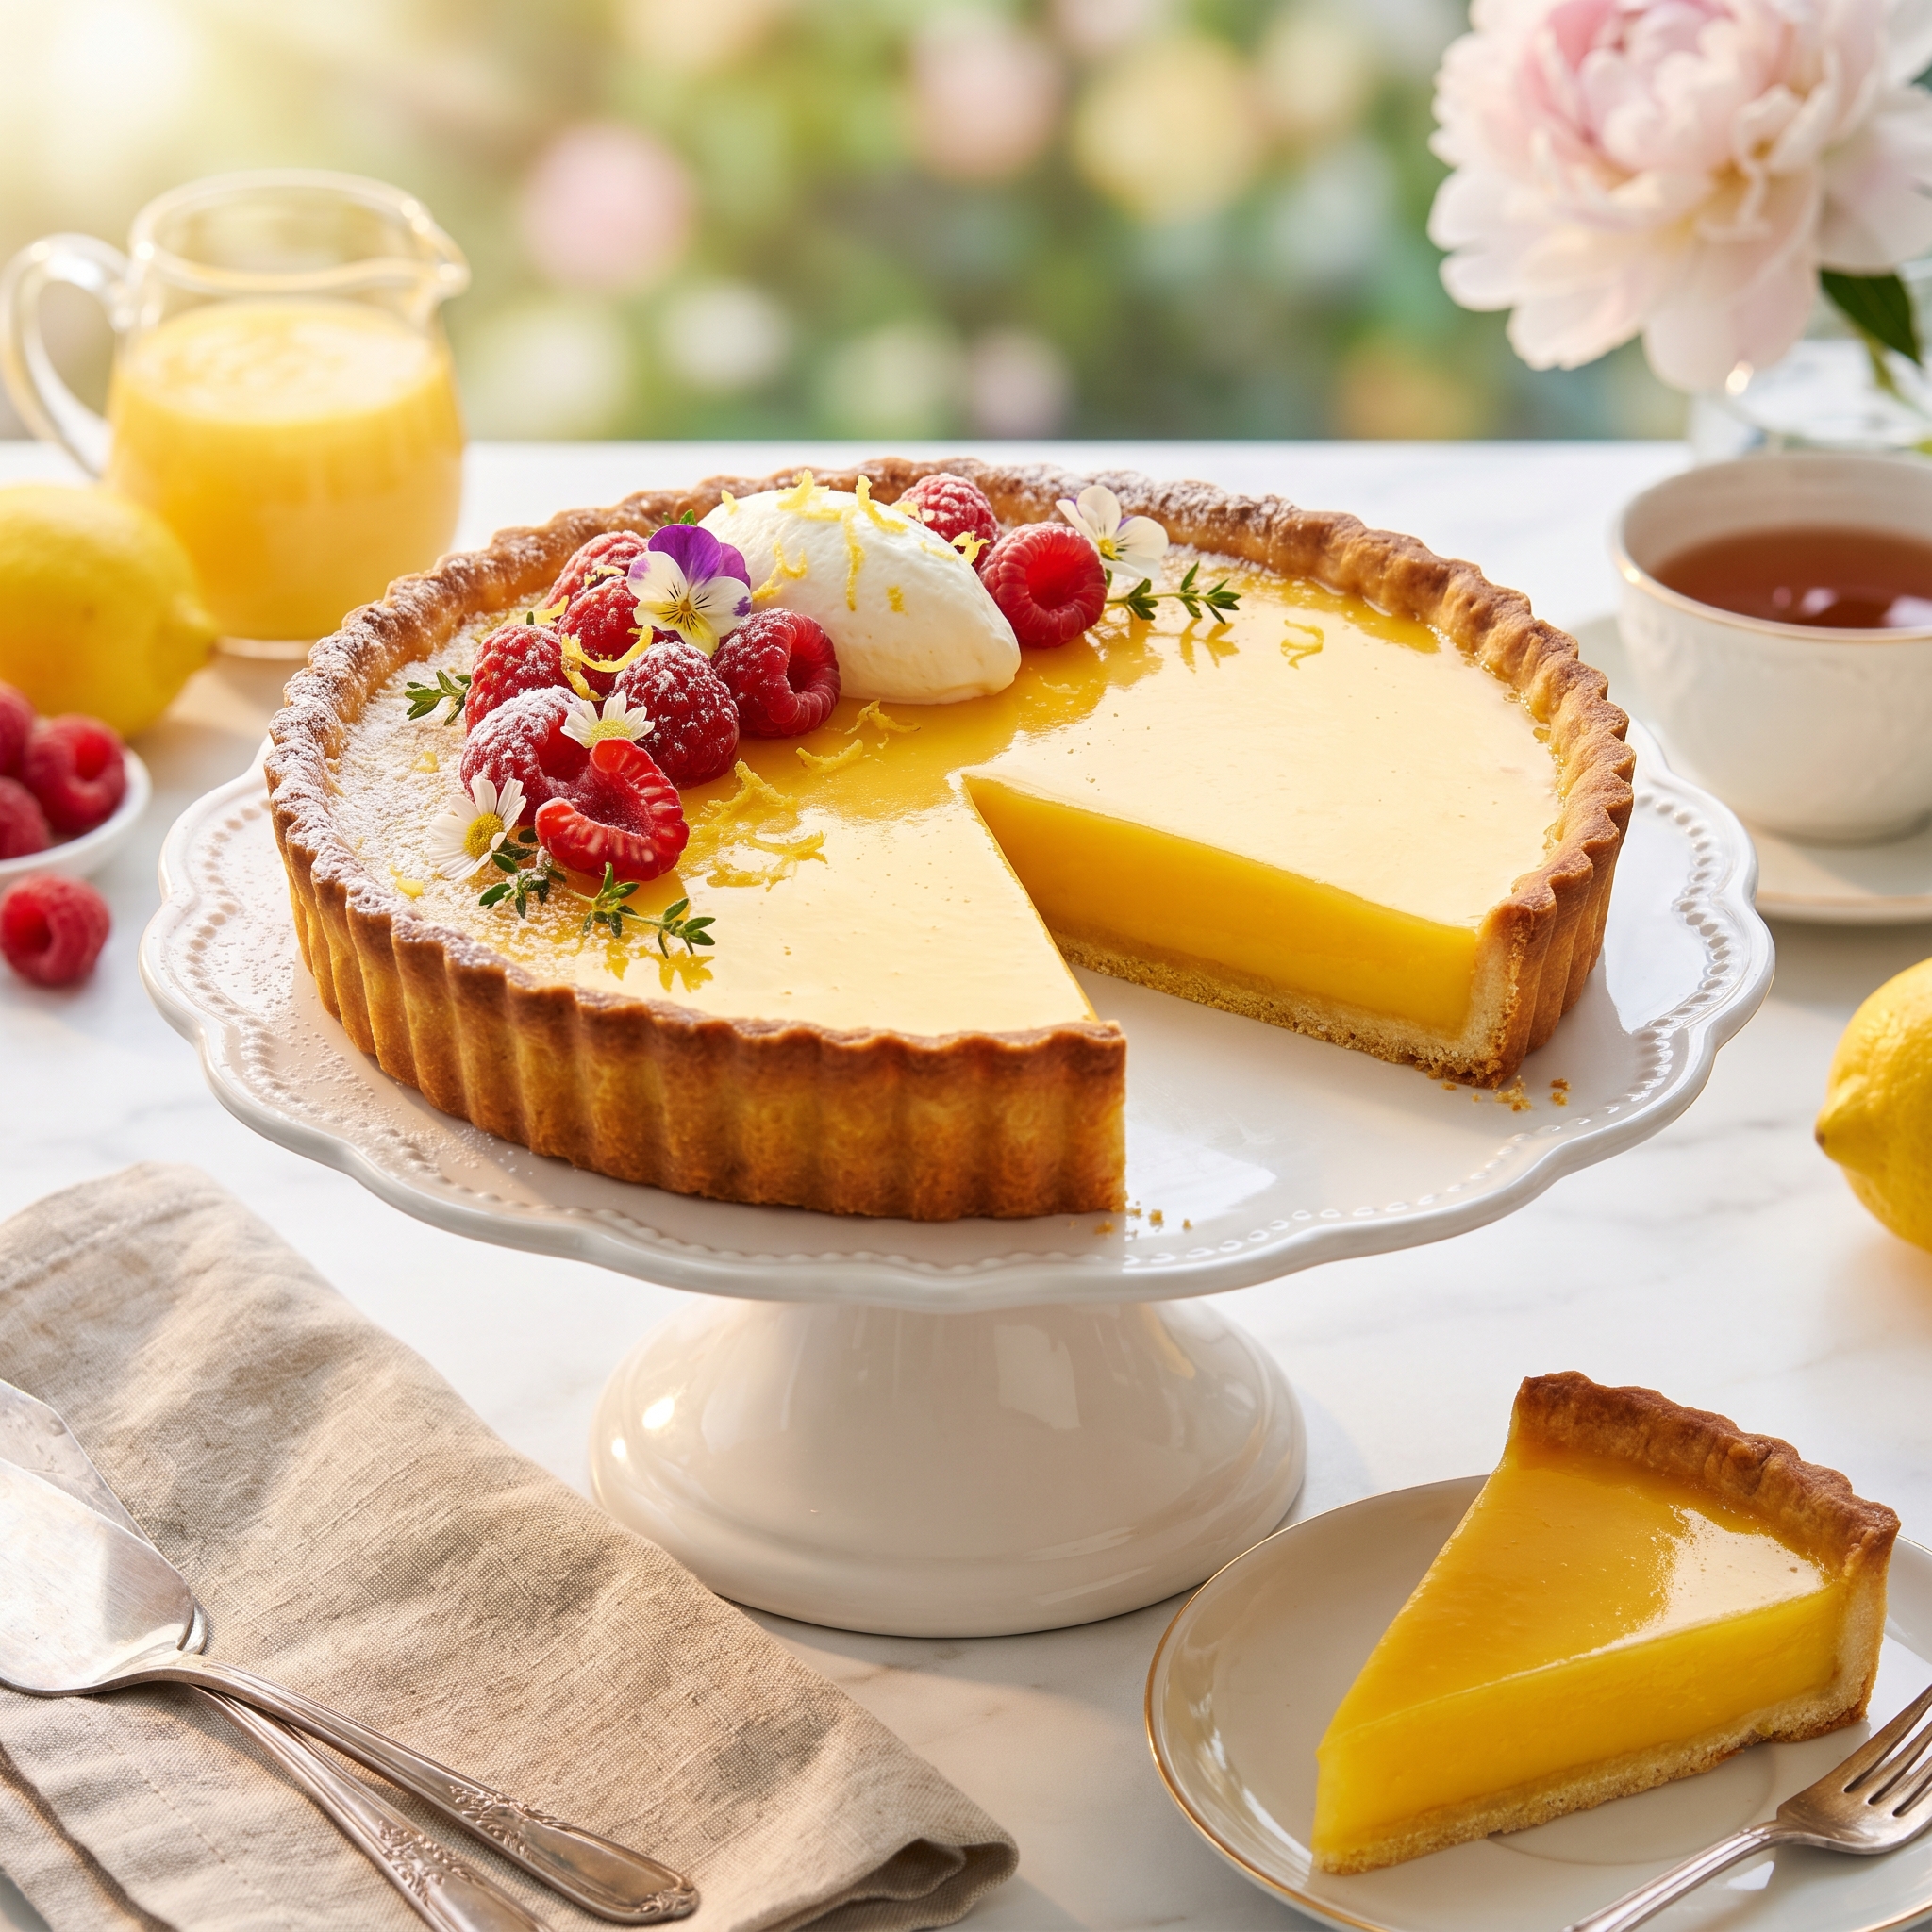
Foolproof Lemon Curd Tart with Buttery Crust: 7 Secrets to the Easiest Show-Stopping Dessert You’ll Ever Make
It started at my neighbor Carol’s Easter table three springs ago — a low, golden tart sitting on a white cake stand at the end of the buffet, looking almost too pretty to cut into. The crust was the color of shortbread, impossibly crisp and buttery at the edges. The filling was this deep, glossy, sunshiny yellow — smooth as silk, trembling just slightly when someone bumped the table. I took one bite and genuinely stopped the conversation I was in. Bright, intensely lemony, rich without being heavy, with that buttery crust shattering cleanly under the fork and dissolving against the silky curd all in the same mouthful. I asked Carol for the recipe before I’d even finished my slice. She laughed and said: it’s easier than it looks. I didn’t believe her until I made it myself the following weekend and realized she was completely right.
Have you ever looked at a beautiful lemon tart in a bakery case and assumed it was firmly in the category of things other people make — pastry chefs, people with culinary training, people with more patience than you? If a stunning dessert that looks like it came from a French patisserie but comes together in a home kitchen in about an hour has ever felt out of reach, this lemon curd tart with buttery crust is the recipe that changes that assumption permanently. The crust is a simple press-in shortbread — no rolling, no chilling, no blind baking anxiety. The lemon curd is five ingredients stirred together over gentle heat. The whole thing sets in the refrigerator while you do something else entirely.
Whether you’re baking for a spring brunch and need something that photographs beautifully, a home baker who wants to stretch into something that feels a little impressive without a full weekend of effort, or someone who has been burned by finicky pastry before and needs a recipe that genuinely delivers on its easy promise — keep reading. This is the tart that makes people think you’ve been holding out on them. And honestly, once you know how simple it is, maybe you have been.
Table of Contents
Why This Recipe Works
Most lemon tart recipes are intimidating because they involve rolled pastry dough, blind baking with weights, and a curd that requires constant attention to avoid scrambling the eggs. This recipe eliminates every one of those stressful steps without sacrificing a single thing in the final result — the tart you pull from the refrigerator looks and tastes like something that took three times the effort it actually did.
- ✔ Press-in crust — no rolling pin required — The shortbread crust goes straight from the food processor into the tart pan and gets pressed in with your fingers. It bakes up crisp, golden, and perfectly even without any of the stress of rolled pastry dough.
- ✔ Silky lemon curd that sets perfectly every time — The curd is cooked low and slow with constant gentle stirring — no double boiler required, no scrambled eggs, no mystery about when it’s done. When it coats the back of a spoon and holds a line, it’s ready.
- ✔ Intensely, unapologetically tart — This is not a mild, politely lemony tart. The filling uses both lemon juice and lemon zest in quantities that make every bite bright and assertive. This is the tart for people who really love lemon.
- ✔ Make-ahead friendly — The tart needs at least two hours in the refrigerator to set, which means it’s best made the day before you need it. The crust stays crisp, the curd stays silky, and you’re not rushing around on party day.
- ✔ Bakery-quality results from pantry staples — Eggs, butter, sugar, lemons, and flour. Everything is a Walmart or Aldi grocery run, and the result is something that looks like it came from a $45 bakery box.
- ✔ No special equipment beyond a tart pan — A standard 9-inch tart pan with a removable bottom is the only specialty item this recipe asks for, and they’re widely available at Walmart, TJ Maxx, and Amazon for under $15.
- ✔ Endlessly versatile for garnishing — The finished tart is a canvas. Whipped cream rosettes, fresh berries, candied lemon slices, edible flowers, toasted meringue — it accepts any topping gracefully and looks stunning either way.
Let’s get into the ingredients — and the two lemon curd secrets that make all the difference.
What You’ll Need
This recipe makes one 9-inch tart that serves 8 to 10 people. Everything here is a standard grocery store staple — no specialty ingredients, nothing you’ll have to hunt for. The lemons are the star, so buy the best ones you can find and use fresh juice only.
For the Buttery Shortbread Crust
- 1½ cups all-purpose flour (King Arthur unbleached all-purpose is my go-to)
- ½ cup powdered sugar, sifted
- ¼ teaspoon kosher salt
- ½ cup (1 stick) unsalted butter, cold and cut into small cubes (Land O’Lakes)
- 1 large egg yolk
- 1 teaspoon pure vanilla extract
- 1 to 2 tablespoons ice cold water, as needed
For the Lemon Curd Filling
- 4 large eggs plus 2 egg yolks (the extra yolks add richness and help the curd set firmly)
- 1 cup granulated sugar
- ½ cup fresh lemon juice — from approximately 4 to 5 large lemons (bottled juice is not acceptable here; fresh only)
- Zest of 3 large lemons (this is where the real lemon flavor lives — use a microplane)
- ½ cup (1 stick) unsalted butter, cut into tablespoon-size pieces, at room temperature
- Pinch of kosher salt
For Finishing and Garnish
- Powdered sugar for dusting, optional
- Lightly sweetened whipped cream for serving
- Fresh raspberries, blueberries, or strawberries
- Thin lemon slices or candied lemon rounds
- Fresh mint leaves
- Edible flowers for a spring or Mother’s Day presentation
Optional Add-Ins and Upgrades
- 1 tablespoon limoncello stirred into the finished warm curd before pouring for an adult version
- ½ teaspoon lavender extract added to the crust for a lemon lavender variation
- A thin layer of lemon curd spread under a toasted meringue topping for a lemon meringue tart version
- A tablespoon of poppy seeds pressed into the crust before baking
- Fresh thyme leaves baked into the crust for an herby, savory-sweet edge
- A drizzle of white chocolate over the set tart for a bakery-style finish
- Crushed shortbread or graham cracker crumbs mixed into the crust for extra texture
Substitutions
Can I use bottled lemon juice instead of fresh? For the lemon curd filling, fresh lemon juice is genuinely non-negotiable and not a place to cut corners. Bottled lemon juice is pasteurized, which mutes and flattens the bright, volatile citrus compounds that make lemon curd taste alive and vibrant. The difference between a curd made with fresh juice and one made with bottled is dramatic and immediately apparent — fresh curd tastes like sunshine, bottled curd tastes like lemon cleaning product. Buy real lemons. You need four to five of them. It is absolutely worth it.
Can I use salted butter instead of unsalted? You can in a pinch for both the crust and the curd, but reduce or eliminate the added salt in each component if you do. Salted butter varies in sodium content by brand, which makes it harder to control the final flavor precisely. Land O’Lakes unsalted butter is the standard in both the crust and the curd here — it gives you a clean, sweet, creamy butter flavor without any salinity competing with the brightness of the lemon.
What if I don’t have a tart pan with a removable bottom? A standard 9-inch pie plate works as a substitute and produces a delicious result — you just won’t be able to unmold it for presentation the way you can with a tart pan. Press the crust into the pie plate the same way, build the sides up slightly higher to contain the curd, and serve it directly from the plate at the table. A springform pan also works and can be unmolded, though the sides will be straight rather than fluted. For a truly beautiful presentation, the $12 tart pan is worth picking up — it transforms a home-baked tart into something that looks genuinely professional.
🧑🍳 Chef’s Note — Zesting Lemons: Always zest your lemons before you juice them — once a lemon is juiced it is nearly impossible to zest effectively. Use a microplane grater held directly over your mixing bowl so every drop of fragrant citrus oil falls into the recipe rather than evaporating on the cutting board. Zest only the bright yellow outer layer — the white pith underneath is bitter and will make your curd taste harsh.
🧑🍳 Chef’s Note — Curd Doneness: The lemon curd is ready when it reaches 170°F on an instant-read thermometer, or when it coats the back of a wooden spoon thickly enough that you can run your finger through it and the line holds clean without the curd flowing back together. It will look thinner than you expect while hot — it thickens significantly as it cools and sets completely in the refrigerator. Do not cook it past 180°F or the eggs will begin to scramble.
How to Make Lemon Curd Tart with Buttery Crust — Step by Step
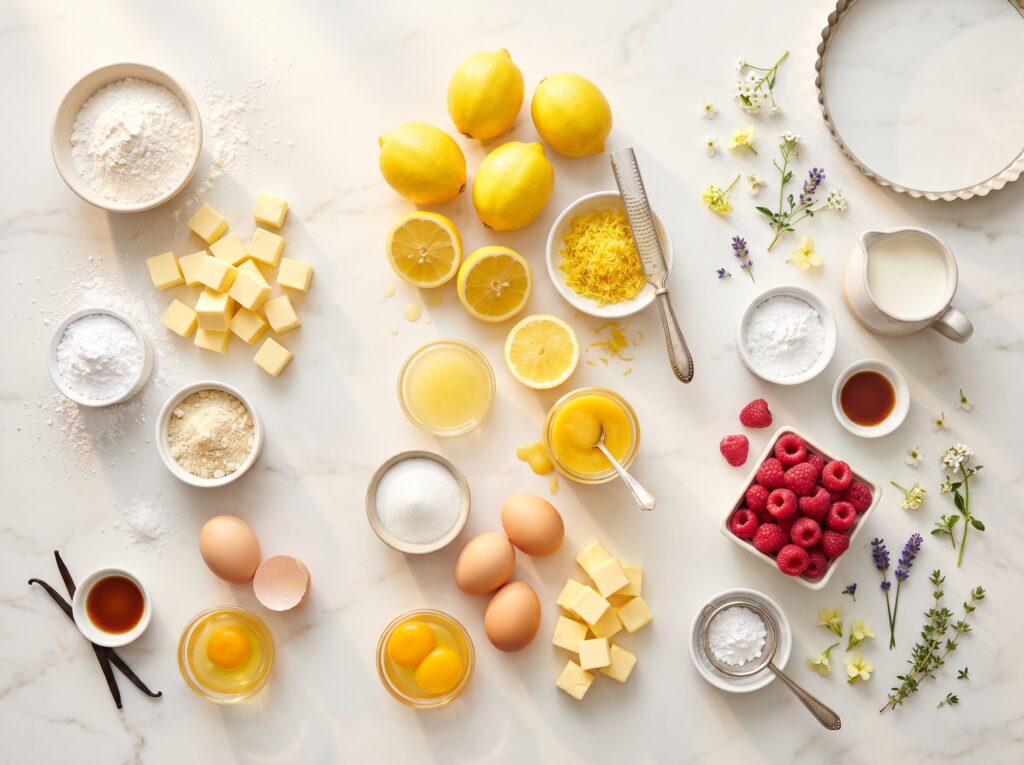
- Make the shortbread crust dough first and get it into the pan. Combine the flour, powdered sugar, and salt in a food processor and pulse two or three times to combine. Add the cold cubed butter and pulse in short bursts until the mixture resembles coarse sand with pea-sized butter pieces still visible — about 8 to 10 pulses. Add the egg yolk and vanilla extract and pulse until the dough just begins to come together into clumps. If it looks too dry, add ice water one tablespoon at a time and pulse briefly. The dough should hold together when you pinch it between your fingers without being wet or sticky. Turn it out into a 9-inch tart pan with a removable bottom.
💡 Pro Tip: No food processor? No problem. Make the crust by hand in a large bowl — whisk together the dry ingredients, add the cold butter, and use your fingertips to quickly rub the butter into the flour until the mixture resembles coarse breadcrumbs. Work fast to keep the butter cold; warm butter makes a greasy, dense crust rather than a tender, flaky one. Add the egg yolk and vanilla and stir with a fork until the dough comes together. Same result, just a little more hands-on.
- Press the crust evenly into the tart pan — no rolling required. Using your fingers and the heel of your hand, press the dough evenly across the bottom of the tart pan and up the fluted sides. Aim for an even thickness of about ¼ inch throughout — thicker than that and the crust will be doughy in the center, thinner and it may crack when unmolded. Use the flat bottom of a measuring cup or a small drinking glass to press the bottom smooth and flat. Take your time with the sides — press the dough firmly into every fluted ridge so the finished crust releases cleanly from the pan. Place the tart pan on a sheet pan and freeze for 20 minutes.
- Preheat the oven to 375°F and blind bake the crust until golden. Remove the tart pan from the freezer and place it — still on the sheet pan — directly in the preheated oven. No pie weights needed for this press-in crust; the freezing step firms the butter enough that the crust holds its shape during baking without any weights. Bake for 18 to 22 minutes until the crust is deep golden brown at the edges and lightly golden across the bottom. It should look fully baked — not pale or blonde, but genuinely golden. A fully baked crust is a crisp crust, and a crisp crust is everything. Let it cool completely on a wire rack before adding the curd.
💡 Pro Tip: If the crust puffs up in the center during baking — which occasionally happens — gently press it back down with the back of a spoon about 10 minutes into the bake while it’s still soft and pliable. It will settle and re-flatten as it continues to cook. Do not panic. This is a normal thing that happens with press-in crusts and it corrects itself easily with a gentle hand.
- While the crust bakes, make the lemon curd. Whisk together the eggs, egg yolks, sugar, lemon juice, lemon zest, and salt in a medium heavy-bottomed saucepan — not a thin pan, which will create hot spots and scramble the eggs. Place the saucepan over medium-low heat and cook, stirring constantly with a wooden spoon or a heatproof rubber spatula, making sure to scrape the bottom and sides of the pan continuously. Do not walk away from this. Do not turn up the heat to speed it up. Low and slow is the only way to lemon curd — patience here is what separates silky curd from scrambled lemon eggs.
- Cook the curd to 170°F, then add the butter off the heat. After about 8 to 12 minutes of constant stirring over medium-low heat, the curd will thicken noticeably — it should coat the back of your spoon and hold a clean line when you run your finger through it. Remove the pan from the heat immediately and add the room-temperature butter pieces, stirring each one in completely before adding the next. The butter enriches and smooths the curd and simultaneously stops the cooking by dropping the temperature. Once all the butter is incorporated, strain the curd through a fine-mesh strainer into a clean bowl or a large measuring cup with a pour spout — this removes the lemon zest pieces and any accidentally cooked egg bits and leaves you with a perfectly smooth, glossy curd.
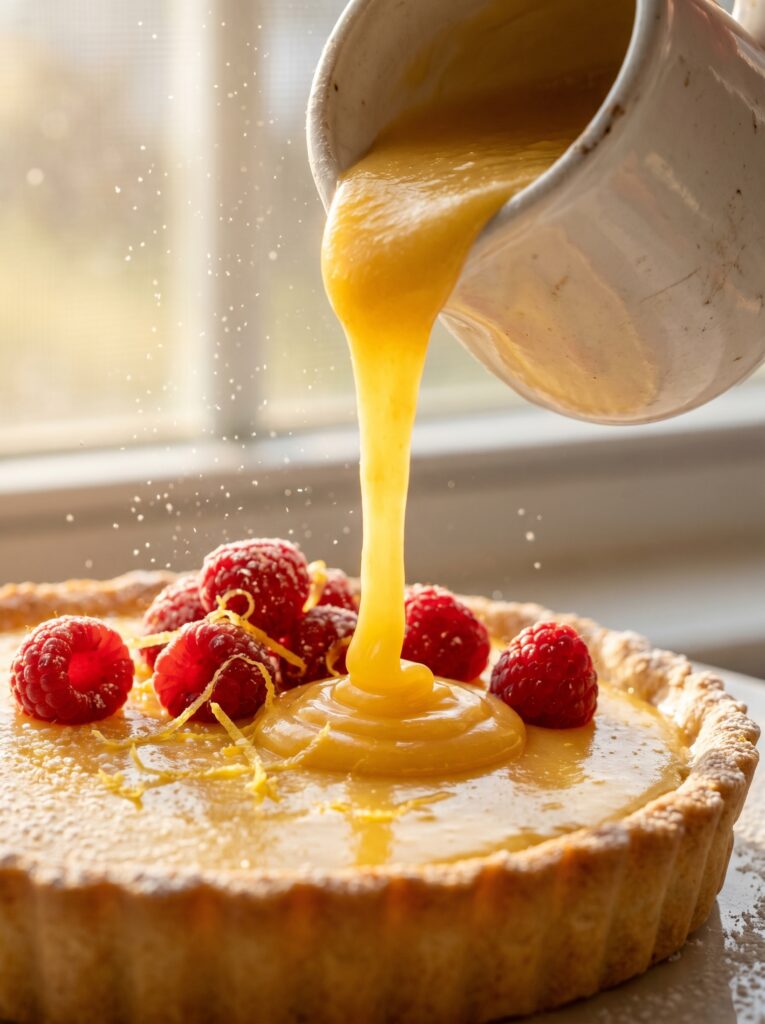
- Pour the warm curd into the cooled baked crust. Make absolutely sure the crust is fully cooled to room temperature before the curd goes in — pouring warm curd into a warm crust creates condensation that can make the crust soggy. Pour the strained curd slowly and evenly over the surface of the crust, filling it right to the edge. Tap the tart pan gently on the counter two or three times to release any air bubbles and settle the curd into a perfectly level, smooth surface. If you see any small air bubbles on the surface, pass a kitchen torch very briefly over the top or drag a toothpick through them to pop them.
💡 Pro Tip: Cover the surface of the poured curd loosely with a piece of plastic wrap pressed directly against the surface — not over the top of the tart pan, but actually touching the curd. This prevents a skin from forming on the surface as it cools and chills. Remove the plastic wrap right before serving and you’ll have a perfectly smooth, glossy, unbroken surface that looks like it was poured by a professional.
- Refrigerate for at least 2 hours — overnight is ideal. Carry the tart pan carefully to the refrigerator and chill it undisturbed for a minimum of 2 hours. The curd needs this time to set from a pourable liquid into a firm, sliceable filling that holds its shape when the tart is cut. Overnight chilling is genuinely best — the curd sets more completely, the flavors deepen and mellow slightly, and the crust stays crisp from the cold. This is a recipe that rewards planning ahead, and making it the day before you need it is always the right call.
- Unmold the tart by setting the pan on a tall can or jar and letting the outer ring drop. When you’re ready to serve, set the tart pan on top of a large can — a standard 28-oz canned tomato can works perfectly — and let the outer fluted ring drop straight down off the base. If it doesn’t release easily, run a thin knife or offset spatula around the very edge between the crust and the pan ring before trying again. Slide the tart — still on the metal base — onto your serving plate or cake stand using a large offset spatula. Or simply leave it on the base and place it directly on your serving plate; the metal base is perfectly presentable at the table.
- Garnish just before serving and slice with a hot, dry knife. Add your garnishes right before the tart hits the table — a dusting of powdered sugar, fresh raspberries or blueberries scattered across the surface, a few thin lemon slices, a scattering of fresh mint. To get clean, beautiful slices, dip a long sharp knife in hot water and wipe it dry between every single cut. A cold, dry knife drags through the curd and ruins the surface; a hot, dry knife glides through it cleanly and gives you those picture-perfect slices you see in the bakery case.
From the moment you start the crust to the moment the tart goes into the refrigerator, the active hands-on time is right around 45 minutes. The refrigerator does the rest. For a dessert that generates the kind of reactions this one generates, that ratio of effort to result is almost unfair in the best possible way.
How to Serve It
This lemon curd tart with buttery crust is one of the most versatile desserts in a home baker’s repertoire — elegant enough for a formal occasion, simple enough for a Sunday afternoon, and beautiful enough to photograph for any occasion in between. Here are five ways to bring it to the table.
- ☕ Spring Brunch Centerpiece: Set the unmolded tart on a white cake stand in the center of your brunch spread and top it with a cascade of fresh mixed berries — raspberries, blueberries, and halved strawberries — and a scatter of edible flowers if the season is right. Dust lightly with powdered sugar right before guests sit down. It will be the first thing people photograph and the first thing that disappears, and it takes almost no effort to look this spectacular.
- 🥞 Mother’s Day or Easter Dessert: Serve individual slices on pretty dessert plates with a cloud of softly whipped cream alongside — not sweetened, or barely sweetened, so the cream’s richness contrasts the tart’s brightness without competing with it. A single perfect raspberry set on the whipped cream and a tiny sprig of fresh mint is all the garnish you need. This is the kind of dessert presentation that makes mothers cry in the best possible way.
- 🌸 Afternoon Tea Dessert: Cut the tart into small, thin slices and serve alongside a pot of Earl Grey or chamomile tea. The floral notes in both teas complement the lemon beautifully, and small slices feel more appropriate for a light afternoon spread than a full wedge. Arrange the slices on a tiered cake stand alongside shortbread cookies and finger sandwiches for a proper tea spread that requires almost no additional baking.
- 📚 Casual Sunday Dinner Finale: Bring the whole tart to the table on its cake stand and let people serve themselves. A bowl of whipped cream in the center of the table, a bowl of fresh berries, and a small pitcher of extra lemon curd — because yes, you’re going to make extra and serve it alongside for people who want more — turns dessert into a communal, relaxed moment rather than a plated course. This is Sunday dinner done right.
- 🎃 Summer Party or Cookout Dessert: Make two tarts — one classic lemon, one with a berry swirl in the curd (stir 3 tablespoons of raspberry jam into the warm curd before pouring) — and set them side by side on the dessert table. Label them simply, add bowls of fresh fruit and whipped cream, and let guests mix and match. Two tarts look like you went all out. They take only marginally more effort than one. This is the dessert table strategy that makes you look like you planned everything perfectly.
Always slice with a hot, dry knife and always add garnishes at the last minute — the tart’s glossy surface is part of its beauty, and fresh toppings that haven’t wilted or bled into the curd are what keep it looking pristine from the first slice to the last.
Storage & Make-Ahead Tips
Finished tart — Refrigerator: The assembled lemon curd tart keeps covered in the refrigerator for up to 4 days. The crust stays remarkably crisp due to the high butter content, and the curd deepens in flavor over the first day or two. Cover the tart loosely with plastic wrap or store it in a large airtight container — avoid wrapping it tightly against the surface since the plastic will pull at the glaze and mar the smooth finish.
Lemon curd alone — Refrigerator: Extra lemon curd stores in a sealed jar in the refrigerator for up to 2 weeks. It’s worth making a double batch of curd every single time — the extra jar is one of the most useful things you can have in the fridge. Spread it on toast, swirl it into yogurt, layer it in a parfait, dollop it on pancakes, use it as a filling for thumbprint cookies, or serve it warm over vanilla ice cream. It is extraordinary in every application.
Pre-batching for an event: This tart is perfectly designed to be made a full day in advance. Make the crust and curd, assemble the tart, cover it, and refrigerate overnight. The day of your event, unmold it, garnish it right before serving, and you’re done. No day-of baking, no day-of stress. The only component to hold off on is the garnish — fresh fruit, whipped cream, and powdered sugar all go on within an hour of serving.
📅 Make-Ahead Tip: The baked, cooled tart shell can be made up to two days ahead and stored at room temperature, covered loosely, until you’re ready to fill it. The lemon curd can also be made up to three days ahead and refrigerated in a jar. On the day of assembly, simply rewarm the curd gently over low heat just until pourable, pour it into the shell, and refrigerate to set. Two components made separately in advance equals one beautifully stress-free assembly day.
Freezing: The fully assembled tart does not freeze well — the curd can weep and the crust absorbs moisture during thawing, compromising both texture and appearance. The baked, unfilled tart shell freezes beautifully for up to one month, wrapped tightly in plastic wrap and foil. Thaw it at room temperature for 30 minutes before filling. The lemon curd itself can be frozen in an airtight container for up to 3 months — thaw overnight in the refrigerator and stir well before using.
Helpful Tips & Common Mistakes
Lemon curd tart is a forgiving recipe, but these five mistakes are the most common reasons a tart doesn’t quite reach its potential — and every single one is completely preventable.
✗ Mistake: Pouring the lemon curd into a warm crust and ending up with a soggy bottom.
✓ Fix: Wait until the baked crust is completely, fully cooled to room temperature before adding the curd — not just warm, not just cool to the touch, but genuinely room temperature throughout. Hot curd into a warm crust creates steam and condensation that soaks into the shortbread and destroys the crisp texture you worked to build. If you’re in a hurry, place the baked crust on a wire rack in front of a fan to speed cooling.
✗ Mistake: Cooking the lemon curd over heat that is too high and scrambling the eggs.
✓ Fix: Medium-low heat only — always. If you see any steam rising from the surface of the curd or feel the sides of the pan getting hot to the touch, the heat is too high. Drop it down immediately. The curd should take 8 to 12 minutes to thicken; if it’s thickening in 3 to 4 minutes, your heat is too high and you are on your way to lemon-flavored scrambled eggs. Low, patient, constant stirring is the entire technique.
✗ Mistake: Skipping the straining step and ending up with lumpy curd.
✓ Fix: Always strain the finished curd through a fine-mesh strainer before pouring it into the tart shell. Even perfectly made curd contains small bits of cooked zest and occasionally a few tiny cooked egg particles that aren’t obvious until they’re sitting in a glossy yellow surface under bright light. Straining takes thirty seconds and is the difference between a smooth, professional-looking curd and one that looks homemade in the wrong way.
✗ Mistake: Under-baking the crust and ending up with a pale, soft, crumbly base that falls apart when sliced.
✓ Fix: Bake the crust until it is genuinely, deeply golden brown — not light blonde, not faintly golden, but the color of good shortbread cookie. A pale crust tastes raw and doughy and doesn’t have the structural strength to support the curd filling without crumbling. If it’s golden at the edges but pale in the center, give it another three to four minutes. The color is your doneness indicator here, and committing to a full bake is what gives you a crust that holds its shape and shatters beautifully under a fork.
✗ Mistake: Cutting the tart with a cold, dry knife and dragging the curd surface.
✓ Fix: Dip a long, sharp knife in a glass of very hot water and wipe it completely dry before every single cut. The hot blade glides through the set curd without dragging or tearing, and each slice comes away with a clean, smooth face that shows off the contrast between the golden crust and the glossy yellow filling. This one technique is the difference between slices that look bakery-perfect and slices that look like they were cut by someone in a hurry.
Recipe Variations
The buttery press-in crust and curd-based filling formula is a foundation that takes on a completely different personality with just a few ingredient swaps. Here are four variations that are all genuinely worth adding to your baking rotation.
🍋 Lemon Blueberry Curd Tart: Make the classic lemon curd exactly as written and pour it into the baked crust. While it’s still warm and just beginning to set — about 20 minutes into the refrigerator chill — press fresh blueberries gently into the surface of the curd in concentric circles or a scattered pattern, pressing each one just far enough that it sits flush with the surface. The blueberries set into the curd as it firms overnight and become part of the filling rather than just a topping. The result is visually stunning — deep purple against glossy yellow — and the sweet blueberry against the tart lemon curd is one of the best flavor combinations in all of summer baking.
🍊 Blood Orange or Meyer Lemon Curd Tart: Substitute blood orange juice and zest for the lemon in equal proportions — same amounts, same technique, same everything. Blood orange curd comes out a gorgeous deep coral pink that is absolutely showstopping in a tart shell, and the flavor is less tart and more floral than lemon, with a faint berry note that makes it taste mysterious and sophisticated. Meyer lemons, when they’re in season in winter and early spring, produce a curd that is sweeter, more fragrant, and slightly less sharp than regular lemon — extraordinary for a holiday dessert table. Both variations use this same crust and same method.
🥧 Lemon Curd Tart with Toasted Meringue: Make the tart exactly as written through the filling and chilling step. Once the curd is fully set, make a simple Swiss meringue — 3 egg whites and ¾ cup granulated sugar whisked together over a double boiler until the sugar dissolves, then beaten with a hand mixer until stiff, glossy peaks form. Spread or pipe the meringue over the surface of the chilled curd in swoops and peaks and toast it with a kitchen torch until the peaks are deeply golden. The contrast between the cold, silky, tart curd and the warm, sweet, lightly smoky meringue is exactly as extraordinary as it sounds — and it transforms this tart into a full lemon meringue tart that is more impressive than the classic pie version in almost every way.
🍫 Chocolate Almond Crust Lemon Tart: Replace ¼ cup of the all-purpose flour in the crust with ¼ cup of Dutch process cocoa powder and add ¼ cup of finely ground toasted almonds (pulse them in the food processor before adding the other crust ingredients). The result is a deep brown, slightly nutty, cocoa-scented crust that creates one of the most dramatic visual presentations in all of tart-making — the dark chocolate crust against the bright yellow lemon curd filling looks like something from a Parisian patisserie window, and the bittersweet chocolate flavor against the tart lemon curd is a combination that stops every conversation at the table.
Final Thoughts
This recipe came into my life at a neighbor’s Easter table and earned a permanent place in my own kitchen within the week. There is something genuinely special about a dessert that is both simple to make and dramatic to present — that sits in that rare overlap between effortless and impressive, between home-baked warmth and bakery-quality beauty. The lemon curd tart lives in that overlap. The press-in crust requires no special skills. The curd requires only patience and a willingness to stir. And what comes out of the refrigerator after a night of chilling is something so glossy, so golden, so perfectly, unapologetically tart and bright that it earns a reaction every single time it arrives at a table.
If you make this lemon curd tart this week — for a brunch, for a dinner party, for a Tuesday that needed a reason to feel special — I want to hear all about it. Leave a ⭐⭐⭐⭐⭐ rating below, tag @zippydishes on Pinterest so I can see your beautiful golden tarts, and send this to the person in your life who has been intimidated by pastry for too long. It’s easier than it looks. I promise. 🍋✨
Frequently Asked Questions
What does lemon curd tart taste like?
It tastes like the best possible version of lemon — bright, assertive, deeply citrusy, and rich all at the same time. The curd is intensely tart from the lemon juice and fragrant from the zest, with a silky, almost custardy richness from the eggs and butter that keeps each bite feeling indulgent rather than puckering. The buttery shortbread crust provides a sweet, crumbly, melt-in-your-mouth contrast that grounds the brightness of the filling and makes the whole thing feel balanced and complete. It’s the dessert equivalent of standing in the sun — warm, bright, and genuinely joyful. People who think they don’t love lemon desserts frequently discover with one bite that what they didn’t love was the pale, timid version. This one is the real thing.
Why did my lemon curd turn out lumpy or scrambled?
Scrambled or lumpy lemon curd is almost always caused by heat that is too high or stirring that wasn’t constant enough. Eggs begin to coagulate and scramble above 180°F, so your curd needs to stay below that temperature throughout cooking — medium-low heat and continuous stirring are the two tools that keep you in the safe zone. If you do end up with some small lumps, don’t panic — strain the finished curd through a fine-mesh strainer and most or all of the lumps will be caught. If the curd is severely scrambled, unfortunately it needs to start over; the eggs cannot be unscrambled. The good news is that with a thermometer and medium-low heat, scrambled lemon curd is almost entirely preventable.
Can I make the crust without a food processor?
Absolutely, and many experienced bakers prefer the by-hand method because it gives you better tactile feedback about the texture of the dough. Whisk the flour, powdered sugar, and salt together in a large bowl. Add the cold cubed butter and use your fingertips to quickly rub the butter into the flour, pressing and smearing each butter piece flat between your thumb and fingers until the mixture resembles coarse breadcrumbs with some pea-sized butter pieces remaining. Work quickly — the goal is to keep the butter cold and avoid melting it with the heat of your hands. Add the egg yolk and vanilla and stir with a fork until the dough just comes together, adding ice water a tablespoon at a time as needed. Press it into the tart pan exactly as described in the instructions.
How do I prevent the tart crust from shrinking during baking?
The freezer step is your insurance policy against crust shrinkage. After pressing the dough into the tart pan, freeze it for a full 20 minutes before baking — this firms the butter completely so that when the crust hits the hot oven, the butter doesn’t melt and slide before the flour structure has a chance to set. A second factor is pressing the dough firmly into the sides of the tart pan — dough that is just loosely draped against the sides rather than firmly pressed in will slide down as it bakes. Use your fingertips to really work the dough into every ridge of the fluted edge and make sure there are no thick spots at the corners where the bottom meets the sides.
Can I make this tart without eggs in the curd?
Traditional lemon curd relies entirely on eggs for its structure, richness, and that characteristic silky texture — there isn’t a direct egg-free substitute that replicates all three qualities simultaneously. That said, there are egg-free lemon curd recipes that use cornstarch as a thickener and coconut cream for richness, which produce a looser, lighter result that works in a tart shell if chilled long enough to set. The flavor and texture won’t be identical to the egg-based version, but it’s a workable option for egg-free households. The crust in this recipe is already egg-free except for the single egg yolk, which can be replaced with 1 tablespoon of heavy cream or cold water for a slightly less rich but perfectly functional shortbread crust.
Can I use store-bought lemon curd instead of making my own?
You can, and honestly a good-quality jarred lemon curd — Trader Joe’s lemon curd and Dickinsons lemon curd are both widely available and genuinely good — makes a respectable tart when paired with this homemade buttery crust. The flavor will be milder and less intensely lemony than homemade, and the texture may be slightly different depending on how the jarred curd is stabilized. If you’re short on time or just want to experience the crust-to-curd ratio before committing to making your own curd, starting with a good jarred version is a completely valid approach. Just warm it gently until pourable before adding it to the baked shell, and chill until set exactly as the recipe describes.
How do I get clean slices without the curd sticking to the knife?
The hot-knife technique is the only reliable method and it works every single time. Before slicing, bring a tall glass of very hot water to the table alongside your serving knife. Dip the entire blade of the knife into the hot water for five seconds, then wipe it completely dry with a clean kitchen towel. Make your cut in one smooth, decisive motion — don’t saw back and forth. Before each subsequent cut, repeat the dip-and-dry process. The heat prevents the cold, set curd from gripping the blade, and each slice comes away with a smooth, clean face. This is the technique used in every professional bakery and it requires nothing more than hot water and a little patience between cuts.
What should I do with leftover lemon curd?
Leftover lemon curd is one of the best kitchen assets you can have in your refrigerator, and making a double batch specifically to have extra is one of the smarter decisions a home baker can make. Spread it generously on toast or warm croissants in place of jam. Swirl it into plain Greek yogurt with a handful of granola for a breakfast that feels indulgent without being fussy. Use it as a filling between cake layers in place of buttercream for a tart, bright alternative that pairs beautifully with vanilla or almond cake. Dollop it into the centers of thumbprint cookies instead of jam. Warm it gently and spoon it over vanilla ice cream. Stir a tablespoon into your morning oatmeal. Layer it with whipped cream and crushed graham crackers in a glass for a five-minute lemon icebox parfait. It keeps for two weeks in a sealed jar in the refrigerator, and there will not be a single day of those two weeks when you can’t find a reason to use it.