
Classic Banana Pudding from Scratch — The Old-Fashioned Southern Dessert That Makes Grown Adults Emotional
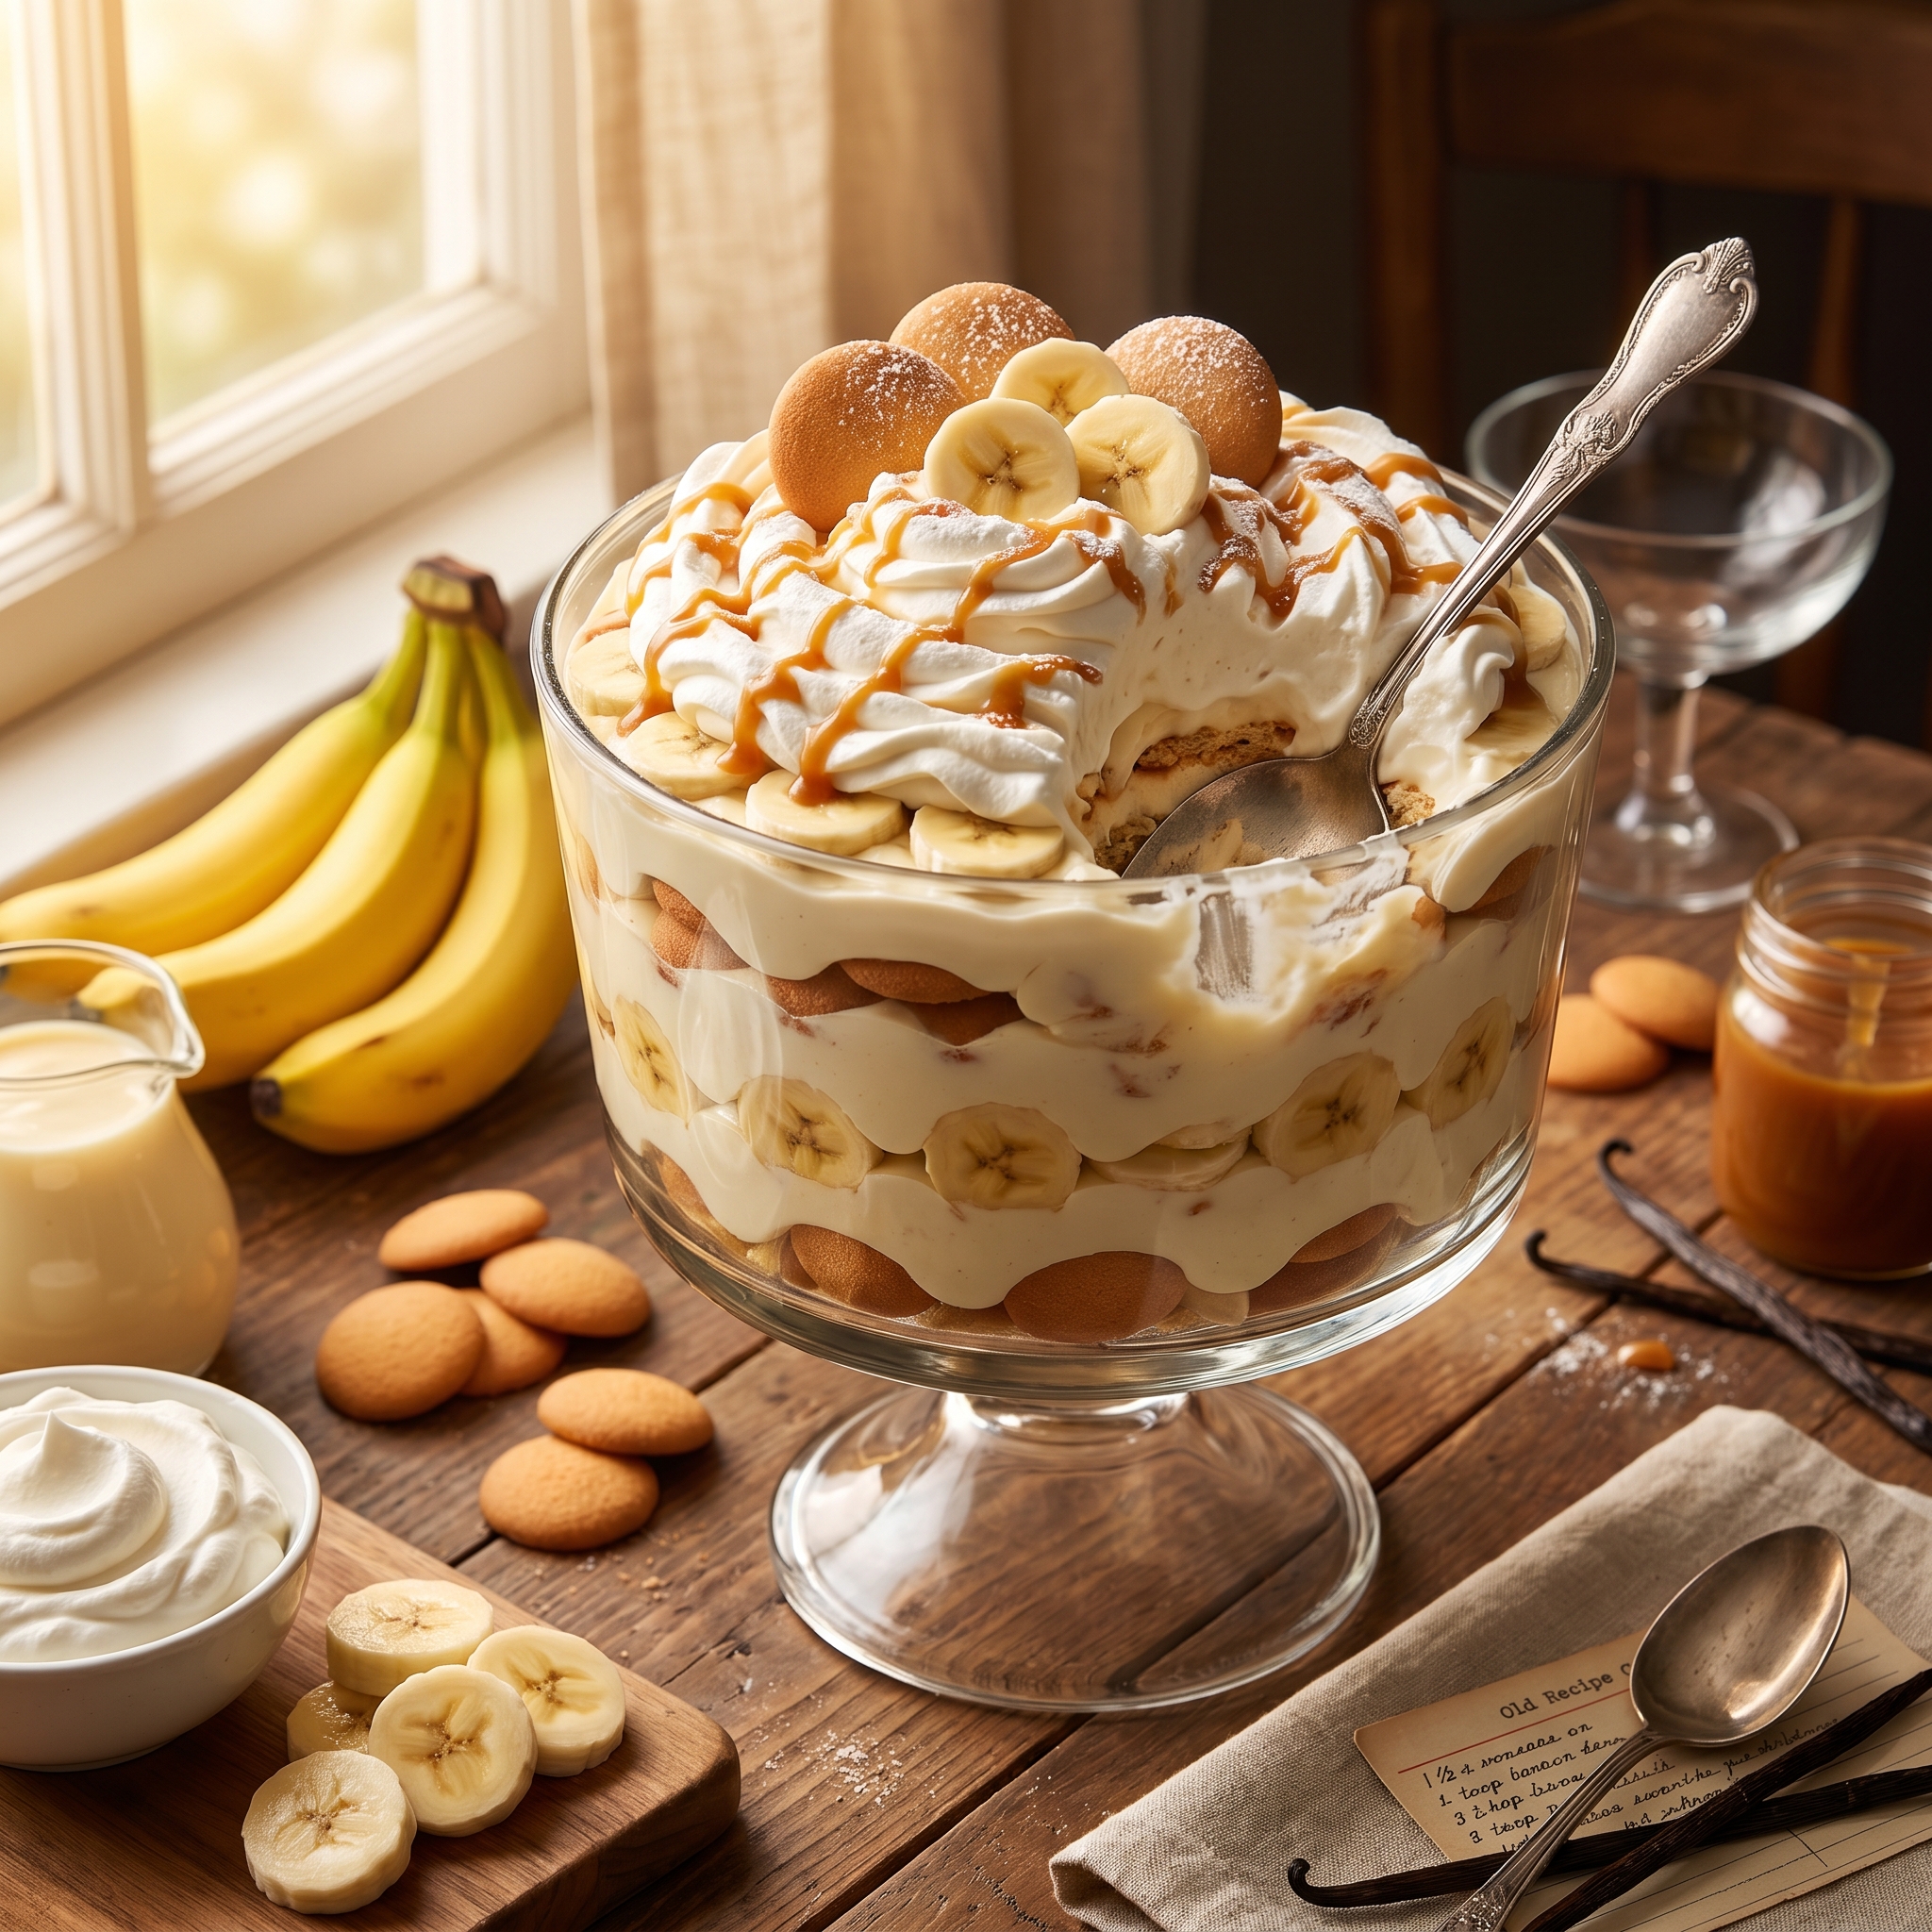
There are desserts you make, and then there are desserts that transport people. The moment you set a big glass bowl of classic banana pudding from scratch on the table — those pillowy layers of homemade vanilla custard, ripe banana slices, and softened vanilla wafers peeking through a cloud of freshly whipped cream — something happens in the room. Conversations pause. Eyes go wide. And without fail, somebody says, “This tastes exactly like my grandmother used to make.” That right there is the whole point.
Be honest with yourself for a second — have you ever made banana pudding from a box of instant pudding mix, eaten it, and thought, “Yeah, this is fine, but it is missing something”? You were right. It was missing the thing that makes homemade banana pudding so profoundly different from the shortcut version: a real, honest, from-scratch vanilla custard made on the stovetop with egg yolks, whole milk, and real vanilla — the kind that coats the back of a spoon and smells like a bakery the moment it starts to come together in the pot. There is simply no substitute for it, and once you make it the real way, you will never go back.
Whether you are making this for a Fourth of July potluck, a Sunday family dinner, a holiday spread, or just because it is Tuesday and you deserve something spectacular, this is the banana pudding recipe worth keeping forever. Keep reading — I am walking you through every single step, explaining the science behind the custard so it works perfectly on your very first try, and sharing the one trick that keeps your banana slices from turning brown before the pudding even hits the table.
Table of Contents
Why This Recipe Works
There are a hundred banana pudding recipes on the internet. Here is why this classic banana pudding from scratch is the one worth bookmarking, printing out, and keeping in your recipe box forever:
- ✔ Real homemade vanilla custard — thick, silky, and deeply flavored in a way that instant pudding mix can never replicate, no matter what the box says
- ✔ Make-ahead friendly — actually tastes better after sitting overnight in the fridge, which makes it the ultimate stress-free entertaining dessert
- ✔ Feeds a crowd generously — this recipe serves 10 to 12 people and costs a fraction of what you would spend on a restaurant or bakery version
- ✔ Uses simple, inexpensive pantry and fridge staples — nothing exotic, nothing hard to find, nothing that requires a specialty grocery store
- ✔ Kid-approved and universally beloved — there is not a person alive who does not love a good banana pudding, and this is a great one
- ✔ The custard technique is easier than it sounds — I am explaining every step in plain English so there is zero guesswork and zero anxiety about it
- ✔ Completely customizable — top it with meringue for the classic Southern style, whipped cream for the modern crowd-pleaser version, or go completely over the top with both
The homemade custard is the heart and soul of this recipe, and once you understand exactly how it works, you will realize it is one of the most approachable and rewarding things you can make from scratch in your kitchen. Let’s talk ingredients.
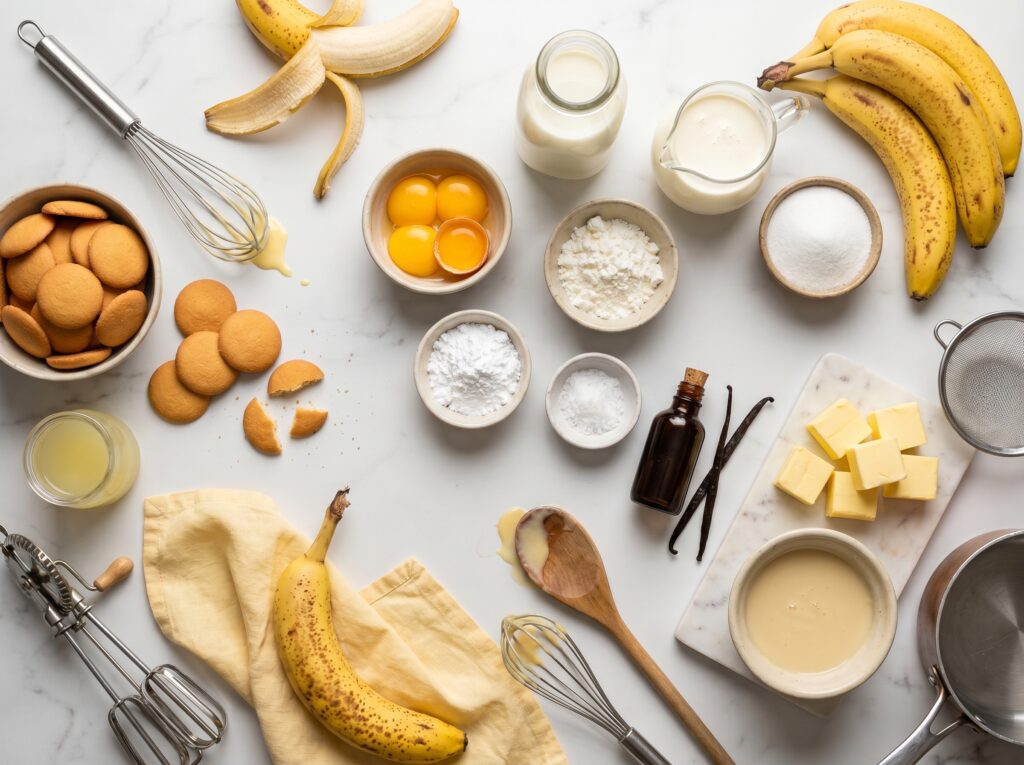
What You’ll Need
Classic, humble, pantry-friendly ingredients — the kind that have been making great Southern desserts for generations.
For the Homemade Vanilla Custard
- 3 cups whole milk
- ¾ cup granulated sugar, divided
- ⅓ cup all-purpose flour
- ¼ teaspoon kosher salt
- 4 large egg yolks, room temperature
- 2 tablespoons unsalted butter
- 2 teaspoons pure vanilla extract — or 1 vanilla bean, split and scraped
For the Layers
- 4 to 5 ripe bananas — yellow with a few brown spots is perfect; green bananas are too firm and starchy
- 1 box (11 oz) Nilla Wafers — the classic, the original, the non-negotiable
- 1 tablespoon fresh lemon juice (for the banana slices — the browning trick)
For the Whipped Cream Topping
- 2 cups heavy whipping cream, very cold
- 3 tablespoons powdered sugar
- 1 teaspoon pure vanilla extract
Classic Southern Meringue Topping (Optional Alternative)
- 4 large egg whites, room temperature (saved from the separated yolks)
- ¼ teaspoon cream of tartar
- 6 tablespoons granulated sugar
- ½ teaspoon pure vanilla extract
Substitutions
No whole milk in the fridge? Two percent milk works in a pinch, but the custard will be slightly thinner and less rich. For an even more indulgent result, swap one cup of the whole milk for heavy cream — the custard becomes extraordinarily silky and luscious in a way that is truly hard to describe until you taste it.
Gluten-free? Swap the all-purpose flour in the custard for an equal amount of cornstarch — it actually produces a slightly silkier, more translucent custard that sets up beautifully. Use gluten-free vanilla wafers, which are available at most major grocery stores, and the entire recipe is completely gluten-free without sacrificing a single bit of flavor or texture.
Want to use vanilla bean paste instead of extract? Yes, please — use one teaspoon of good quality vanilla bean paste in place of the extract and you will see gorgeous flecks of real vanilla throughout the custard. It is a small upgrade that makes the presentation noticeably more beautiful and the flavor noticeably more complex.
🧑🍳 Chef’s Note — Ripe Bananas: The ripeness of your bananas matters more than almost any other ingredient choice in this recipe. You want bananas that are fully yellow with several brown spots — this is peak sweetness and peak flavor. Under-ripe bananas are starchy, slightly bitter, and firm in a way that does not soften properly into the layers. Over-ripe bananas (the very black ones) are too mushy and will turn the whole pudding brown prematurely. Yellow with brown spots is the sweet spot, and it is worth waiting an extra day or two for your bananas to get there.
🧑🍳 Chef’s Note — Nilla Wafers: Do not substitute a different cookie here. The Nilla Wafer is not just a vehicle for texture — it is a flavor component that is absolutely fundamental to what makes this taste like the banana pudding people have been eating and loving in the American South for well over a hundred years. As the wafers sit in the layers overnight, they absorb the custard and transform from a crisp cookie into something soft, creamy, and almost cake-like that is one of the best textural experiences in all of dessert. No other cookie does this the same way.
How to Make Classic Banana Pudding from Scratch — Step by Step
- Warm the milk gently. Pour the whole milk into a medium, heavy-bottomed saucepan over medium heat. Warm it slowly, stirring occasionally, until it is steaming and just barely beginning to simmer around the edges — small bubbles forming at the sides of the pot, but not a full rolling boil. This step is called scalding the milk, and it speeds up the custard-making process significantly by giving the egg yolk mixture hot liquid to work with immediately.
- Whisk the egg yolk mixture. While the milk warms, combine half the sugar (about 6 tablespoons), the flour, and the salt in a large heatproof bowl and whisk them together until evenly mixed. Add the 4 egg yolks and whisk vigorously for about 60 seconds until the mixture is pale yellow, smooth, and slightly thickened. The egg yolks and sugar are doing something important here — the sugar is protecting the yolk proteins from cooking too fast when the hot milk hits them, so do not skip this step or rush it.
- Temper the eggs — this is the critical step. This is the moment that intimidates most home cooks, but I promise it is simple once you understand what you are doing. Slowly pour about one cup of the hot milk into the egg yolk mixture in a thin, steady stream, whisking constantly and vigorously the entire time. You are gradually raising the temperature of the eggs before they go into the full pot of hot milk — this is called tempering, and it prevents the eggs from scrambling into little yellow flecks throughout your custard. Go slow, keep whisking, and you will be perfectly fine.
- Cook the custard. Pour the tempered egg mixture back into the saucepan with the remaining warm milk and the remaining sugar. Set it over medium heat and cook, stirring constantly with a wooden spoon or heat-proof rubber spatula, making sure to reach the bottom corners and edges of the pot where the custard tends to stick and scorch first. After 8 to 12 minutes of steady stirring, the custard will begin to thicken noticeably. Keep stirring until it is thick enough to coat the back of a spoon and holds a clean line when you run your finger across the spoon — this is the classic “nappe” stage that tells you the custard is properly cooked.
- Finish and cool the custard. Remove the saucepan from the heat immediately. Stir in the butter one tablespoon at a time until each piece is fully melted and incorporated, then stir in the vanilla extract. The butter adds a glossy richness that makes the finished custard taste exceptionally smooth and indulgent. Pour the finished custard through a fine-mesh strainer into a clean bowl — this catches any small bits of cooked egg that might have formed and gives you a perfectly silky, lump-free result. Press a sheet of plastic wrap directly onto the surface of the custard so it is touching the entire top — this prevents a skin from forming as it cools. Cool at room temperature for 30 minutes, then refrigerate until completely cold, at least 2 hours.
- Prep the bananas. Slice the bananas into rounds about ¼ inch thick. Immediately toss the slices with 1 tablespoon of fresh lemon juice and toss gently to coat every slice. The lemon juice is slightly acidic and slows the enzymatic browning process that turns banana slices dark — your banana slices will stay bright yellow and beautiful for hours in the assembled pudding rather than turning unappetizing brown within minutes of slicing.
- Whip the cream. Pour the cold heavy cream into a chilled bowl — run it under cold water and dry it, or refrigerate it for 10 minutes before using. Beat on medium-high speed until the cream begins to thicken, then add the powdered sugar and vanilla and continue beating until stiff, billowy peaks form. The cream should hold its shape firmly when you lift the beaters but still look soft and cloud-like rather than grainy or overworked. Use immediately or refrigerate covered for up to an hour before assembling.
- Assemble the layers. In a large trifle bowl, deep glass baking dish, or a 9×13-inch dish, spread a thin layer of custard across the bottom — just enough to anchor the first layer of wafers. Arrange a single layer of Nilla Wafers over the custard, covering as much of the surface as possible. Lay the banana slices in a single even layer over the wafers, covering them completely. Spoon half of the remaining custard over the bananas in an even layer and smooth it gently with a spatula. Repeat the layers — wafers, bananas, custard — then finish with the final layer of custard smoothed across the top.
- Top and refrigerate. Spread or pipe the freshly whipped cream generously over the entire top of the pudding. Decorate with a few extra Nilla Wafers standing upright around the edges and a row of fresh banana slices across the center for a beautiful, classic presentation. Cover loosely with plastic wrap and refrigerate for a minimum of 4 hours — but overnight is strongly preferred and will give you the absolute best result. The wafers need time to fully soften into the custard layers, and the flavors need time to meld and deepen into something genuinely extraordinary.
You have just made one of the great American desserts entirely from scratch — and now let’s talk about how to serve it in a way that does it proper justice.
How to Serve It
This classic banana pudding from scratch is one of those timeless, universally beloved desserts that belongs on every kind of table — here are the occasions where it truly shines:
- 🌸 Easter or Mother’s Day dessert table: Serve it in a beautiful clear trifle bowl so all those gorgeous layers are fully visible from the side — the golden wafers, the cream custard, the bright banana slices, the billowy white whipped cream on top. It is visually stunning and tastes like pure nostalgia. Set it at the center of the dessert table and watch it become the first thing gone.
- 🇺🇸 Fourth of July or Memorial Day potluck: This travels beautifully in the dish it was assembled in, covered tightly with plastic wrap and kept cold in a cooler. It feeds a big crowd, requires no serving utensils beyond a large spoon, and is the kind of dessert that makes people go back for second and third helpings without even a little bit of guilt.
- 🍽️ Sunday family dinner: This is the dessert your grandmother brought to the table after Sunday dinner — simple, deeply comforting, made with love and real ingredients. Serve it in individual bowls right at the table and let everyone dig in together. It is the definition of a family-style dessert that makes everyone feel at home.
- 🎂 Birthday parties and celebrations: Layer it in individual mason jars or clear plastic cups for a portable, adorable, single-serving presentation that works beautifully for birthday parties, baby showers, bridal showers, and any celebration where individual portions are more practical than a shared dish.
- 🥄 Holiday dessert spread alternative: When the Thanksgiving or Christmas table already has three pies and a cake, bring the banana pudding as the unexpected wildcard that everyone gravitates toward. It offers a completely different flavor and texture profile from anything else on the table and reliably becomes the dessert everyone talks about on the drive home.
However you serve it, make sure it is properly chilled — warm banana pudding is a very different, much less appealing experience than cold banana pudding, and cold is absolutely how this dessert is meant to be enjoyed.
Storage & Leftovers
Refrigerator: Store assembled banana pudding covered tightly with plastic wrap in the refrigerator for up to 3 days. The flavor is genuinely at its peak on day two — overnight resting transforms the wafers from crisp cookies into something soft and custard-soaked that is one of the signature pleasures of this dessert. By day three the bananas will begin to soften and the pudding will be slightly looser in texture, but it is still completely delicious and perfectly safe to eat.
Freezer: Do not freeze assembled banana pudding. The custard will weep and separate upon thawing, the bananas will turn dark and mushy, and the wafers will disintegrate into an unpleasant mush. This is strictly a refrigerator dessert — fortunately it keeps well for three days, which is usually more than enough time for it to disappear completely.
Storing components separately: The homemade custard on its own keeps beautifully in the fridge for up to 4 days in an airtight container with plastic wrap pressed directly onto the surface. The whipped cream is best made fresh the day of serving, but stabilized whipped cream (with a teaspoon of cornstarch beaten in) will hold for up to 24 hours in the fridge.
📅 Make-Ahead Tip: This is one of the very best desserts to make entirely the day before your event — and I would argue it is actually better that way. Make the custard two days ahead and store it in the fridge. Assemble the full pudding the evening before your party, topping it with freshly whipped cream. By the time it hits the table the next day, the wafers will have fully softened, the custard will have settled into the layers beautifully, and the flavors will be deeper and more cohesive than they were the night you assembled it. No day-of stress, no rushing, just a spectacular dessert that has been quietly getting better in your refrigerator while you focused on everything else.
Reviving leftovers: If the whipped cream topping has deflated after a day or two in the fridge, simply dollop fresh whipped cream over the top right before serving. It takes two minutes and makes the pudding look freshly made. Nobody needs to know it was assembled yesterday — your secret is completely safe.
Helpful Tips & Common Mistakes
Homemade custard sounds intimidating to a lot of people — but the mistakes that ruin it are completely avoidable once you know what they are. Here is everything to watch for:
✗ Mistake: Pouring the hot milk directly into the egg yolks all at once without tempering.
✓ Fix: Always temper — add the hot milk to the eggs slowly, in a thin stream, while whisking constantly. This gradual temperature increase is what keeps the eggs from scrambling. Go slowly, keep the whisk moving, and you will be perfectly fine every single time.
✗ Mistake: Turning the heat up too high trying to speed up the thickening process.
✓ Fix: Medium heat and patience is the only correct approach for homemade custard. High heat scorches the bottom of the pot, cooks the eggs unevenly, and gives you a grainy, lumpy custard that no amount of straining can fully rescue. Low and slow, stirring constantly — 10 to 12 minutes of attention is all it takes.
✗ Mistake: Not pressing plastic wrap directly onto the surface of the cooling custard.
✓ Fix: The moment the custard is strained and in its cooling bowl, press a sheet of plastic wrap directly onto the surface so there is no air gap anywhere. This prevents the pudding skin — that thick, slightly rubbery layer that forms on the top of custard as it cools — from developing. Skin-free custard assembles more smoothly and has a better texture in the final dish.
✗ Mistake: Using under-ripe or over-ripe bananas.
✓ Fix: Yellow bananas with several brown spots are peak banana pudding bananas — sweet, soft enough to meld into the layers, but still firm enough to hold their slice shape. Green-tipped bananas are starchy and lack sweetness. Very black bananas are too soft and will make the pudding turn an unappetizing color. Wait for the right ripeness — it genuinely matters for the final result.
✗ Mistake: Serving the pudding too soon after assembly without giving it enough chilling time.
✓ Fix: Four hours minimum, overnight preferred. The chilling time is not just about getting the pudding cold — it is the time the Nilla Wafers need to absorb the custard and transform from crisp cookies into those soft, cake-like layers that are the signature texture of a properly made banana pudding. Serve it too early and you have crunchy cookies floating in custard. Give it the time it needs and you have something transcendent.
Recipe Variations
The classic version is an absolute masterpiece as written — but these four twists are genuinely worth making at least once:
🍫 Chocolate Banana Pudding: Add 3 tablespoons of high-quality unsweetened cocoa powder and an extra 2 tablespoons of sugar to the custard along with the flour and salt. The result is a deeply chocolatey, rich custard that pairs with the banana slices in a way that tastes like a banana split in pudding form. Layer with chocolate wafers instead of vanilla for a completely chocolate-forward version that is absolutely stunning and gets requested constantly once people try it.
🥜 Peanut Butter Banana Pudding: Whisk 3 tablespoons of creamy peanut butter into the finished warm custard right after you stir in the butter and vanilla. It melts in completely and adds a nutty, savory depth that works with banana the way Elvis always knew it would. Top with crushed peanut butter cookies instead of or alongside the Nilla Wafers and finish with chopped roasted peanuts and a drizzle of honey over the whipped cream. This is the version that surprises people the most and converts the most skeptics.
🌴 Coconut Banana Pudding: Swap one cup of the whole milk for full-fat coconut milk in the custard and add ½ teaspoon of coconut extract along with the vanilla. Replace half the Nilla Wafers with toasted coconut shortbread cookies and garnish the finished pudding generously with toasted shredded coconut over the whipped cream. The tropical flavor combination is fresh, unexpected, and absolutely irresistible — perfect for summer parties and backyard cookouts where you want to bring something a little different from the usual.
🍌 Brûléed Banana Pudding: Assemble and chill the pudding as directed but swap the whipped cream topping for the classic Southern meringue. Spread the meringue all the way to the edges of the dish in dramatic peaks and swirls, then run it under a high-temperature broiler for 2 to 3 minutes until the peaks are golden and just beginning to char at the tips — or use a kitchen torch for more precise, dramatic results. The contrast of the warm, toasted, slightly crispy meringue against the cold custard beneath it is one of the most spectacular textural experiences in all of American dessert. This is the version for special occasions when you want maximum drama and maximum impact at the table.
Final Thoughts
This classic banana pudding from scratch is more than just a recipe — it is a connection to every church potluck, every family reunion, every Sunday dinner table where someone’s grandmother set down a bowl of this and watched the whole room light up. It is the kind of dessert that reminds people what food made with real ingredients and real care actually tastes like, and once you make it this way, from scratch, the way it was always meant to be made, you will understand immediately why no shortcut version has ever come close.
If you make this recipe — and I sincerely hope you do — please come back and leave a comment below, drop a star rating, and tag me on Pinterest with your beautiful layers. Seeing your banana pudding photos makes my entire week, every single time. 🍌💛
Frequently Asked Questions
What is the difference between banana pudding from scratch and instant pudding mix?
The difference is dramatic and immediately obvious in the first bite. Instant pudding mix is made from pre-cooked starch, artificial flavoring, and a long list of stabilizers that give it a gluey, overly sweet, slightly chemical taste. Homemade custard from scratch is made with real egg yolks, whole milk, real butter, and real vanilla — the result is silky, rich, deeply flavored, and genuinely creamy in a way that instant pudding simply cannot replicate. The scratch version takes about 15 extra minutes of active cooking time and the difference in quality is not even close.
Can I make banana pudding the night before?
Not only can you — it is genuinely the best way to make it. Assembling banana pudding the night before and letting it rest overnight in the refrigerator is what transforms the Nilla Wafers from crisp cookies into those soft, custard-soaked, almost cake-like layers that are the defining texture of a properly made banana pudding. The flavors also meld and deepen overnight in a way that freshly assembled pudding simply has not had time to achieve. Make it the night before every single time and it will be noticeably better than same-day assembly.
How do I keep banana slices from turning brown in banana pudding?
Toss the sliced bananas immediately in one tablespoon of fresh lemon juice and stir gently to coat every slice before layering them into the pudding. The mild acidity in the lemon juice slows the enzymatic browning process that causes cut bananas to turn dark. You will not taste the lemon in the finished pudding — the custard, vanilla, and banana flavor completely mask it — but your banana slices will stay bright and beautiful for the full shelf life of the pudding.
How long does homemade banana pudding last in the fridge?
Up to 3 days in the refrigerator, covered tightly with plastic wrap. Day one is wonderful, day two is peak flavor and texture when the wafers have fully softened into the layers, and day three is still very good though the bananas will be noticeably softer and the pudding will be slightly looser. Beyond day three, the quality declines significantly and it is best to finish it before then — which, in most households, is not a difficult challenge.
Can I use a different cookie instead of Nilla Wafers?
You can experiment, but Nilla Wafers are the traditional and objectively correct choice for classic banana pudding for a very specific reason: they are tender enough to absorb custard completely overnight and transform into a soft, creamy layer that is deeply integrated into the pudding rather than sitting on top of it. Ladyfinger cookies are the most successful substitute — they absorb liquid similarly and have a neutral, slightly sweet flavor that works well. Graham crackers and shortbread work in a pinch but produce a different result. No other cookie replicates exactly what a Nilla Wafer does in this dessert.
Can I make banana pudding gluten-free?
Yes, with two simple swaps. Replace the all-purpose flour in the custard with an equal amount of cornstarch — cornstarch actually produces a slightly silkier, more translucent custard that sets up beautifully and is completely indistinguishable from the flour-thickened version. Use a certified gluten-free vanilla wafer for the layers — several brands are available at major grocery stores and online. Everything else in the recipe is naturally gluten-free. The finished pudding tastes exactly like the original.
Why did my custard turn out lumpy?
Lumpy custard is almost always caused by one of two things: the eggs were added to milk that was too hot too quickly without proper tempering, or the heat was too high during cooking and the eggs cooked unevenly before the starch could fully hydrate and smooth everything out. The good news is that lumpy custard is almost always completely fixable — strain it through a fine-mesh strainer while it is still warm and you will remove the vast majority of any lumps. Whisk vigorously as you strain for the smoothest result. In the future, go slowly on the tempering step and keep the heat at medium, not medium-high.
Can I make individual servings instead of one big dish?
Individual servings are wonderful and actually make for a more elegant presentation at dinner parties, showers, and celebrations. Use mason jars, clear plastic cups, small ramekins, or wine glasses and layer the components in the same order — a thin custard layer, wafers, banana slices, custard, wafers, bananas, custard — finishing with a dollop or piped swirl of whipped cream and a single Nilla Wafer or banana slice on top. Individual portions chill and set slightly faster than one large dish, so three hours in the fridge is usually sufficient, though overnight is still better.