
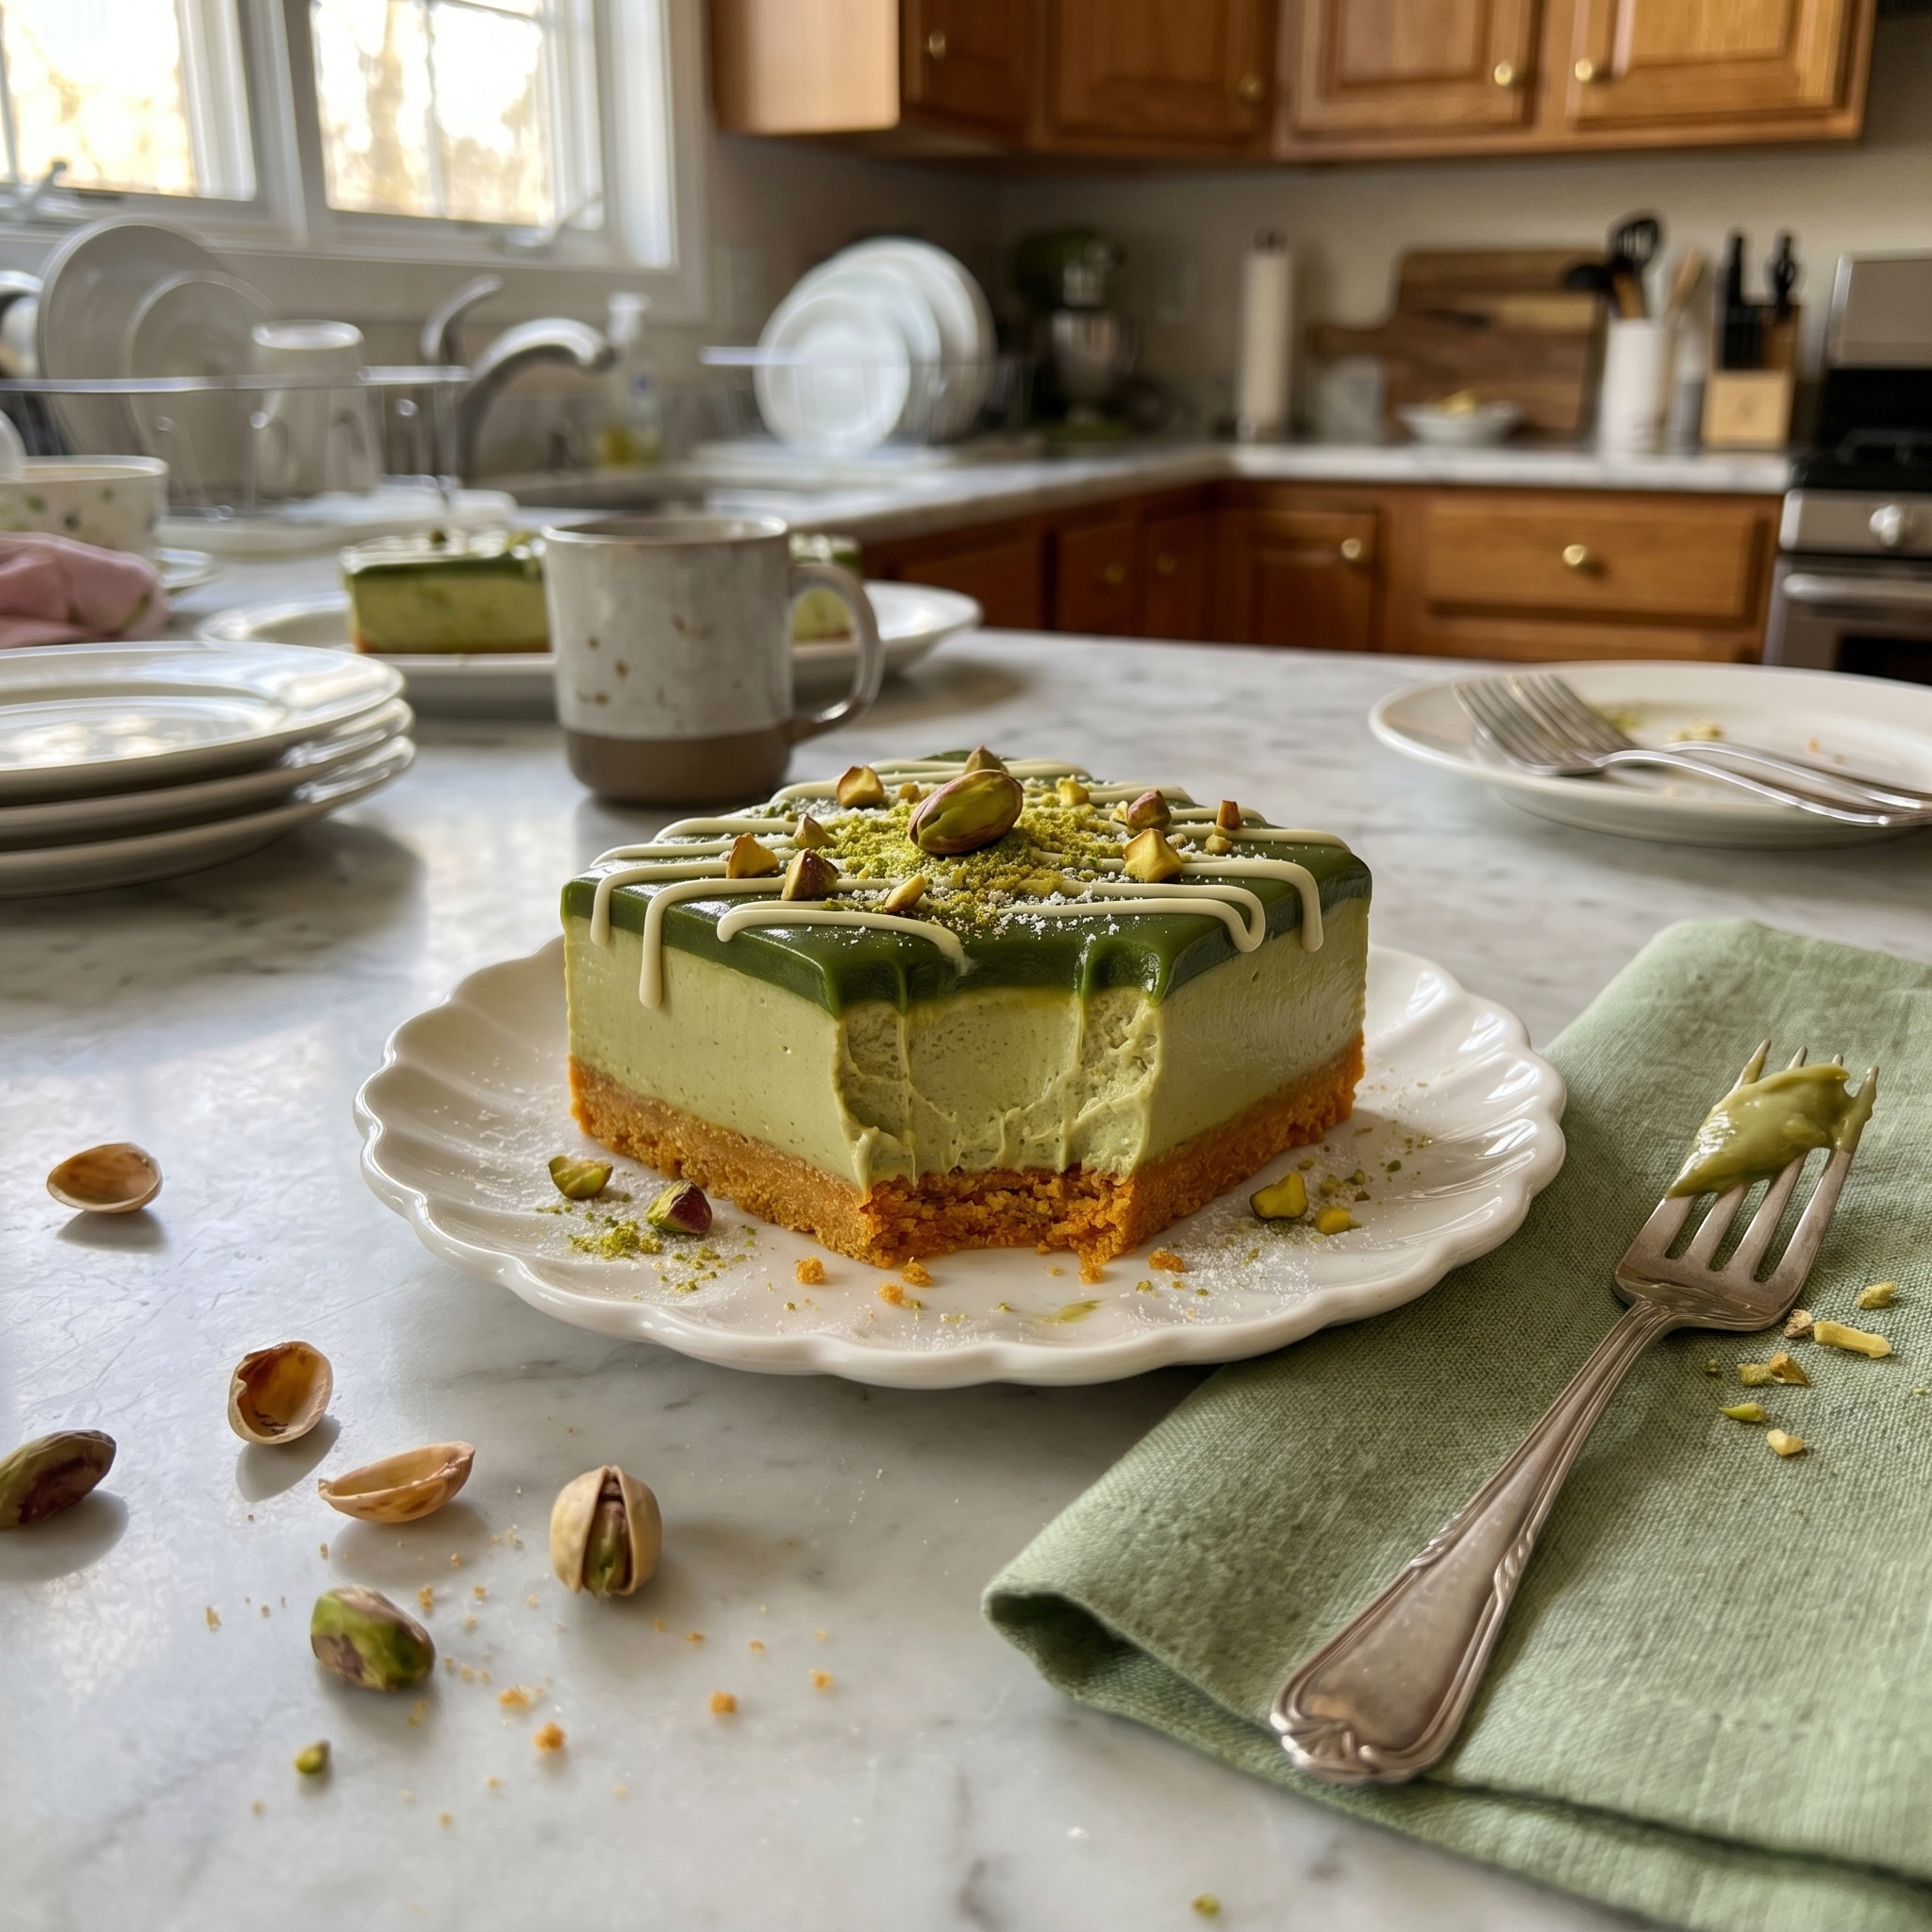
Ridiculously Easy No-Bake Pistachio Cheesecake Bars: 7 Reasons This Dreamy Dessert Will Be Your New Signature
It started with a potluck assignment I almost talked my way out of. My neighbor texted the group chat on a Thursday asking everyone to bring a dessert to her daughter’s graduation party that Saturday, and I typed and deleted three different excuses before I finally just committed and said yes. The problem was I had zero interest in turning my oven on in ninety-degree Tennessee heat, I hadn’t baked anything in months, and my track record with elaborate layer cakes was not something I was eager to revisit. I opened my pantry, stared at a bag of roasted pistachios I’d bought at Costco and never finished, and something clicked. Two hours later — most of which was hands-off freezer time — I was pulling the most beautiful pale green cheesecake bars I had ever made out of the fridge. I showed up to that graduation party with a pan covered in foil, genuinely not sure what I had made. They were gone in eleven minutes. Three people asked me for the recipe before I’d eaten one myself.
Have you ever needed a dessert that looks completely stunning, tastes like something from a fancy bakery, and requires absolutely zero oven time, zero water baths, zero fussy temperamental layers, and zero baking experience to pull off? These no-bake pistachio cheesecake bars are exactly that — a buttery graham cracker crust pressed into a pan, topped with a silky, cloud-like pistachio cheesecake filling that sets up firm enough to slice cleanly without a single minute of baking. The color alone stops people in their tracks. That natural pale sage green from real pistachios is one of the most beautiful things you can put on a dessert table, and it comes from nothing more than blended pistachios and cream cheese whipped together with a handful of pantry ingredients.
Whether you’re a no-bake dessert devotee who avoids turning on the oven from June through September, a first-time cheesecake maker who’s always been intimidated by the baked version and its cracking and water bath drama, or someone who needs a make-ahead showstopper for a party that doesn’t require any day-of stress — keep reading. This recipe was made for all three of you, and it delivers every single time you pull it out of the fridge.
Table of Contents
Why This Recipe Works
No-bake cheesecakes have a reputation for being either too soft to slice cleanly or too dense and heavy to feel like an actual cheesecake — and both of those problems come down to the same root cause, which is the ratio of cream cheese to whipped cream and the stabilization method. This recipe solves both issues with a combination of full-fat cream cheese, properly whipped heavy cream folded in at the right stage, and just enough powdered sugar to sweeten without making the filling cloying. The pistachio paste does the rest — flavor, color, and an added richness that makes every single bite taste intentional.
- ✔ Absolutely no oven required — The crust gets pressed, the filling gets whipped, the pan goes in the fridge. That’s the whole recipe. No baking, no water bath, no oven temperature drama, no cracking on the surface. Just mix, press, pour, and chill.
- ✔ That stunning natural pistachio color — Real blended pistachios give the filling a gorgeous, natural pale green hue that looks like something a professional pastry chef spent hours achieving. There’s no food coloring involved. The color comes entirely from the nuts, and it is genuinely one of the prettiest desserts you can put on a table.
- ✔ Slices cleanly into perfect bars — Unlike many no-bake cheesecakes that are too soft to cut neatly, this filling sets up firm and sliceable after a full chill. A hot knife pulled through gives you clean, Instagram-worthy edges every single time.
- ✔ Made entirely ahead of time — This dessert has to be made in advance — minimum 4 hours of chill time, overnight preferred — which means it’s the ideal make-ahead party dessert. Make it Friday night, serve it Saturday afternoon, and spend zero time in the kitchen on party day.
- ✔ Crowd-stopping presentation with almost no effort — Top the chilled bars with a scatter of chopped pistachios, a drizzle of honey, and a few flakes of flaky sea salt, and you have a dessert that looks like it came from a bakery case. The effort is minimal. The impact is maximum.
- ✔ Deeply rich without being heavy — The whipped cream folded into the cream cheese base gives the filling a mousse-like lightness that keeps people going back for a second bar even when they thought they were done. It’s rich but it’s not dense — and that balance is everything in a no-bake cheesecake.
- ✔ Works for any occasion and any season — The pale green color makes it perfect for spring and summer events, St. Patrick’s Day, Easter, bridal showers, and graduation parties. But honestly? It’s good enough that it has no off-season. Make it in January. Make it in October. Nobody has ever been sad to see a pan of pistachio cheesecake bars at any time of year.
Let’s talk about what goes into these bars and why every single ingredient is earning its spot in the pan.
What You’ll Need
This recipe makes 16 standard bars from a 9×13-inch pan, or 12 larger generous bars if you prefer. Everything here is available at Walmart, Trader Joe’s, or any well-stocked grocery store. The pistachios are the star — buy the best quality roasted, unsalted shelled pistachios you can find, because that flavor is what the entire filling is built around.
For the Graham Cracker Crust
- 2 cups graham cracker crumbs (about 14 full graham cracker sheets, crushed — or one sleeve of Honey Maid)
- ½ cup unsalted butter, melted
- 3 tablespoons granulated sugar
- ¼ teaspoon kosher salt
- Optional: ¼ teaspoon cinnamon stirred into the crust crumbs for a warm note
For the Pistachio Cheesecake Filling
- 1 cup roasted, unsalted shelled pistachios (plus extra for topping)
- 16 oz full-fat cream cheese (two standard Philadelphia blocks), completely softened to room temperature
- 1 cup powdered sugar, sifted
- 1 teaspoon pure vanilla extract
- ½ teaspoon almond extract (this is the secret — it amplifies the pistachio flavor dramatically)
- Zest of 1 lemon (brightens everything and cuts the richness)
- 2 tablespoons fresh lemon juice
- 1½ cups heavy whipping cream, cold
- 3 tablespoons powdered sugar (for whipping into the cream separately)
- Pinch of kosher salt
For the Toppings
- ⅓ cup roasted pistachios, roughly chopped
- 2 tablespoons honey or hot honey for drizzling
- Flaky sea salt — Maldon is ideal here
- Optional: white chocolate drizzle melted with a teaspoon of coconut oil
- Optional: edible rose petals or dried raspberry powder for a floral, colorful finish
Optional Add-Ins and Upgrades
- A layer of raspberry jam spread over the crust before the filling goes on — the pistachio and raspberry combination is extraordinary
- 2 tablespoons of pistachio cream (the jarred Sicilian style from Trader Joe’s or Aldi) stirred into the filling for an even deeper pistachio flavor
- A tablespoon of rosewater added to the filling for a Persian-inspired flavor profile that is stunning
- Crushed pistachios mixed directly into the graham cracker crust for extra nuttiness and crunch in every layer
- A swirl of melted white chocolate folded gently into the top of the filling before chilling for a marbled effect
Substitutions
What if I can’t find unsalted shelled pistachios? Salted roasted pistachios work fine — just omit the pinch of salt in the filling and reduce the salt in the crust to a pinch rather than ¼ teaspoon. The slight extra saltiness from salted pistachios actually plays beautifully against the sweet cream cheese filling, and some people prefer the result. Raw unroasted pistachios can also be used, but you’ll lose some of the deeper, nuttier flavor that roasting develops — if using raw, toast them yourself in a dry skillet over medium heat for 3–4 minutes, stirring constantly, until fragrant.
Can I use a different crust? Golden Oreos crushed into crumbs with their filling intact make an incredible, slightly sweeter crust that complements the pistachio filling beautifully — use the same ratio of crumbs to melted butter. Digestive biscuits are a wonderful option for a less sweet, more buttery crust. Shortbread cookies crushed fine work brilliantly and add a buttery richness that elevates the whole bar. If you want to go completely nut-forward, a crust made from crushed pistachios mixed with butter and a little sugar pressed firmly into the pan is extraordinary but requires more time and more pistachios.
What if I need this to be dairy-free? Dairy-free cream cheese — Violife and Kite Hill both make solid full-fat versions — works in this recipe, though the filling will be slightly less firm after chilling and may need an extra hour in the freezer before slicing. Replace the butter in the crust with melted coconut oil. For the whipped cream, full-fat coconut cream chilled overnight in the fridge and whipped until stiff peaks form is the best dairy-free substitute — chill the can, open it, scoop out the solid cream only, and whip as you would heavy cream.
🧑🍳 Chef’s Note — Cream Cheese Temperature: This is the single most important ingredient instruction in this entire recipe — your cream cheese must be completely at room temperature before you mix the filling. Cold cream cheese does not whip smooth; it stays lumpy no matter how long you beat it, and those lumps do not disappear in the finished bars. Pull your cream cheese out of the refrigerator a full hour before you start. Press your finger into the block — it should leave an indent easily with no resistance. That is room temperature cream cheese. Anything firmer than that goes back on the counter for another 20 minutes.
🧑🍳 Chef’s Note — Pistachio Paste: The pistachios get blended into a paste before going into the filling, and the texture of that paste matters. Blend in a food processor for a full 3–4 minutes, scraping down the sides every minute, until the mixture goes from crumbs to a fine meal to a slightly clumping paste. It doesn’t need to be as smooth as almond butter — some texture is actually wonderful in the finished bars — but you want it past the dry crumb stage so it incorporates smoothly into the cream cheese without leaving dry pockets.
How to Make No-Bake Pistachio Cheesecake Bars — Step by Step
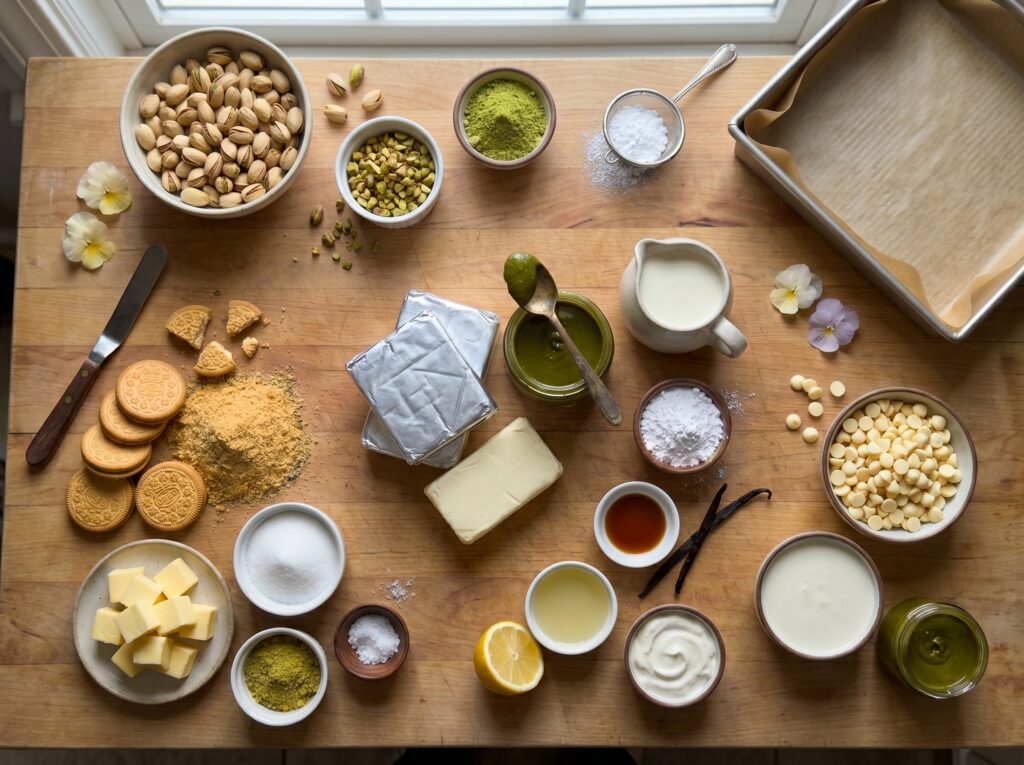
- Prepare your pan and make the graham cracker crust first. Line a 9×13-inch baking pan with parchment paper, leaving enough overhang on two sides to use as handles for lifting the finished bars out cleanly. This step is not optional — without the parchment overhang, you will be chiseling bars out of the pan and they will not look like anything you want to photograph or serve. In a medium bowl, combine the graham cracker crumbs, melted butter, sugar, and salt and stir with a fork until every crumb is evenly coated and the mixture holds together when you squeeze a handful. It should look like wet sand — not dry and crumbly, not greasy and soaked.
💡 Pro Tip: Press the crust into the pan using the flat bottom of a measuring cup rather than your fingers. It gives you an even, firmly packed surface that won’t crumble when you slice the bars — and an evenly pressed crust holds its shape far better under the weight of the filling than one that’s pressed unevenly by hand. Press the crumbs up the sides about ½ inch to create a little lip that cradles the filling. Freeze the pressed crust for 15 minutes while you make the filling — it sets up perfectly firm and won’t shift when you pour the filling over it.
- Blend the pistachios into a paste in a food processor. Add the 1 cup of roasted unsalted pistachios to a food processor and process for 3–4 minutes, stopping to scrape down the sides every minute. The pistachios will go through several stages — first coarse crumbs, then a finer meal, then a slightly clumping, oily paste as the natural fats release. You want to reach that final stage. The natural green color intensifies as the nuts break down further, and the flavor deepens significantly compared to just crushing them. Set the pistachio paste aside in the food processor bowl.
- Beat the softened cream cheese until completely smooth and lump-free. In a large bowl using a hand mixer or stand mixer fitted with the paddle attachment, beat the room-temperature cream cheese on medium-high speed for 2–3 full minutes until it’s completely smooth, slightly airy, and has lost any visible lumps whatsoever. This step is the foundation of the entire filling — starting with perfectly smooth cream cheese means the finished bars will be silky and uniform. Any lumps you don’t beat out at this stage will be in your bars forever. Take the time to do this right.
💡 Pro Tip: Add the pistachio paste to the cream cheese before any other ingredients and beat them together until completely combined before adding anything else. The paste needs direct, unimpeded contact with the cream cheese to incorporate fully — if you add sugar or liquid first, the paste tends to stay in streaks or clumps rather than blending evenly throughout. Pistachio paste in, beat until smooth, then proceed with everything else.
- Add the powdered sugar, vanilla, almond extract, lemon zest, lemon juice, and salt to the cream cheese mixture and beat until silky and well combined. Sift the powdered sugar directly into the bowl — unsifted powdered sugar can leave tiny lumps in an otherwise smooth filling. Beat on medium speed for about 2 minutes until the filling is glossy, smooth, and slightly increased in volume. Taste it at this point — it should be deeply nutty, lightly sweet, tangy from the cream cheese and lemon, and have that distinctive pistachio flavor amplified by the almond extract. Adjust sweetness with a little more powdered sugar if needed.
- In a separate cold bowl, whip the heavy cream with 3 tablespoons of powdered sugar to stiff peaks. Use a cold bowl — a metal bowl that’s been in the freezer for 10 minutes is ideal — and cold heavy cream straight from the refrigerator. Warm cream takes forever to whip and doesn’t achieve the same stable peaks. Beat on medium-high speed until the cream holds stiff peaks — meaning when you pull the beaters out, the peak that forms stands straight up without flopping over. This takes about 3–4 minutes with a hand mixer. Stop at stiff peaks; whipped cream taken past that point starts to separate and turn grainy.
- Fold the whipped cream into the pistachio cream cheese mixture in three additions. Add about one-third of the whipped cream to the pistachio filling and stir it in gently but deliberately with a rubber spatula — this first addition is meant to lighten the denser cream cheese mixture, so you don’t need to be as careful about deflating it. Add the second and third portions of whipped cream with a true folding motion — cutting down through the center of the bowl, sweeping under and up the side, and rotating the bowl a quarter turn with each fold. Stop folding the moment you can no longer see white streaks of whipped cream. Over-folding deflates the air you just spent time whipping in, and the filling loses the cloud-like texture that makes these bars special.
💡 Pro Tip: Once the filling is made and folded, work quickly. The whipped cream begins to deflate gradually at room temperature, and a filling that sat on the counter for 20 minutes while you did other things will be noticeably less airy than one that went straight into the pan. Pull the crust out of the freezer, pour the filling over it immediately, and smooth the surface with an offset spatula. Speed here is not about rushing — it’s about preserving the texture you worked to build.
- Pour the filling over the frozen crust and smooth the top with an offset spatula or the back of a spoon. Work from the center outward, coaxing the filling to the edges and into the corners. Smooth the surface as flat and even as you can — this is what your bars will look like after slicing, so a little care here pays off. Tap the pan gently on the counter a few times to release any large air bubbles trapped near the surface. The filling should come nearly to the top of the parchment lip you created with the crust.
- Cover the pan tightly and refrigerate for a minimum of 6 hours — overnight is strongly preferred. The filling needs this full chilling time to set up firm enough to slice cleanly without smearing. Six hours gets you there; overnight gets you perfect bars with clean edges and a firm, sliceable texture that holds its shape beautifully at room temperature for several hours. Do not put it in the freezer to speed up the process — freezing makes the filling icy and changes the texture in a way that doesn’t recover well at room temperature.
- To serve, lift the bars from the pan using the parchment overhang and top before slicing. Scatter the chopped pistachios over the surface, drizzle honey generously across the top in a loose zigzag, and finish with a pinch of flaky sea salt over everything. Run a sharp chef’s knife under hot water, wipe it dry, and make your first cut — clean the knife and reheat it under hot water between cuts for the cleanest possible edges. Slice into 16 bars for a party or 12 larger bars for a more generous serving. Plate on your best serving dish and try to look like you didn’t lose an hour of sleep wondering if they’d turn out.
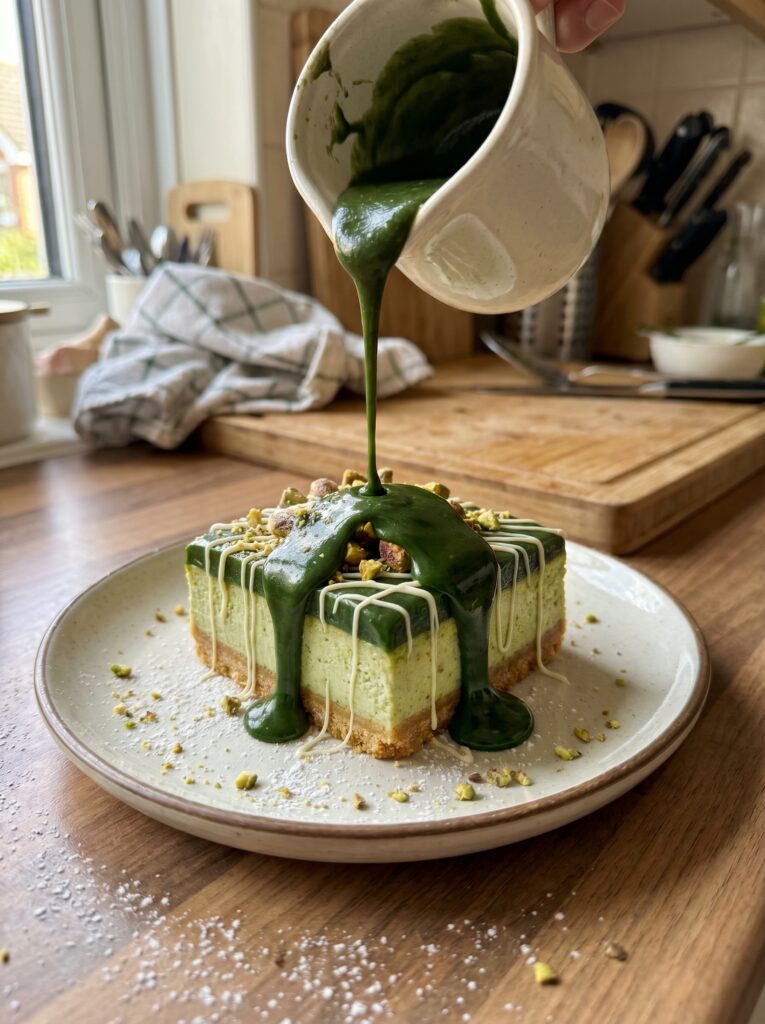
From pressing the crust to pulling perfectly set bars from the fridge, this recipe gives you one of the most visually impressive, crowd-pleasing desserts in the no-bake category with genuinely minimal active effort. The refrigerator is doing most of the work. You’re just showing up with good ingredients and following a straightforward process — and the result looks like something you spent all day on.
How to Serve It
These no-bake pistachio cheesecake bars are one of those desserts that work beautifully in almost any setting — elegant enough for a bridal shower, casual enough for a potluck, impressive enough to bring to someone who thinks they don’t like cheesecake and change their mind completely. Here are five ways to bring them to the table.
- ☕ Classic Dessert Table Centerpiece: Arrange the sliced bars on a long wooden serving board or a marble slab and scatter extra whole pistachios, a few sprigs of fresh mint, and a light dusting of powdered sugar over the display. The pale green bars against a natural surface look stunning and require exactly zero additional decoration beyond what you already put on top. This presentation stops people mid-conversation when they walk past the dessert table.
- 🥞 Elegant Plated Dinner Party Dessert: Plate individual bars on white dessert plates with a small quenelle of lightly sweetened whipped cream alongside, a drizzle of raspberry coulis or honey around the plate, and three whole pistachios arranged at the corner of the bar. Add a tiny sprig of fresh thyme or a few edible rose petals for color. It looks like a restaurant plate and takes about ninety seconds to assemble per person — which is the ideal ratio of effort to impression for a dinner party.
- 🌸 Spring and Summer Party Make-Ahead: These bars are the perfect dessert to bring to any warm-weather gathering because they travel beautifully in the pan, hold up at room temperature for 2–3 hours without softening, and slice cleanly even when slightly warmed. Cover the unsliced slab tightly in plastic wrap, transport in the pan, and slice on-site right before serving so the edges look freshly cut. Bring a small jar of honey and a bag of chopped pistachios to finish them on arrival — thirty seconds of topping and you look like you just made them.
- 📚 Individual Gift Boxes or Bake Sale Presentation: Cut the bars slightly smaller — about 20 from the pan — wrap each one individually in a small square of parchment, and tuck them into kraft paper gift boxes lined with tissue paper. These make extraordinary homemade gifts for teachers, neighbors, and coworkers, and they look like something from a specialty bakery. The pistachio color visible through the parchment wrap is genuinely beautiful and needs no further explanation.
- 🎃 Holiday and Seasonal Dressed-Up Version: For a Christmas or winter holiday presentation, add a drizzle of white chocolate over the top and finish with dried cranberries and gold-dusted pistachios alongside the flaky salt. For an Easter or spring shower, top with edible flowers and a dusting of freeze-dried raspberry powder for a pink-and-green color combination that photographs like a dream. The base bar is so versatile that a simple topping change dresses it for virtually any occasion on the calendar.
Whatever occasion you’re serving them for, always add the honey drizzle and flaky salt right before serving rather than before storing — the honey absorbs into the surface over time and the salt dissolves, and both look and taste best applied fresh at the last moment.
Storage & Make-Ahead Tips
Finished bars — Refrigerator: Store sliced or unsliced pistachio cheesecake bars in an airtight container in the refrigerator for up to 5 days. If storing sliced bars, separate the layers with parchment paper so they don’t stick together and the toppings don’t transfer between bars. The flavor deepens and improves over the first two days as everything melds together — bars made on Friday and served on Sunday are genuinely better than bars served the same day they’re made.
Finished bars — Freezer: These bars freeze beautifully for up to 2 months. Freeze the slab uncut and without toppings for the best result — wrap the entire pan tightly in two layers of plastic wrap followed by a layer of foil. Thaw overnight in the refrigerator, then top and slice as written. Alternatively, freeze individual sliced bars separated by parchment in a single-layer freezer-safe container. Thaw individual bars in the fridge for 2–3 hours or at room temperature for about 45 minutes. Add the honey, pistachios, and flaky salt fresh after thawing.
Make-ahead timeline for parties: This is one of the best make-ahead desserts in existence because every step of it benefits from advance preparation. Make the bars up to 2 days before your event — Friday for a Sunday party — and store covered in the fridge. The crust firms up even more over time, the filling develops deeper flavor, and the whole slab becomes easier to slice cleanly the longer it has chilled. Add the toppings on-site or just before serving. There is genuinely nothing to do on party day except pull it out of the fridge and slice.
📅 Make-Ahead Tip: Make the pistachio paste up to 3 days in advance and store it in a sealed jar in the refrigerator. The paste keeps beautifully and saves you the food processor step on the day you make the bars — which means the active time on bar-making day drops to about 20 minutes of mixing and pressing before the fridge takes over. Prep the paste Thursday, make the bars Friday, serve Sunday. Truly stress-free.
Do not add the honey and flaky salt before storing: The honey will absorb into the surface of the filling during extended refrigerator storage, making the top tacky and slightly wet-looking rather than glossy and fresh. The flaky salt dissolves completely within a few hours of contact with the filling. Both toppings are five-second additions at serving time — always add them fresh, always right before the bars hit the table.
Helpful Tips & Common Mistakes
Every one of these mistakes is something I’ve made myself or watched someone else make — and every single fix is simple, fast, and makes a dramatic difference in the finished bars.
✗ Mistake: Starting with cold cream cheese straight from the refrigerator and then wondering why the filling is lumpy no matter how long you beat it.
✓ Fix: Pull your cream cheese out a full hour before you start. Room temperature cream cheese — the kind that gives easily when you press it with your finger — whips completely smooth in about 2 minutes. Cold cream cheese stays lumpy no matter how long you beat it and those lumps will be in your finished bars. This single step is the difference between a silky, professional-looking filling and one that looks like cottage cheese.
✗ Mistake: Not processing the pistachios long enough and ending up with dry crumbs in the filling rather than an integrated paste.
✓ Fix: Process for a full 3–4 minutes, scraping down the sides every minute, until the pistachios release their natural oils and the mixture clumps and sticks together. You’re looking for a consistency somewhere between almond flour and almond butter — past the crumb stage, slightly oily and clumping. Dry pistachio crumbs don’t incorporate smoothly into cream cheese; they leave grainy pockets. The extra two minutes of processing time is one of the most important steps in this recipe.
✗ Mistake: Folding the whipped cream into the cream cheese with aggressive stirring motions and ending up with a dense, heavy filling.
✓ Fix: Fold — not stir, not whisk, fold. Use a rubber spatula, cut down through the center of the bowl, sweep under and up the side, rotate the bowl, repeat. Stop the moment you can’t see white streaks. The whipped cream is what gives this filling its light, mousse-like texture; every unnecessary fold deflates the air bubbles you spent time creating. If the filling looks slightly streaky after four or five folds, that’s fine — it will even out as it chills.
✗ Mistake: Trying to slice the bars after only 2–3 hours of chilling because the surface looks set.
✓ Fix: Wait the full 6 hours minimum — overnight is better. The surface of a no-bake cheesecake sets much faster than the interior, and bars that look firm on top may still be soft and smeary in the middle at the 3-hour mark. Slicing too early gives you bars that smear, crumble at the edges, and collapse when you try to plate them. Overnight chilling produces bars with a firm, sliceable texture and clean edges that hold their shape beautifully. The wait is genuinely worth it.
✗ Mistake: Skipping the hot knife step and ending up with filling that smears and drags on every cut.
✓ Fix: Run your chef’s knife under hot water and wipe it completely dry before every single cut. The warm blade glides through the chilled filling cleanly instead of dragging and smearing. Wipe the blade between cuts to keep crumbs from transferring. This one technique is what separates bars that look like a bakery made them from bars that look like they survived a rough journey. Hot knife, clean cut, beautiful bars — every time.
Recipe Variations
The pistachio cheesecake bar formula is one of the most adaptable no-bake dessert bases I know — once you understand the ratios and the technique, you can take it in a dozen beautiful directions. Here are four worth exploring.
🍋 Pistachio Lemon Curd Cheesecake Bars: Make the bars exactly as written, but before pouring the filling over the crust, spread a thin layer of good store-bought lemon curd — or homemade if you’re feeling ambitious — directly over the frozen crust. Pour the pistachio filling over the lemon curd layer and chill as written. When you slice the bars, you get a thin ribbon of bright, tangy lemon curd between the buttery crust and the nutty pistachio filling that is one of the best flavor combinations I have ever put in a dessert. The lemon layer also keeps the crust from getting soggy, which is a practical bonus on top of the flavor benefit.
🍓 Pistachio Raspberry Swirl Bars: Warm 3 tablespoons of seedless raspberry jam until pourable, then drop small spoonfuls across the top of the filled, smoothed cheesecake before it goes into the fridge. Use a toothpick or a skewer to swirl the jam gently through the surface of the filling in loose figure-eight patterns — don’t over-swirl or the colors muddy. The deep pink raspberry against the pale green pistachio creates a marbled surface that is genuinely stunning, and the sweet-tart jam cuts through the richness of the filling in a way that makes every bite more interesting. Top with fresh raspberries and chopped pistachios after chilling.
🍫 Chocolate Pistachio Cheesecake Bars: Replace the graham cracker crust with an Oreo crust — pulse 24 Oreos (filling included) in a food processor until fine crumbs, then combine with 5 tablespoons of melted butter and press into the pan. For the filling, melt 3 oz of good white chocolate and let it cool to room temperature, then fold it into the cream cheese mixture before adding the whipped cream. The white chocolate adds a subtle sweetness and extra stability that makes the bars even firmer and more sliceable. Finish the chilled bars with a drizzle of dark chocolate and a generous scatter of chopped pistachios. The combination of dark chocolate crust, pistachio filling, and dark chocolate drizzle is rich and sophisticated in a way that feels genuinely special.
🌹 Rosewater Pistachio Cheesecake Bars: Add 1½ teaspoons of rosewater to the filling along with the vanilla and almond extracts — this is the classic Persian flavor pairing of pistachio and rose, and it is extraordinary in a no-bake cheesecake context. Reduce the lemon juice to 1 tablespoon so the rosewater flavor isn’t competed with too aggressively. Top the chilled bars with dried edible rose petals, crushed pistachios, and a light dusting of powdered sugar. The flavor is floral, nutty, lightly tangy, and unlike anything most people have had before in a bar dessert — and the visual of rose petals scattered over pale green cheesecake bars is one of the prettiest things you can put on a table.
Final Thoughts
Those graduation party bars that disappeared in eleven minutes changed the way I think about no-bake desserts — which I had always treated as a backup plan, a compromise, the thing you make when you don’t have time to do something real. These pistachio cheesecake bars are not a compromise. They are better than most baked cheesecakes I have ever made, they travel better, they make ahead better, and they look more beautiful on a table without a single minute of oven time. The pale green color, the silky filling, the buttery crust, the crunch of the chopped pistachios on top — it all comes together into something that genuinely earns the recipe requests it will generate every single time you serve it.
Make these for your next gathering, your next potluck, your next “I need to bring something impressive and I have limited time” moment — and when someone asks you for the recipe, send them here. Leave a ⭐⭐⭐⭐⭐ rating below, tag @zippydishes on Pinterest with your beautiful green bars, and share this with anyone in your life who needs a no-bake dessert that actually lives up to the hype. This one does. 🍵✨
Frequently Asked Questions
What do no-bake pistachio cheesecake bars taste like?
They taste like a perfect cheesecake crossed with the best pistachio gelato you’ve ever had — silky, lightly tangy from the cream cheese and lemon, deeply nutty from the blended pistachio paste, and sweet without being cloying. The almond extract plays a supporting role that most people can’t identify but everyone notices — it amplifies the pistachio flavor in a way that makes the bars taste more intensely nutty than the pistachios alone would deliver. The texture is light and mousse-like rather than dense and heavy, which keeps you going back for another bar even when you thought you were done. The buttery graham cracker crust provides a crunch contrast to the silky filling that makes every bite feel complete.
Do I need a food processor to make the pistachio paste?
A food processor is by far the easiest tool for this step, but a high-powered blender like a Vitamix or Blendtec works well too — just stop and scrape down the sides frequently since pistachios can get stuck under the blades. In a pinch, you can use a very good quality pistachio cream from a jar — the Sicilian-style pistachio cream sold at Trader Joe’s and some Aldi stores is outstanding and can be stirred directly into the cream cheese without any blending. Use about ⅓ cup of jarred pistachio cream in place of the blended paste. What you cannot substitute effectively is just crushing the pistachios by hand or with a rolling pin — the texture stays too coarse to incorporate smoothly into the cream cheese filling.
How do I get perfectly clean slices when cutting the bars?
Three things make the difference between clean bakery-worthy slices and smeared, crumbled cuts. First, chill the bars for a full 6 hours minimum — overnight is better — so the filling is completely set all the way through, not just on the surface. Second, run your chef’s knife under very hot water and wipe it completely dry before every single cut — the warm blade glides through cold cheesecake filling cleanly instead of dragging. Third, cut with one firm downward motion rather than a sawing back-and-forth — sawing tears the filling and smears the edges. Hot knife, firm press, clean lift, wipe, repeat. That sequence gives you bars that look like they came out of a professional bakery case.
Can I make these in a different size pan?
Absolutely. A 9×9-inch square pan gives you thicker, more generous bars — the filling will be about 1½ inches deep versus about 1 inch in a 9×13-inch pan, and they’ll need an extra hour or two of chilling time to set completely through the deeper filling. An 8×8-inch pan gives you very thick, tall bars that look impressive but need a full overnight chill without exception. For individual servings, press the crust into a muffin tin lined with cupcake liners and portion the filling into each cup — chill for 4 hours and remove by lifting the liner. These mini cheesecakes are stunning on a dessert table and serve beautifully without any slicing or plating required.
Can I make these bars without the almond extract?
You can, but I’d genuinely encourage you not to — the almond extract is doing more work than its small quantity suggests. Pistachios and almonds share a closely related flavor compound, and a small amount of almond extract amplifies and deepens the pistachio flavor in a way that makes the finished bars taste significantly more nutty and complex than they do without it. If you have a tree nut allergy concern, the almond extract can be omitted safely — you’ll still have wonderful pistachio cheesecake bars, just with a slightly less intense pistachio flavor. There is no almond in the recipe otherwise, so the extract is the only potential concern for those with almond sensitivities.
Can I make these dairy-free or vegan?
Yes, with a few adjustments. For dairy-free, use full-fat Violife or Kite Hill cream cheese, replace the butter in the crust with melted refined coconut oil, and substitute the heavy whipping cream with the solid portion of a can of full-fat coconut cream that has been refrigerated overnight — scoop out only the solid white cream, discard or save the liquid, and whip to stiff peaks just as you would dairy cream. The filling will be slightly less stable than the dairy version and may need an extra hour of chilling, but the flavor is genuinely wonderful. For fully vegan bars, check that your graham crackers are vegan — many standard varieties including some Honey Maid products contain honey; look for a brand specifically labeled vegan or use crushed digestive biscuits instead.
Why did my filling turn out too soft to slice after chilling?
A too-soft filling that won’t slice cleanly after the full chill time usually comes from one of three things. The most common cause is whipped cream that wasn’t beaten to true stiff peaks — cream at soft or medium peak stage doesn’t provide enough structure to support the filling as it chills, and the bars stay loose and smeary. The second cause is cream cheese that was too cold when beaten and didn’t incorporate smoothly, leaving the emulsification incomplete. The third is insufficient chilling time — 4 hours looks set on the surface but the interior may still be soft. If your bars are too soft after overnight chilling, transfer the pan to the freezer for 45 minutes before slicing — the colder temperature firms the filling enough to cut cleanly, and the bars will soften back to the ideal creamy cheesecake texture within 10 minutes at room temperature.
What’s the best way to add more pistachio flavor if I want it more intense?
There are four ways to push the pistachio flavor deeper without changing the structure of the recipe. The most impactful is adding 2 tablespoons of jarred pistachio cream — the Sicilian-style from Trader Joe’s or specialty grocery stores — stirred into the cream cheese mixture along with the blended paste. The second is toasting the pistachios in a dry skillet for 3–4 minutes before processing them into paste — toasting intensifies the flavor significantly and adds a subtle roasted depth. The third is replacing 1 tablespoon of the vanilla extract with pistachio extract, which is available at specialty baking stores and online. The fourth is folding ¼ cup of very finely chopped pistachios directly into the finished filling before spreading it into the pan — the small pieces of nut distributed throughout the filling give you a burst of concentrated pistachio flavor in every bite that the paste alone doesn’t provide.