
Easy Key Lime Pie Bars That Feed a Crowd Every Time
Imagine pulling this out of the oven while the whole house fills with the smell of sweet graham crackers and zesty lime. It’s that perfect, nostalgic aroma that instantly takes you back to family reunions and lazy July afternoons. There really is nothing quite like homemade baking to make a house feel like a home.
Are you looking for that one guaranteed recipe to bring to your next neighborhood block party? We’ve all been there, stressing over what to make that won’t melt in the sun or take hours of prep. This foolproof treat is your answer, and it’s an absolute crowd-pleaser.
Whether you’re hosting a massive summer barbecue or just need a quick weeknight dessert, these easy key lime pie bars are exactly what you need. They are simple, budget-friendly, and always the first thing to disappear from the dessert table.
Keep reading — I’m sharing every tip and trick I’ve learned!
Table of Contents
Why This Recipe Works
These key lime pie bars are a true family favorite in our house, and I promise they will be in yours, too. Here is why you are going to fall head over heels for this recipe:
- ✔ Ready in under 45 minutes: Perfect for when you need a dessert in a pinch.
- ✔ Uses simple pantry staples: You probably have most of these in your kitchen right now!
- ✔ Potluck-ready: Easy to slice, serve, and share with a hungry crowd.
- ✔ Kid-approved: Sweet, tangy, and fun to eat with your hands.
- ✔ Budget-friendly: Way cheaper than buying a bakery-made pie.
- ✔ Perfect for meal prep: Make them on Sunday for a sweet treat all week long.
I know you’re eager to get baking, but you have to see the secret ingredient list first to understand why these bars are so magical. Check out exactly what you need in the next section!
What You’ll Need
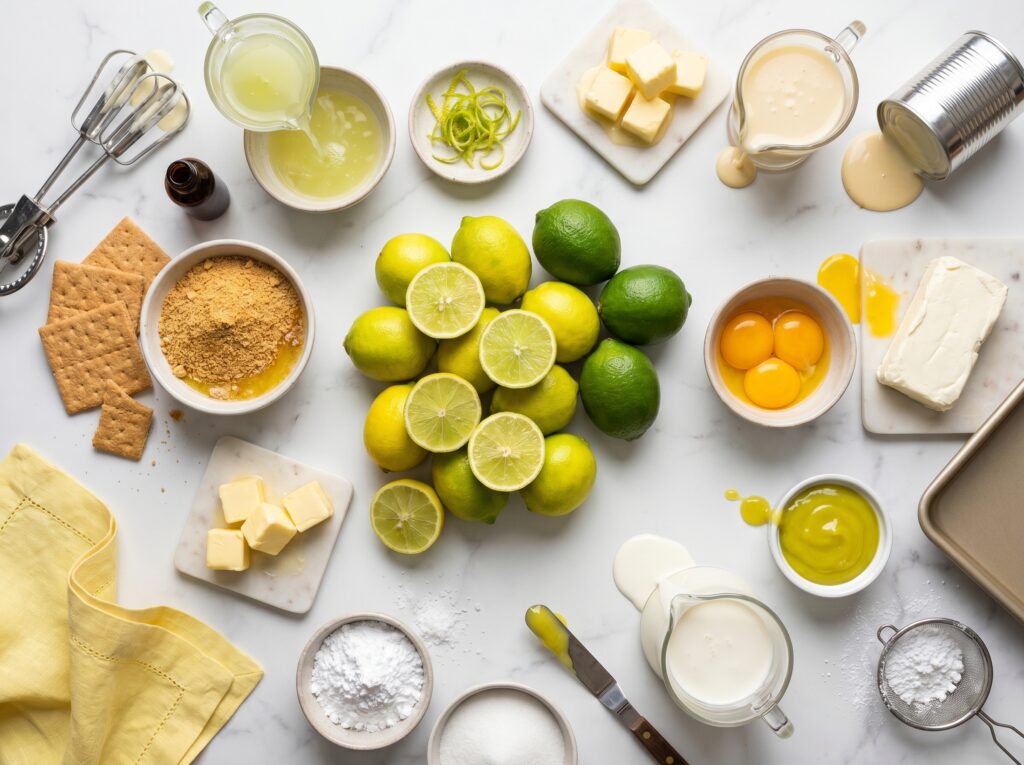
For the Graham Cracker Crust:
- 1 1/2 cups graham cracker crumbs (about 10 full sheets)
- 1/3 cup granulated sugar
- 6 tablespoons unsalted butter, melted
For the Key Lime Filling:
- 2 (14 oz) cans sweetened condensed milk
- 1/2 cup sour cream
- 3/4 cup key lime juice (fresh or bottled)
- 1 tablespoon lime zest
Substitutions
No graham crackers? No problem. You can swap it for crushed vanilla wafers or even animal crackers.
If you can’t find key limes, regular Persian limes work just fine, though the flavor will be a tiny bit less tart.
Need a dairy-free option? Swap the butter for coconut oil and use coconut condensed milk!
Chef’s Note
Fresh vs. Bottled Juice: While squeezing tiny key limes takes patience, fresh juice gives you that bright, unmistakable snap. However, if you’re rushing to get this to your summer barbecue, a high-quality bottled key lime juice is a perfectly acceptable shortcut!
Ready to put it all together? Scroll down for the easiest step-by-step instructions you’ll ever read.
How to Make Key Lime Pie Bars — Step by Step
1. Preheat and prep: Start by preheating your oven to 350°F. Line an 8×8 inch square baking dish with parchment paper, leaving a little overhang on the sides for easy removal later.
2. Mix the crust: In a medium bowl, combine the graham cracker crumbs, granulated sugar, and melted butter. Stir until the mixture looks like wet sand.
3. Press the crust: Dump the crumb mixture into your prepared baking dish. Press it down firmly and evenly into the bottom using the back of a measuring cup or a spoon.
Pro Tip 💡: Don’t press too hard, or your crust will become tough to cut later. Just press until it holds together!
4. Bake the crust: Bake the crust at 350°F for 10 minutes until golden brown and fragrant. Remove from the oven and let it cool slightly while you make the filling.
5. Whisk the filling: In a large bowl, whisk together the sweetened condensed milk, sour cream, key lime juice, and lime zest. Blend until the mixture is completely smooth and slightly thickened.
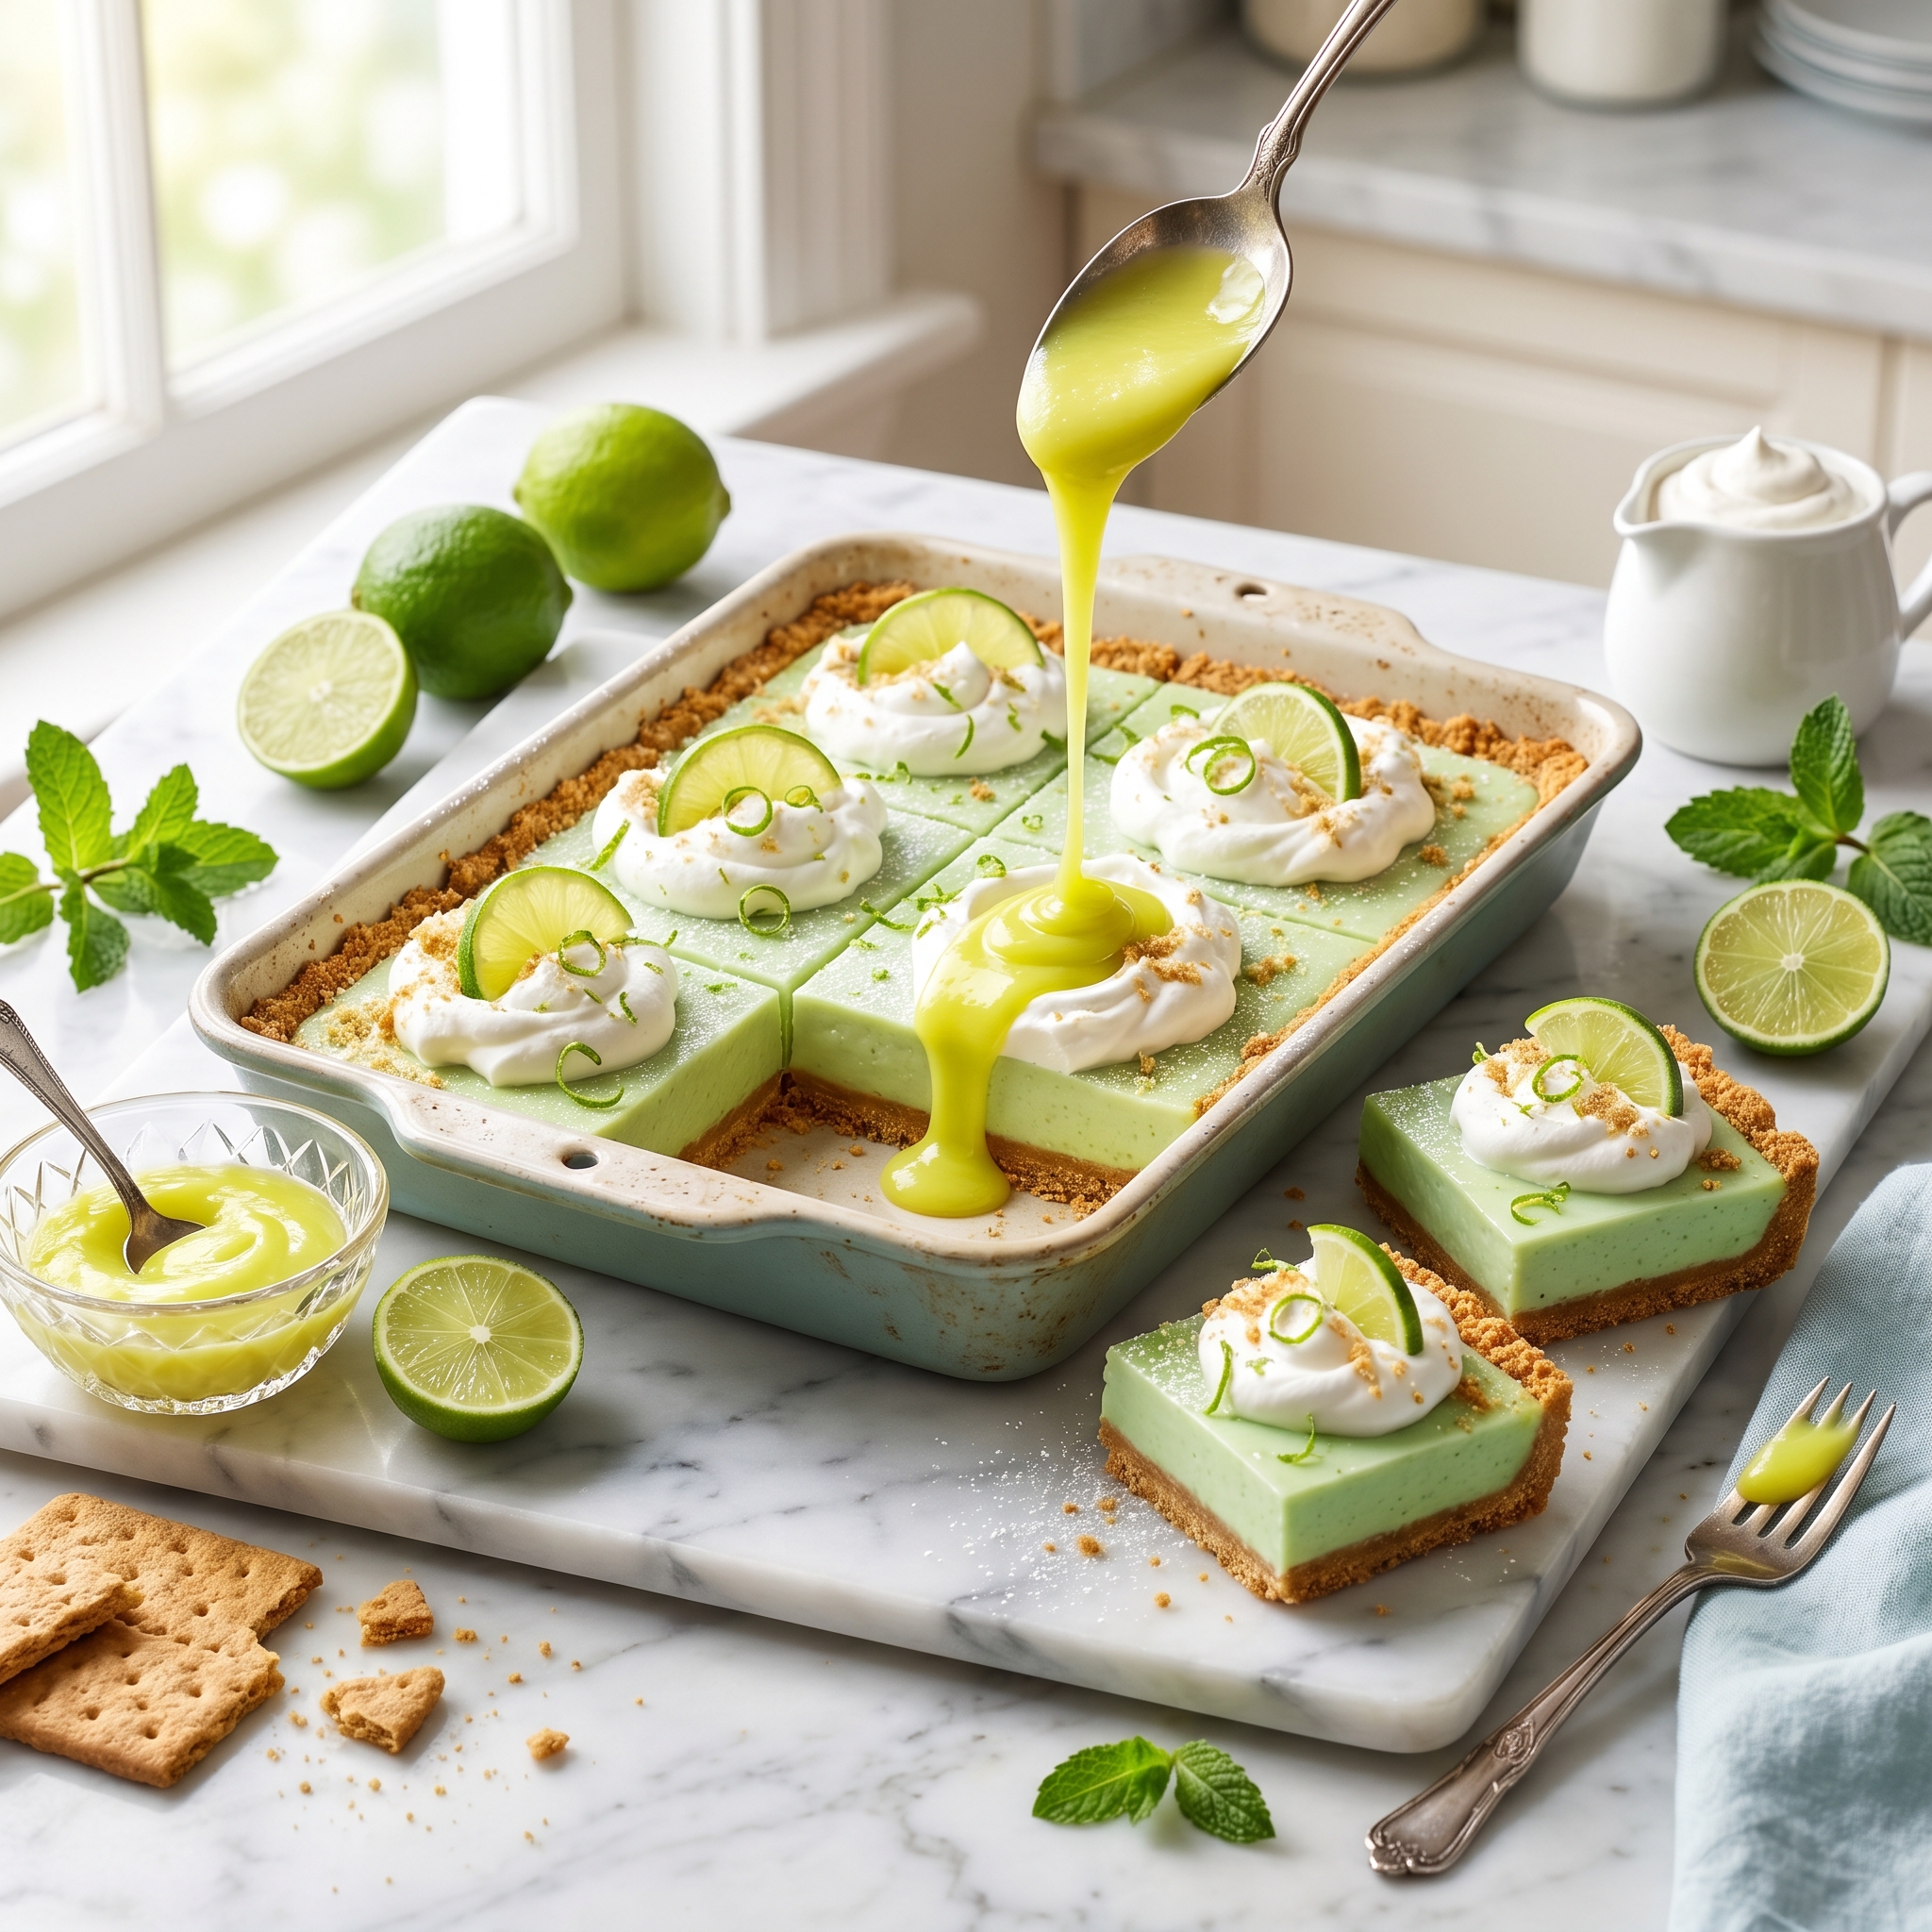
6. Pour and bake: Pour the lime filling over the warm graham cracker crust. Smooth the top with a spatula so it sits in an even layer.
Pro Tip 💡: Tapping the pan gently on the counter a few times will pop any air bubbles hiding in your filling!
7. Bake to perfection: Return the pan to the oven and bake for 15 to 17 minutes. You’ll know it’s done when the edges are set and bubbly around the edges, but the center still has a slight jiggle.
8. Chill thoroughly: Let the bars cool completely at room temperature, then transfer them to the fridge for at least 3 hours. Slice into squares and serve!
Wondering exactly what to pair with these tangy treats? You won’t want to miss my favorite serving ideas up next!
How to Serve It
These easy key lime pie bars are incredibly versatile. They feed 4–6 people generously, making them the ultimate sweet finish to any American classic meal. Here are my favorite ways to serve them up:
- Summer Barbecue Style: Serve right alongside grilled smash burgers, hot dogs, and a massive bowl of potato salad.
- Game Day Spread: Cut them into bite-sized “shooters” so guests can grab them while watching the big football game.
- Sunday Brunch: Pair them with a pitcher of ice-cold sweet tea and fresh fruit skewers.
- Holiday Table Dessert: Top with a dollop of fresh whipped cream and a sprinkle of toasted coconut for Thanksgiving or Easter.
- Weeknight Dinner Treat: Pack a square into the kids’ school lunches for a surprise that will make them the envy of the cafeteria.
If you think these sound amazing fresh, wait until you hear how well they hold up as leftovers. Keep reading for my ultimate storage secrets!
Storage & Leftovers
Counter: Do not leave these on the counter for more than 2 hours! Because of the dairy, key lime pie bars need to be kept cool.
Fridge: Store leftovers in an airtight container in the fridge for up to 5 days. The crust softens slightly over time, but they remain absolutely delicious.
Freezer: These freeze beautifully! Wrap individual slices in plastic wrap, then place them in a zip-top bag. They will keep in the freezer for up to 3 months.
Make-Ahead Tip: Americans love a good make-ahead recipe, and this one is gold. Make the whole pan up to two days before your summer barbecue, keep it wrapped in the fridge, and slice just before serving!
Reheating: Okay, I know what you’re thinking—who reheats a cold pie bar? But trust me, some folks love a warm graham cracker crust! If you want a warm base to top with vanilla ice cream, here is what to do:
- Microwave: Place a bar on a microwave-safe plate and heat on medium power for 10-15 seconds just to knock the chill off.
- Oven: Place on a baking sheet at 300°F for 5 minutes. The filling will soften into a gooey, warm lime curd that is downright heavenly!
Want to make sure yours turn out absolutely flawless on the very first try? Scroll down for the most common mistakes and how to fix them.
Helpful Tips & Common Mistakes
Even an easy, foolproof recipe can have its pitfalls. Avoid these common blunders, and your key lime pie bars will be bakery-perfect every single time:
- ✗ Mistake: Skipping the sour cream.✓ Fix: Don’t skip it! Sour cream cuts the sweetness of the condensed milk and gives the filling a velvety, rich texture.
- ✗ Mistake: Baking the filling until it is completely stiff.✓ Fix: Pull them out when the center still jiggles slightly; they will continue to set up as they chill in the fridge.
- ✗ Mistake: Cutting the bars while they are still warm.✓ Fix: Have patience! Chill them for at least 3 hours. For razor-sharp edges, run your knife under hot water and wipe it clean between every slice.
- ✗ Mistake: Over-zesting the limes.✓ Fix: Only zest the dark green part of the skin. The white pith underneath is bitter and will ruin your filling.
- ✗ Mistake: Using a dull knife to slice.✓ Fix: Always use a large, sharp chef’s knife for clean, beautiful squares that look totally professional.
Once you’ve mastered the classic recipe, you’ll want to mix things up. Check out these fun, creative twists in the next section!
Recipe Variations
One of the best things about homemade key lime pie bars is how easy they are to customize. Try these popular American flavor profiles to switch things up:
The Spicy “Tex-Mex” Version: Add a sprinkle of Tajín or a tiny pinch of cayenne pepper to the graham cracker crust before baking. The salty, spicy kick against the sweet lime is a game changer!
The Cheesy Swirl Version: Beat 4 oz of softened cream cheese into the filling mixture for an ultra-rich, decadent “key lime cheesecake” vibe. It makes the bars thicker and incredibly luxurious.
The Lighter Version: Want to save a few calories? Swap the sour cream for plain, non-fat Greek yogurt, and use a low-fat graham cracker option. It still tastes amazing!
The Air Fryer Version: Yes, you can make these in an air fryer! Press the crust into a 6-inch pan that fits your air fryer basket. “Bake” at 320°F for 5 minutes, add the filling, and cook for another 8-10 minutes.
You are officially a key lime pie expert now. Read on for some final thoughts and a quick favor to ask of you!
Conclusion
There you have it, friends—the absolute best key lime pie bars you’ll ever make. They are bright, creamy, and guaranteed to bring a little sunshine to your next summer barbecue.
If you try this recipe, I’d love to hear how it turned out! Drop a comment below, leave a 5-star rating, or tag me on Pinterest with a photo of your beautiful bake.
Still have a few lingering questions? Don’t worry, I’ve got you covered in the FAQ section below!
FAQs
Can I make this ahead of time?
Absolutely! These are the perfect make-ahead dessert. You can prepare them up to 48 hours in advance. Just keep them tightly covered in the refrigerator until you’re ready to slice and serve.
Can I freeze this?
Yes, they freeze incredibly well! Wrap individual squares tightly in plastic wrap and store them in a freezer-safe bag for up to 3 months. You can even eat them straight from the freezer for a popsicle-like treat!
Can I use a store-bought crust?
You sure can. If you want to skip the homemade crust step, just buy a pre-made graham cracker pie crust. Pour the filling right in, adjust your baking time slightly, and you have a traditional pie instead of bars.
How long does this keep in the fridge?
Stored in an airtight container, these key lime pie bars will stay fresh and delicious in your fridge for up to 5 days. Though, honestly, they rarely last that long in my house!
Can I make this in an Instant Pot?
While you can make cheesecakes in an Instant Pot, these specific bars are best done in the oven to ensure the graham cracker crust gets properly toasted and crisp.
Is this recipe gluten-free?
The traditional recipe is not, but it is incredibly easy to adapt! Simply swap the standard graham crackers for your favorite brand of gluten-free graham crackers, and you are good to go.
Is this recipe dairy-free?
No, it relies heavily on butter, condensed milk, and sour cream. However, you can substitute vegan butter, coconut condensed milk, and a dairy-free sour cream alternative if needed.
Do I really need to use key limes?
While key limes offer the most authentic, floral, and tart flavor, standard Persian limes will absolutely work in a pinch. The results will still be sweet, citrusy, and a massive crowd-pleaser!