
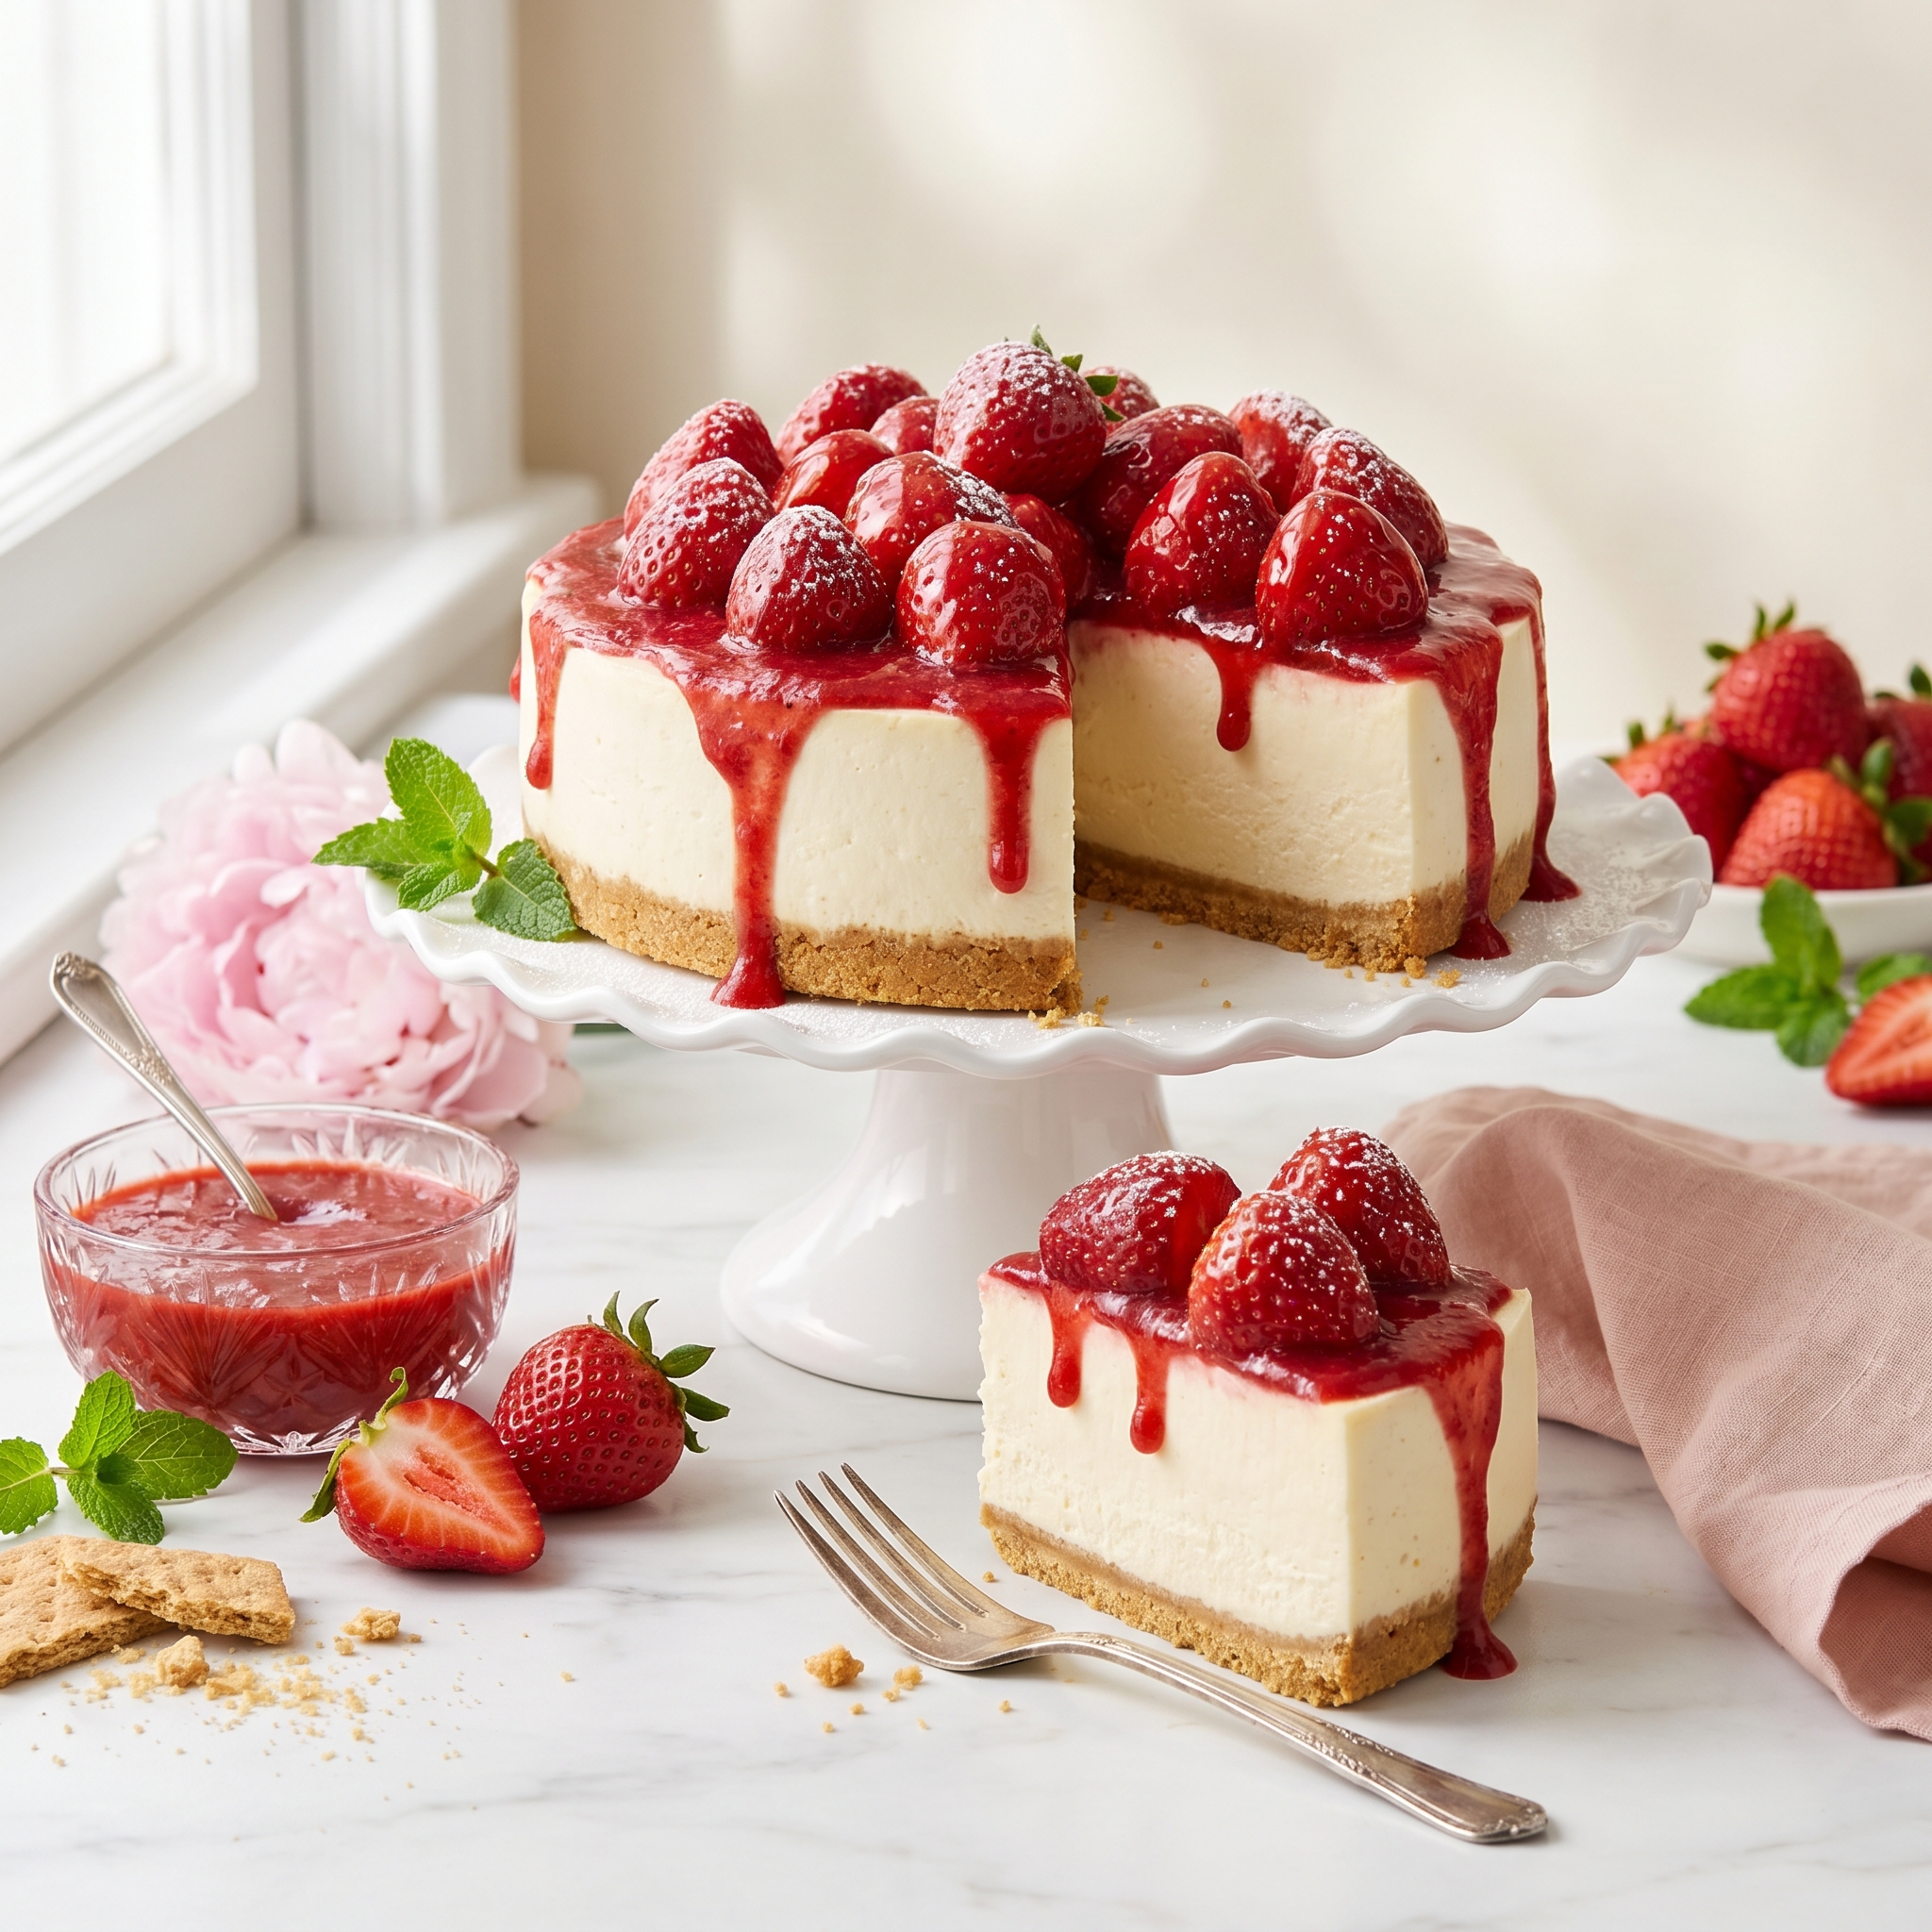
No-Bake Strawberry Cheesecake for Mother’s Day — The Showstopping Dessert You Can Make the Night Before
Imagine setting a stunning, creamy, pink-topped no-bake strawberry cheesecake on the Mother’s Day table — glossy fresh strawberries piled high over a silky smooth filling that’s perfectly set, slices cleanly, and tastes like something straight out of a bakery window — and the most beautiful part is that you made the whole thing the evening before without ever turning on the oven. Not a single drop of sweat, not a single bain-marie, not a single cracked top. Just pure, effortless, gorgeous dessert that makes everyone at the table go completely quiet for a moment before someone says, “This is incredible — where did you buy this?”
Have you ever wanted to give Mom a truly special homemade dessert for Mother’s Day but felt intimidated by the idea of a classic baked cheesecake — the water baths, the cracking, the timing anxiety? You are not alone, and I am here to tell you that this recipe was made exactly for you. No baking. No stress. No guessing. Just a handful of simple ingredients, one bowl, and a refrigerator doing all the hard work while you sleep. Sound like the kind of Mother’s Day dessert you’ve been looking for?
This no-bake strawberry cheesecake is every bit as rich, creamy, and impressive as the classic baked version — actually, I’d argue it’s even better because the texture is lighter, silkier, and almost mousse-like in the most luxurious way. It’s the dessert that makes moms feel completely adored, feeds a full table of family without any last-minute kitchen drama, and looks so beautiful that everyone wants to photograph it before they eat it. Keep reading — I’m sharing every tip and trick I’ve learned so your cheesecake comes out perfectly every single time.
Table of Contents
Why This Recipe Works
This isn’t just a dessert — this is the make-ahead, no-stress, crowd-stopping centerpiece that completely changes how you celebrate the moms in your life. Here’s why this no-bake strawberry cheesecake is about to become your most requested holiday recipe:
- ✔ Zero baking required — no oven, no water bath, no cracked tops, no timing anxiety whatsoever
- ✔ 100% make-ahead — assemble the night before and simply slice and serve the next day
- ✔ Feeds 10–12 people from one gorgeous dish — perfect for the whole family at once
- ✔ Uses simple, affordable ingredients you can find at any grocery store
- ✔ Stunning enough for Mother’s Day, Easter, and spring celebrations — it photographs beautifully every single time
- ✔ Kid-approved and adult-obsessed — there is not a single person at the table who won’t ask for the recipe
- ✔ Cheaper than a bakery cheesecake and infinitely more meaningful because you made it yourself
A buttery golden graham cracker crust, a cloud-soft cream cheese filling whipped with fresh lemon and vanilla, and a jewel-bright fresh strawberry topping that tastes like peak spring in every single bite — this is the dessert Mom actually deserves. Let’s make sure you have everything you need.
What You’ll Need
For the Graham Cracker Crust
- 2 cups graham cracker crumbs (about 15 full graham cracker sheets)
- ⅓ cup granulated sugar
- ½ cup unsalted butter, melted
- Pinch of salt
For the No-Bake Cheesecake Filling
- 24 oz (three 8-oz blocks) full-fat cream cheese, softened to room temperature
- 1 cup powdered sugar, sifted
- 1 teaspoon pure vanilla extract
- 2 tablespoons fresh lemon juice (about 1 large lemon)
- 1 teaspoon lemon zest
- 1½ cups heavy whipping cream, very cold
For the Fresh Strawberry Topping
- 1½ lbs fresh strawberries, hulled and halved (about 4 cups)
- 3 tablespoons granulated sugar
- 1 tablespoon fresh lemon juice
- 1 tablespoon cornstarch mixed with 1 tablespoon cold water (optional — for a glossy, thickened sauce)
- ½ teaspoon pure vanilla extract
Optional Garnishes
- Fresh whole strawberries for decorating the top
- Lightly sweetened whipped cream for piping around the edges
- Fresh mint leaves for color and elegance
- White chocolate shavings or drizzle
Substitutions
No graham crackers? Golden Oreos, digestive biscuits, vanilla wafers, or even crushed shortbread cookies all make a spectacular crust — just keep the total crumb amount the same. No fresh strawberries? Frozen strawberries thawed and drained work beautifully for the cooked topping — just make sure to drain the excess liquid well so the topping isn’t watery. Dairy-free? Use dairy-free cream cheese (Violife or Kite Hill both work well), full-fat coconut cream whipped in place of heavy cream, and a dairy-free butter for the crust. Making it for kids? Swap the lemon juice in the filling for an extra half teaspoon of vanilla and the cheesecake becomes even softer and sweeter — the little ones absolutely love it.
Chef’s Note — Full-Fat Cream Cheese Is Non-Negotiable: Please do not reach for the reduced-fat or fat-free cream cheese here — I’m begging you. Full-fat cream cheese is what gives this no-bake cheesecake its rich, dense, luxurious body that holds its shape when sliced. Low-fat cream cheese has a higher water content and the filling will be looser, softer, and may not set firmly enough to slice cleanly. Three blocks of full-fat Philadelphia cream cheese, softened completely to room temperature — that’s your foundation, and it’s worth every bit of it.
Chef’s Note — Cold Heavy Cream, Warm Cream Cheese: This is the single most important technique in the entire recipe, and it’s a simple one. Your cream cheese must be completely at room temperature before you beat it — cold cream cheese leaves lumps in the filling that no amount of mixing will smooth out. Your heavy whipping cream, on the other hand, must be ice cold straight from the refrigerator — warm cream won’t whip into stiff peaks and the filling won’t set. Room temperature cream cheese, ice cold heavy cream. Do this and your cheesecake filling will be flawlessly smooth and perfectly light every single time.
Everything prepped and ready? Let’s build this beautiful no-bake masterpiece layer by gorgeous layer.
How to Make No-Bake Strawberry Cheesecake — Step by Step
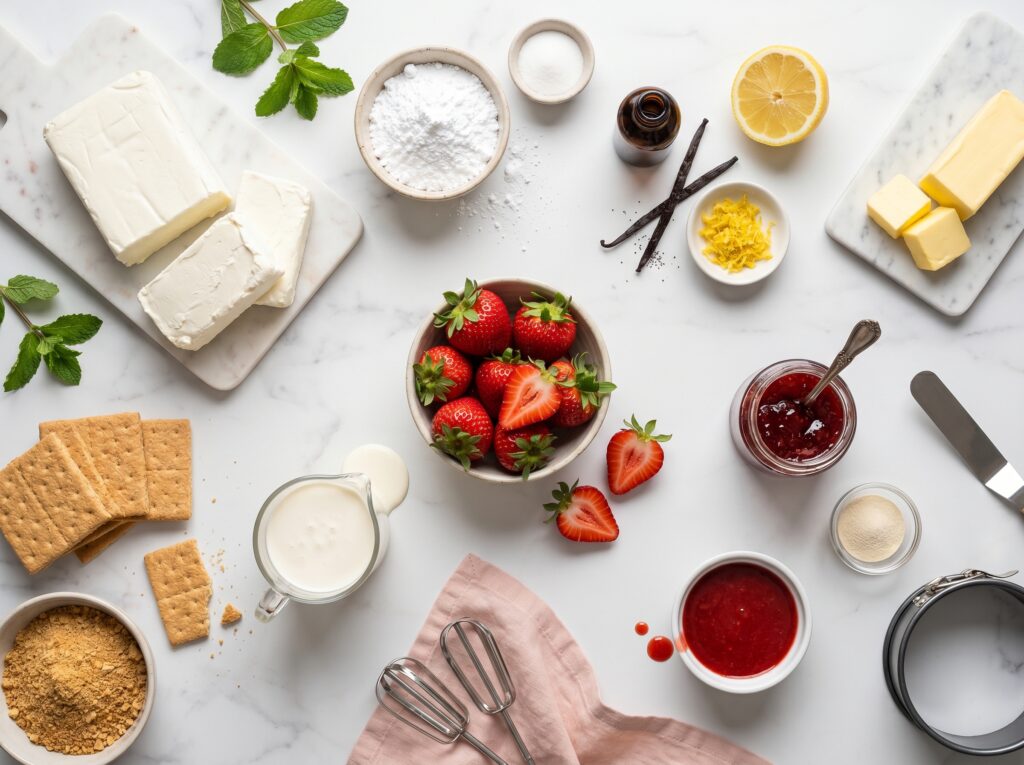
- Make the graham cracker crust. In a medium bowl, combine the graham cracker crumbs, sugar, melted butter, and pinch of salt. Stir until every crumb is evenly moistened and the mixture looks like wet sand — it should hold together easily when you press a small handful between your fingers. If it feels too dry and crumbly, add one more tablespoon of melted butter. Pour the crumb mixture into a 9-inch springform pan and press it firmly and evenly across the bottom and about 1 inch up the sides using the flat bottom of a measuring cup. The crust should be compact, even, and smooth — this is what gives you that clean, sturdy slice later.
- Chill the crust. Place the crust-lined springform pan in the freezer for at least 15–20 minutes while you prepare the filling. A cold, firm crust holds its shape when the filling is poured in and gives you that beautiful, distinct graham cracker layer in every slice rather than a crumbly, collapsed mess at the bottom of the plate.
- Whip the heavy cream to stiff peaks. In a large chilled bowl using a hand mixer or stand mixer fitted with the whisk attachment, beat the cold heavy whipping cream on medium-high speed until stiff peaks form — this takes about 3–4 minutes. The cream should hold firm peaks that stand straight up when you lift the beaters. Don’t over-beat past stiff peaks or the cream will become grainy. Set the whipped cream aside in the refrigerator while you prepare the cream cheese mixture.
💡 Pro Tip: Chill your mixing bowl and beaters in the freezer for 10 minutes before whipping the heavy cream. Cold equipment makes cold cream whip up faster, higher, and more stably than equipment at room temperature — and the difference in volume and firmness is remarkable. This one small step is the reason bakery whipped cream always looks fluffier and holds longer than homemade.
- Beat the cream cheese until perfectly smooth. In a separate large bowl, beat the softened cream cheese on medium-high speed for 2–3 full minutes until it’s completely smooth, light, and fluffy with absolutely no lumps remaining. This step is critical — rush it and you’ll have a lumpy filling no matter what you add next. Scrape down the sides and bottom of the bowl at least twice during beating to make sure every bit of cream cheese is incorporated.
- Add the sugar, vanilla, lemon juice, and zest. With the mixer on low speed, gradually add the sifted powdered sugar to the beaten cream cheese, mixing until combined. Add the vanilla extract, fresh lemon juice, and lemon zest. Increase to medium speed and beat for another 60 seconds until the mixture is silky smooth, bright, and beautifully fragrant. Taste it at this stage — it should be rich, creamy, and perfectly balanced between sweet, tangy, and bright.
- Fold in the whipped cream. Add the whipped cream to the cream cheese mixture in three additions, gently folding it in with a large rubber spatula using slow, deliberate strokes from the bottom of the bowl upward. Do not stir vigorously or use the mixer here — you want to preserve as much air as possible in the whipped cream. The finished filling should be thick, mousse-like, and hold soft peaks when you scoop it with a spoon. This is the texture that makes the cheesecake so impossibly light and luxurious.
💡 Pro Tip: Fold, don’t stir — this is the most important technique in the whole recipe. Aggressive stirring deflates all the air you just whipped into that cream, and air is what gives this no-bake cheesecake its signature light, cloud-soft texture. Think of folding as gently turning the mixture over on itself — slow, patient, and deliberate. Twenty careful folds will give you a better result than sixty careless ones every single time.
- Fill and smooth the cheesecake. Remove the chilled crust from the freezer and pour the cream cheese filling into the pan. Use an offset spatula or the back of a large spoon to spread the filling into an even, smooth layer that reaches all the way to the edges of the crust. Give the pan a few gentle taps on the counter to release any air bubbles and settle the filling evenly. The surface should be perfectly flat and level — this is your canvas for that beautiful strawberry topping.
- Refrigerate overnight — or for a minimum of 6–8 hours. Cover the pan loosely but completely with plastic wrap — make sure the plastic doesn’t touch the surface of the cheesecake filling, or it will leave marks. Refrigerate for a minimum of 6 hours, but overnight is absolutely ideal and gives you the firmest, cleanest-slicing cheesecake. The filling needs this time to set completely — there are no shortcuts here, and the wait is absolutely worth it.
- Make the strawberry topping. In a medium saucepan over medium heat, combine half of the halved strawberries with the sugar, lemon juice, and vanilla extract. Cook for 5–7 minutes, stirring occasionally, until the strawberries break down and release their juices into a glossy, fragrant sauce. If you want a thicker, more jammy topping, stir in the cornstarch slurry and cook for one more minute until the sauce thickens and turns glossy. Remove from heat and stir in the remaining fresh strawberries. Let the topping cool completely to room temperature — at least 30 minutes — before spooning it onto the cheesecake.
- Top, garnish, and serve. Remove the fully set cheesecake from the refrigerator. Carefully unlock and remove the springform ring. Spoon the completely cooled strawberry topping evenly over the surface, letting it cascade naturally toward the edges. Arrange a border of fresh whole strawberries around the outer edge, pipe or dollop whipped cream between the berries if desired, and add fresh mint leaves for a touch of elegant green against all that beautiful pink and red. Slice with a sharp knife wiped clean between each cut, and serve to the most deserving woman at your table. 🌸
That glossy strawberry topping against the creamy white filling and golden crust is pure springtime on a plate. Now let’s talk about how to build the perfect Mother’s Day dessert experience around this showstopper.
How to Serve It
This no-bake strawberry cheesecake is a showstopper all on its own, but here are our favorite ways to make the whole presentation feel truly special and memorable:
- 🌸 Mother’s Day dessert centerpiece — bring the whole cheesecake to the table still on the springform base, set it on a beautiful cake stand surrounded by fresh flowers and candles, and let everyone ooh and ahh before you slice it. The presentation alone will make Mom feel completely celebrated.
- ☕ Pair with a rich cup of coffee or tea — the brightness of the strawberries and the richness of the cream cheese filling are perfectly complemented by a strong cup of coffee, a pot of Earl Grey, or even a sparkling rosé for a truly festive Mother’s Day feel.
- 🍓 Serve alongside a fresh berry platter — extra fresh strawberries, raspberries, and blueberries on the side let everyone add more fruit to their slice and make the dessert spread look absolutely abundant and gorgeous.
- 🐣 Easter Sunday dessert — the pink-and-red strawberry topping looks stunning on an Easter table and the make-ahead nature means zero dessert stress on the morning of the celebration.
- 🎀 Birthday celebration for spring birthdays — add number candles to the top, pipe a message in whipped cream, and this cheesecake transforms into the most beautiful, personal birthday cake that is infinitely more impressive than anything from a box.
Set it on the table, watch everyone reach for their phones to photograph it, then watch those same phones disappear the moment the first bite hits. Up next — how to store every last slice so nothing goes to waste.
Storage & Leftovers
Refrigerator: Store leftover no-bake strawberry cheesecake loosely covered with plastic wrap or in an airtight container in the refrigerator for up to 5 days. The cheesecake actually holds up beautifully over several days — the crust stays crisp, the filling stays set, and the flavor gets even more developed by day two.
Freezer: The cheesecake freezes exceptionally well for up to 2 months. Freeze the whole cheesecake or individual slices without the strawberry topping — the topping is best made fresh. Wrap tightly in plastic wrap, then in aluminum foil. Thaw overnight in the refrigerator and add fresh strawberry topping just before serving. It’s a genuinely wonderful make-way-ahead option when you want to get the cheesecake done days before the celebration.
Make-Ahead Strategy: The cheesecake filling and crust can be assembled up to 48 hours in advance without the topping — just keep it tightly covered in the refrigerator. Make the strawberry topping the morning of serving for the freshest flavor and most vibrant color. This two-stage approach gives you maximum flexibility around a busy holiday schedule.
Make-Ahead Tip: Here is the Mother’s Day dessert game plan that will make you feel like the most prepared, thoughtful, and organized host on the block. Friday evening — 25 minutes to make the crust and filling, assemble the cheesecake, cover it, and slide it into the refrigerator. Sunday morning — make the fresh strawberry topping in 10 minutes, let it cool, and spoon it over the set cheesecake. By the time brunch or dinner rolls around, the most stunning dessert on the table has been essentially done for two full days and all you did this morning was make a quick fruit sauce. That kind of calm, prepared hosting is its own kind of gift — to yourself and to everyone you’re celebrating.
Serving from Cold:
— Pull the cheesecake from the refrigerator 10–15 minutes before slicing and serving. Slightly tempered cheesecake slices more cleanly and tastes more flavorful than cheesecake served ice-cold straight from the fridge.
— Slicing tip: Use a sharp knife dipped in hot water and wiped dry between each cut for those clean, bakery-perfect slices that hold their shape beautifully on the plate.
Just ahead — the most common no-bake cheesecake mistakes that lead to a soft, runny filling that won’t set and a soggy crust that falls apart, and exactly how to avoid every single one of them.
Helpful Tips & Common Mistakes
Want a perfectly set, perfectly sliceable, perfectly creamy no-bake strawberry cheesecake every single time? Avoid these very common mistakes:
✗ Mistake: Using cold cream cheese straight from the refrigerator.
✓ Fix: Cold cream cheese will not beat smooth — no matter how long you run the mixer, you will have lumps. Pull your cream cheese out of the fridge at least 1–2 hours before you begin (or leave it on the counter overnight). It should be completely soft, pliable, and almost spreadable before you start beating it. Room temperature cream cheese beats into a flawlessly smooth filling in under 3 minutes. Cold cream cheese fights you the whole way and leaves a grainy, lumpy result.
✗ Mistake: Not whipping the heavy cream to true stiff peaks before folding.
✓ Fix: Under-whipped cream — still soft, floppy, not fully structured — means the filling won’t have enough body to set firm overnight. Beat the heavy cream until the peaks stand completely straight and don’t curl over. Test it by lifting the beaters — the peaks should hold their shape without drooping. This is the structural backbone of your entire cheesecake filling, so don’t cut this step short.
✗ Mistake: Rushing the refrigerator set time.
✓ Fix: A no-bake cheesecake filling that hasn’t had enough time to firm up in the refrigerator will be soft, loose, and impossible to slice cleanly — it’ll collapse on the plate instead of holding its shape. Six hours is the minimum; overnight is what delivers a cheesecake that slices like a dream with clean, beautiful edges. Make it the night before. This recipe genuinely rewards patience.
✗ Mistake: Adding a warm strawberry topping to the chilled cheesecake.
✓ Fix: Pouring a warm or even slightly warm strawberry topping directly onto the set cheesecake surface will melt the top layer of filling and create a soft, runny mess that takes hours to re-set — if it sets at all. Always let the cooked strawberry topping cool completely to room temperature (at least 30 minutes) or even refrigerate it briefly before spooning it over the cheesecake. This one detail is the difference between a beautiful, composed topping and a pink-streaked disaster.
✗ Mistake: Pressing the crust too lightly or unevenly.
✓ Fix: A loosely pressed crust crumbles the moment you release the springform ring and falls apart completely when you try to slice. Use the flat bottom of a measuring cup to press the crumb mixture down firmly and evenly — you want it genuinely compact, almost like a pressed cookie. Press the sides firmly too. A properly pressed crust holds together cleanly and gives you that satisfying graham cracker snap with every bite instead of a pile of crumbs.
Nail all five of these and you will put a no-bake strawberry cheesecake on the Mother’s Day table that looks like it came from a high-end dessert bakery — for a fraction of the price and with none of the baking anxiety.
Recipe Variations
Once you’ve mastered the classic version, here are four irresistible directions to take your no-bake cheesecake for any crowd, occasion, or flavor craving:
🫐 Mixed Berry Dream Version: Replace the strawberry topping with a gorgeous mixed berry compote — strawberries, blueberries, raspberries, and blackberries cooked together with sugar, lemon, and a splash of vanilla into a jewel-toned, deeply flavored sauce. Scatter fresh whole berries on top for color and texture. This version is stunning for the Fourth of July or any patriotic spring and summer celebration where the red, white, and blue color combination is absolutely breathtaking on the dessert table.
🍋 Lemon Strawberry Version: Increase the lemon zest in the filling to 2 full tablespoons and add ¼ cup of lemon curd swirled through the top of the filling before refrigerating. The bright lemon cuts through the richness of the cream cheese in the most refreshing way and makes the strawberry topping taste even more vibrant and alive. This is the spring and summer version of this cheesecake that tastes like sunshine in dessert form.
🍫 Chocolate Strawberry Version: Swap the graham cracker crust for an Oreo cookie crust — simply use 24 Oreos processed to fine crumbs with ⅓ cup melted butter. Add 2 tablespoons of good-quality cocoa powder to the cream cheese filling. The combination of chocolate, vanilla cream cheese, and fresh strawberries is a classic flavor trio that is outrageously delicious and completely irresistible to every chocolate lover at the table.
🍓 Individual Mini Cheesecakes Version: Use a 12-cup standard muffin tin lined with cupcake liners. Press 2 tablespoons of crust mixture into each cup, chill for 10 minutes, then divide the filling evenly between all twelve cups. Refrigerate for 4 hours until set, top each one with a spoonful of strawberry topping and a single fresh strawberry, and serve individually. These adorable, perfectly portioned mini cheesecakes are a spectacular alternative for a crowd — no slicing required, no springform drama, just pick one up and eat it. They are absolutely showstopping on a Mother’s Day dessert platter.
Each variation uses the exact same base method — master the classic once and you have four completely different stunning no-bake cheesecakes in your repertoire for every spring and summer celebration on the calendar.
Ready to Make Mom the Most Beautiful Dessert She’s Ever Been Served?
This no-bake strawberry cheesecake is the kind of make-ahead, genuinely stunning, deeply delicious recipe that makes the mom in your life feel completely celebrated, treasured, and adored — without a single minute of morning-of stress standing between you and that beautiful moment when you set it on the table and watch her face light up. No oven, no anxiety, no cracked tops — just pure, creamy, strawberry-crowned perfection that tastes like it took all day and actually took you 25 minutes of hands-on effort the evening before.
If you make this recipe for Mother’s Day, I would absolutely love to hear how it turned out! Drop a comment below with your results, leave a star rating so other families can find this recipe, or tag me on Pinterest with a photo of your beautiful cheesecake — nothing makes my day more than seeing the desserts you’re making for the people you love. Now go pull that cream cheese out of the fridge, and let’s give Mom the dessert she absolutely deserves. 🌸🍓
Frequently Asked Questions
Can I make this no-bake strawberry cheesecake the night before?
Yes — and that is exactly how this recipe is designed to be made. Making it the night before isn’t just convenient, it is what makes the cheesecake taste its absolute best. The filling firms up fully overnight, the flavors in the crust and filling meld and deepen into something that tastes much more complex and rich than a quickly chilled cheesecake. Assemble Saturday evening, add the strawberry topping Sunday morning, serve at the Mother’s Day table — it is the most stress-free holiday dessert routine you will ever adopt.
Why won’t my no-bake cheesecake filling set firm?
The two most common culprits are cream cheese that wasn’t fully at room temperature before beating (leaving excess moisture in the filling) and heavy cream that wasn’t whipped to true stiff peaks (leaving the filling without the structure it needs to hold shape). Make sure your cream cheese is genuinely soft and your whipped cream stands in firm, upright peaks before you fold them together. Also ensure the cheesecake has had a minimum of 6 hours — ideally overnight — in the refrigerator to set completely.
Can I make this cheesecake without a springform pan?
Absolutely. A 9×13-inch baking dish works beautifully for a slab-style cheesecake that you scoop and serve rather than slice into wedges — it’s casual, generous, and actually makes serving a crowd even easier. You can also use a deep 9-inch pie dish for a more traditional look. The slices won’t have the clean springform-released sides, but the taste and texture will be identical and completely wonderful.
Can I use frozen strawberries for the topping?
Yes — frozen strawberries work very well for the cooked portion of the strawberry topping. Thaw them completely and drain off the excess liquid before cooking, otherwise the topping will be too watery and won’t thicken properly. For the fresh strawberries stirred in at the end and used as garnish on top, fresh is always better for texture and appearance — but the cooked base of the sauce can absolutely be made with frozen fruit year-round.
Can I freeze no-bake strawberry cheesecake?
Yes — the cheesecake (without the strawberry topping) freezes beautifully for up to 2 months. Wrap the whole cheesecake or individual slices tightly in plastic wrap, then in aluminum foil. Thaw overnight in the refrigerator — never at room temperature, which can make the filling weep. Add freshly made strawberry topping after thawing, just before serving. The texture after freezing is slightly denser than fresh but still incredibly delicious.
Is this no-bake cheesecake gluten-free?
It can be very easily. Simply substitute the graham cracker crust with a gluten-free graham cracker crumb crust — many brands like Kinnikinnick or Schar make excellent gluten-free graham crackers that crush and press into a crust just as well as the original. All other ingredients in this recipe — cream cheese, heavy cream, powdered sugar, vanilla, lemon, and fresh strawberries — are naturally gluten-free. It’s a simple one-ingredient swap that makes this cheesecake accessible and safe for every guest at your table.
Can I make this cheesecake dairy-free?
Yes — with a few smart substitutions this cheesecake can be made completely dairy-free without sacrificing the creamy, luxurious texture. Use full-fat dairy-free cream cheese (Violife brand is exceptional for no-bake cheesecakes), full-fat coconut cream whipped until stiff in place of heavy cream, and dairy-free butter for the crust. The result is slightly different in flavor — there’s a hint of coconut — but still beautifully rich, set, and delicious. Chill the coconut cream overnight in the refrigerator before whipping for the best results.
How do I get perfectly clean slices?
The professional bakery trick for clean, beautiful cheesecake slices is simple — use a long, sharp knife, dip it in a glass of very hot water before each cut, and wipe it completely dry with a clean kitchen towel between every single slice. The heat prevents the filling from sticking to the knife and dragging. For the very cleanest results, pop the cheesecake in the freezer for 20–30 minutes before slicing — a slightly firmer filling cuts like a dream and holds its shape perfectly on the plate.