
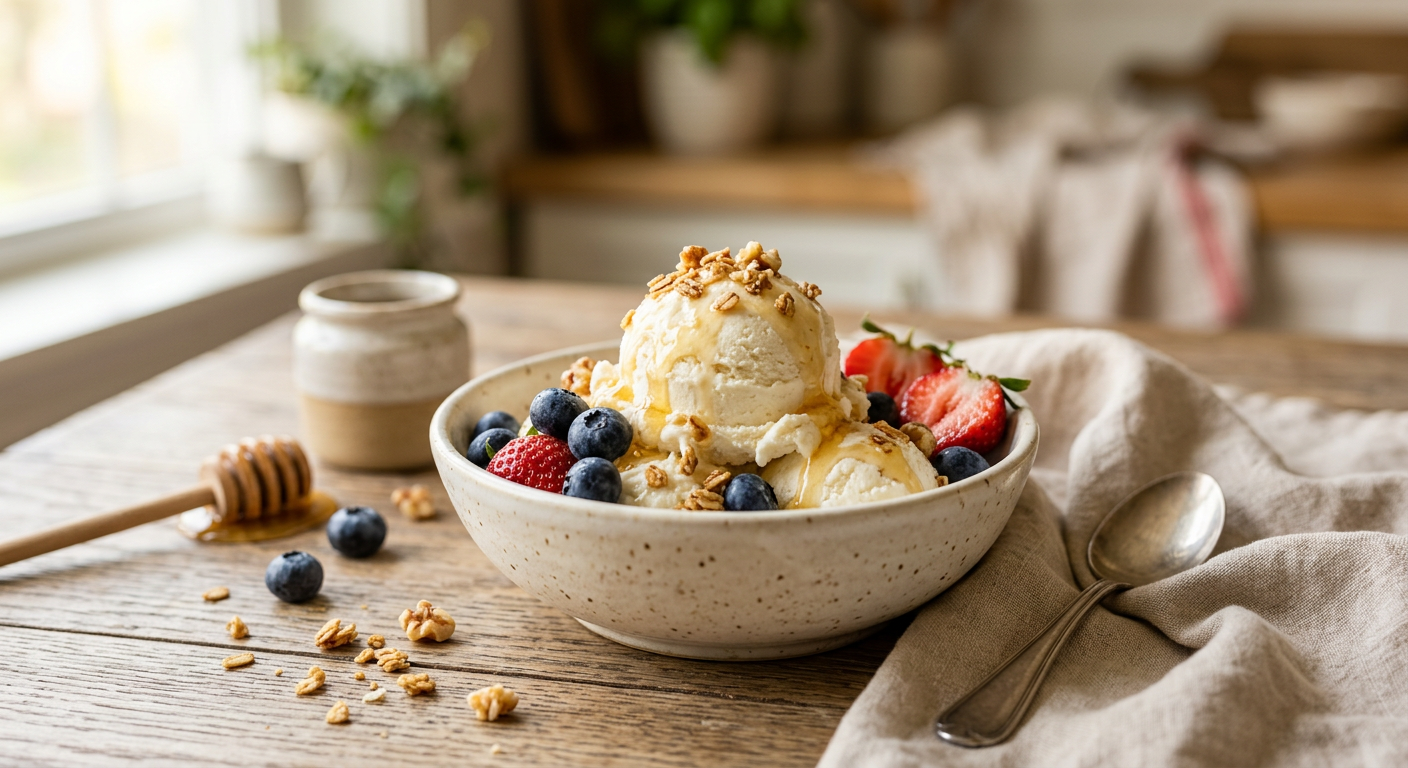
Easy Cottage Cheese Ice Cream That’s Creamy, High-Protein, and Ready in Minutes
Imagine scooping into a bowl of ice cream that’s rich, creamy, and cold — and then finding out it’s actually good for you. No guilt. No regrets. Just pure, delicious satisfaction. That’s exactly what cottage cheese ice cream delivers, and once you try it, you’re never going back to store-bought.
Have you ever stood in the freezer aisle, staring at $7 pints of “protein ice cream,” wishing there was a better way? Y’all — there absolutely is. This homemade cottage cheese ice cream is packed with protein, naturally creamy, and costs a fraction of what you’d spend on those fancy freezer brands. And the best part? You only need a blender and a handful of ingredients you probably already have.
This has become one of the most talked-about recipes on the internet for a reason — it actually works, it actually tastes amazing, and it fits into just about every lifestyle, from high-protein diets to low-sugar eating plans. Keep reading — I’m sharing every tip and trick I’ve learned, including the secret to getting that perfectly scoopable texture every single time.
Table of Contents
Why This Recipe Works
- ✔ Ready in under 5 minutes of active prep — the freezer does the rest
- ✔ High-protein — one serving packs 15–20 grams of protein depending on your mix-ins
- ✔ Uses simple pantry staples you already have at home
- ✔ Kid-approved — they’ll never even know it’s healthy
- ✔ Cheaper than store-bought protein ice cream — by a long shot
- ✔ Endlessly customizable — chocolate, strawberry, peanut butter, you name it
- ✔ Perfect for meal prep — make a big batch on Sunday and enjoy it all week
And if you’ve ever been skeptical about cottage cheese as a dessert ingredient, I promise — the texture and flavor once blended will completely blow your mind. Let’s get into it.
What You’ll Need
Base Ingredients (Classic Vanilla)
- 2 cups full-fat cottage cheese
- 3 tablespoons honey or maple syrup (adjust to your sweetness preference)
- 1 teaspoon pure vanilla extract
- Pinch of salt
Optional Mix-Ins & Toppings
- ½ cup fresh or frozen strawberries, blueberries, or mango
- 2 tablespoons peanut butter or almond butter
- 2 tablespoons cocoa powder (for chocolate version)
- ¼ cup mini chocolate chips (stir in after blending)
- 1 tablespoon lemon zest (for a bright citrusy version)
- ¼ cup crushed graham crackers or Oreos (for a fun crunch)
🧑🍳 Chef’s Note — Full-Fat Cottage Cheese: This is non-negotiable, friends. Full-fat cottage cheese blends into the creamiest, smoothest base. Low-fat versions tend to be icier and less satisfying. Splurge on the good stuff — your future self will thank you.
🧑🍳 Chef’s Note — Honey vs. Maple Syrup: Both work beautifully here. Honey gives a more neutral sweetness, while maple syrup adds a subtle warmth that pairs especially well with peanut butter or banana versions. Either way, start with 2 tablespoons and taste as you go.
Substitutions
No honey? No problem. Agave nectar, date syrup, or even a few drops of liquid stevia work great. For a lower-sugar version, use 1–2 tablespoons of a monk fruit sweetener blend.
No vanilla extract? A scraping from half a vanilla bean is absolutely divine here — or just skip it if you’re going with a fruit-forward flavor.
Dairy-free? Some brands now make dairy-free cottage cheese alternatives made from almond or cashew milk — look for those in the natural foods section of your grocery store.
Simple, right? Now let’s turn that tub of cottage cheese into something magical.
How to Make Cottage Cheese Ice Cream — Step by Step
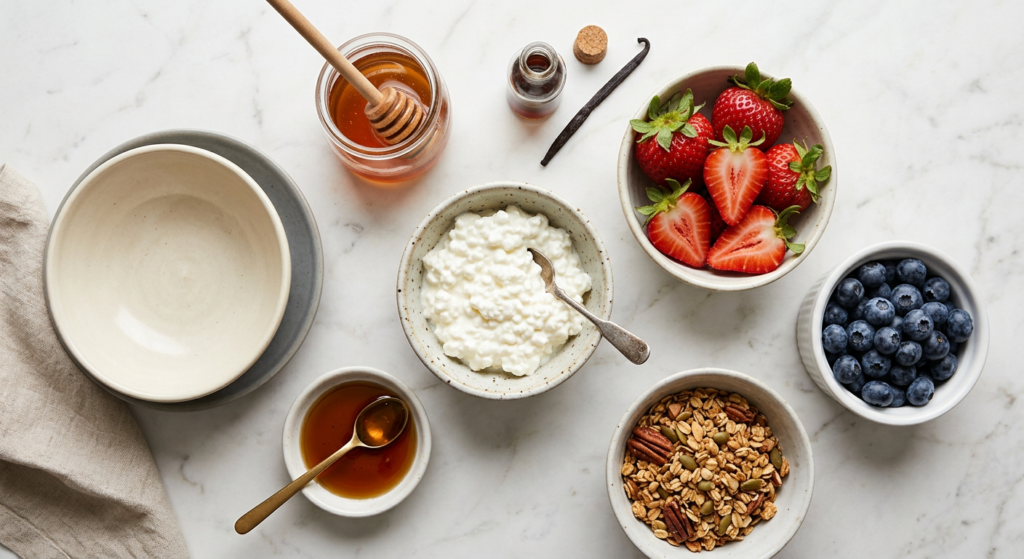
- Blend until silky smooth. Add your cottage cheese, sweetener, vanilla extract, and a pinch of salt to a high-powered blender or food processor. Blend on high for 60–90 seconds, scraping down the sides halfway through. You want zero curds remaining — it should look like thick, smooth soft-serve batter.
- Taste and adjust. Give it a taste right now — this is your chance! If you want it sweeter, add another tablespoon of honey. More vanilla? Go for it. This is your ice cream and you’re in charge.
- Add your mix-ins. If you’re adding fruit, you can blend it right in for a fruity swirl throughout. If you’re using chocolate chips, crushed cookies, or nuts, stir those in by hand after blending so they stay chunky and delicious.
💡 Pro Tip: For the smoothest possible texture, make sure your cottage cheese is at room temperature for about 10 minutes before blending. Cold cottage cheese doesn’t blend as smoothly and can leave tiny lumps behind.
- Pour and freeze. Pour the blended mixture into a freezer-safe container — a loaf pan works perfectly. Smooth the top with a spatula, then press a piece of plastic wrap directly onto the surface (this prevents ice crystals from forming). Cover with the lid or foil.
- Freeze for at least 4 hours. For best results, freeze overnight. The longer it freezes, the firmer and more scoopable it becomes. I know the wait is hard — trust me, it’s worth every minute.
- Scoop and serve. Let the container sit on the counter for 5–10 minutes before scooping — this softens it just enough to get those beautiful, rounded scoops. Serve in a bowl or cone and top with whatever makes your heart happy.
💡 Pro Tip: Run your ice cream scoop under warm water before scooping. It glides right through the frozen cottage cheese ice cream and gives you gorgeous, Instagram-worthy scoops every time.
Six steps to the most surprisingly delicious frozen treat you’ve ever made at home. Now let’s talk toppings and serving ideas.
How to Serve It
This cottage cheese ice cream is a blank canvas for all your favorite flavors. Here are some of my favorite ways to serve it:
- 🍓 Summer cookouts: Serve the strawberry version in waffle cones alongside grilled burgers — it’s the ultimate backyard BBQ dessert that people will talk about all season.
- 🏈 Game day treat: Make a big chocolate peanut butter batch and set it out with toppings bar — crushed pretzels, mini chips, caramel drizzle. Everyone builds their own bowl.
- 🍌 Weeknight dessert: Scoop over a sliced banana with a drizzle of honey and a sprinkle of granola for a dessert that actually feels like breakfast — in the best way.
- 🎄 Holiday entertaining: A peppermint chocolate chip version in a festive bowl is a showstopper at Christmas dinner and so much lighter than traditional desserts.
- 💪 Post-workout snack: Enjoy a scoop straight from the container after the gym — high protein, naturally sweet, and way better than a protein bar.
However you serve it, have your storage game ready — because you’ll want to make big batches of this one.
Storage & Leftovers
- ❄️ Freezer: Store in an airtight, freezer-safe container for up to 2 weeks for best texture. After that it can get a little icier, but it’s still perfectly safe to eat.
- 🧊 Fridge: Don’t store it in the fridge — it’ll just melt into a smoothie. Straight to the freezer is the move.
- 🍦 Individual portions: Pour the blended mix into silicone muffin tins for perfectly portioned single-serve cups. Pop them out and store in a zip-lock bag — grab one whenever the craving hits.
Reheating / Softening Instructions
- Counter method (recommended): Let the container sit at room temperature for 5–10 minutes before scooping. This is the gentlest method and preserves the best texture.
- Microwave method: For a quicker softening, microwave in 10-second bursts (not longer!) until it reaches your desired consistency. Great if you forgot to pull it out ahead of time.
📅 Make-Ahead Tip: This is one of the ultimate make-ahead desserts. Blend your base on Sunday, freeze it, and you’ve got a healthy frozen treat ready for the entire week. Make two or three different flavors at once for a fun variety — it takes less than 15 minutes total.
Before you run to make this, let me share the mistakes that’ll save you from a less-than-perfect batch.
Helpful Tips & Common Mistakes
✗ Mistake: Using low-fat or fat-free cottage cheese.
✓ Fix: Always use full-fat (4% milkfat) cottage cheese. The fat is what creates that creamy, rich texture. Low-fat versions freeze up much icier and lack that satisfying mouthfeel.
✗ Mistake: Not blending long enough.
✓ Fix: Blend for a full 60–90 seconds, even if it looks smooth after 30. Those tiny curds need time to fully break down. Scrape the sides and blend again to make sure every bit is silky.
✗ Mistake: Scooping straight from the freezer without letting it sit.
✓ Fix: Give it 5–10 minutes on the counter before scooping. Cottage cheese ice cream freezes firmer than regular ice cream, so patience here makes a huge difference in texture.
✗ Mistake: Skipping the plastic wrap on the surface.
✓ Fix: Press plastic wrap directly onto the surface of the ice cream before sealing the container. This prevents ice crystals from forming on top, which is what causes that unpleasant icy layer.
✗ Mistake: Adding too much sweetener at once.
✓ Fix: Start with 2 tablespoons, blend, and taste before adding more. The sweetness concentrates slightly as it freezes, so what tastes barely sweet fresh will taste just right once frozen.
Now that you’re set up for success, let’s get creative with some delicious flavor variations.
Recipe Variations
🍫 Chocolate Peanut Butter: Add 2 tablespoons of cocoa powder and 2 tablespoons of peanut butter to the base blend. Swirl in a little extra peanut butter after pouring into the container for a gorgeous ribboned effect. This one is an absolute game changer for chocolate lovers.
🍓 Strawberry Cheesecake: Blend in ¾ cup of fresh or frozen strawberries and add 1 tablespoon of cream cheese to the base. Top with crushed graham crackers right before serving. It tastes like a strawberry cheesecake in ice cream form — yes, really.
🥭 Tropical Mango Coconut: Blend in ¾ cup of frozen mango chunks and swap the vanilla for ½ teaspoon of coconut extract. Sprinkle toasted coconut flakes on top. It’s like a vacation in a bowl and perfect for summer cookouts.
🍋 Lemon Blueberry: Add 2 tablespoons of fresh lemon juice, 1 tablespoon of lemon zest, and ½ cup of frozen blueberries to the base. This bright, tangy version is perfect for spring brunches or Easter dessert tables.
🍪 Cookies & Cream (Lighter Version): Blend the vanilla base, then stir in ½ cup of crushed Oreos by hand. It satisfies that cookies-and-cream craving for a fraction of the calories and with way more protein. Your kids will go absolutely wild for this one.
With five variations in your back pocket, you’ve basically got a full ice cream shop at home — and a healthy one at that.
The Bottom Line
This easy cottage cheese ice cream recipe is proof that eating healthy doesn’t mean giving up the foods you love — sometimes it just means getting a little creative with your blender. It’s creamy, customizable, protein-packed, and genuinely one of the most foolproof frozen desserts you’ll ever make at home.
Give it a try this week and I promise it’ll earn a permanent spot in your freezer rotation. If you make it, I’d love to hear which flavor variation was your favorite — drop a comment below or tag me on Pinterest so I can see your gorgeous scoops! 🍦
Frequently Asked Questions
Does cottage cheese ice cream actually taste good?
Hand on heart — yes! Once blended, cottage cheese loses its characteristic tang and curdy texture entirely. What you’re left with is a thick, neutral, creamy base that tastes remarkably similar to frozen yogurt or soft-serve. The sweetener and flavorings do all the heavy lifting.
Can I make cottage cheese ice cream without a blender?
A high-powered blender or food processor gives the smoothest results. A regular blender can work, but you’ll need to blend longer and scrape down the sides frequently. Avoid hand mixers — they won’t break down the curds properly and you’ll end up with a lumpy texture.
How long does cottage cheese ice cream keep in the freezer?
It keeps well for up to 2 weeks in an airtight container. Beyond that, ice crystals start to develop and the texture becomes less creamy. For best results, press plastic wrap directly onto the surface before sealing to prevent crystallization.
Can I use low-fat cottage cheese?
Technically yes, but the results won’t be as creamy. Low-fat cottage cheese has more water content, which means it freezes icier and has a less satisfying texture. If you really need to go lower in fat, try 2% rather than fat-free — it’s a decent compromise.
How many calories are in cottage cheese ice cream?
A basic vanilla serving (about ½ cup) comes in around 120–160 calories depending on your sweetener and add-ins, compared to 250–350 calories in most regular ice cream. Plus you’re getting 15–20 grams of protein per serving — something no pint of Ben & Jerry’s can claim.
Is this recipe gluten-free?
The base recipe is naturally gluten-free! Just watch your mix-ins — items like Oreos or graham crackers contain gluten. Swap those for gluten-free cookie options if needed, and you’re all set.
Can I make this in an ice cream maker?
Absolutely — and it gives you an even creamier result! Pour the blended mixture into your ice cream maker and churn according to the manufacturer’s instructions (usually 20–25 minutes). Transfer to a freezer container and freeze for 1–2 hours for a firmer scoop.
Is cottage cheese ice cream good for weight loss?
It can definitely be a smart swap as part of a balanced diet. It’s higher in protein than traditional ice cream (which helps keep you full), lower in sugar, and lower in calories. That said, it’s still a dessert — enjoy it mindfully and it can absolutely fit into a healthy lifestyle. As always, talk to your doctor or nutritionist for personalized advice.